- 106 -
Adjusting Color with the Control Panel
4
Check the color balance adjustment
results.
(1)
Print the color tuning pattern.
(2)
Use the print results for the
color tuning pattern to check the
adjusted results.
If the pattern that seems most
similar to the adjacent CMY mixed
colors part and single color K part
in the “Highlight”, “Mid-Tone”,
or “Dark” areas matches the
“Current” on the left of the color
tuning pattern, the color balance
adjustment is complete.
Repeat steps 1 through 3 of this
procedure in accordance with the
results of your pattern check.
Fine-tuning Color Balance
The printer can implement compensation
periodically using auto density compensation
mode. However, you can implement this
adjustment when you want to finely adjust
the gray balance of the halftones, which is
not sufficiently adjusted by the auto density
compensation.
Note
z
The densities of the colors are mutually dependent on
each other, so you will need to repeat adjustment several
times until the desired color balance is achieved.
1
Print a color tuning pattern.
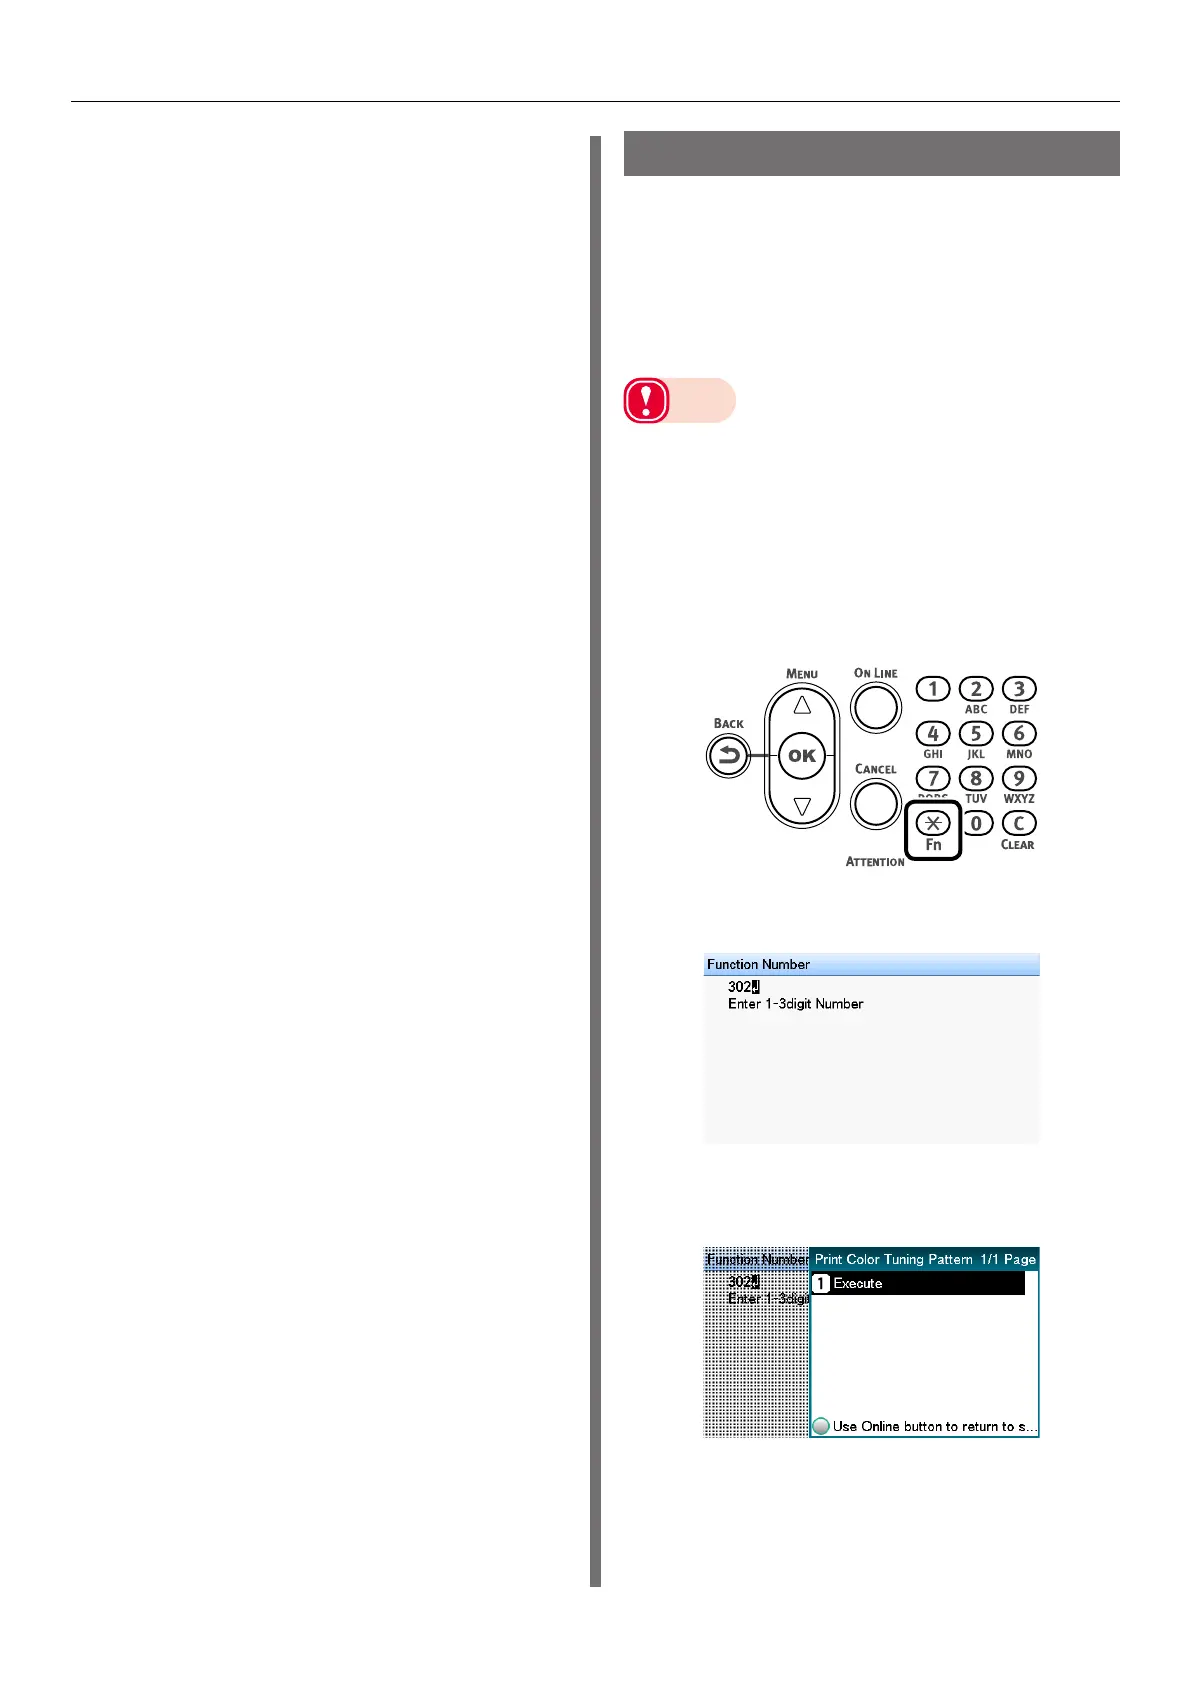
(1)
Press the <Fn> key.
The numerical values input screen
will be displayed.
(2)
Press <3>, <0>, <2>, and press
the <OK> button.
(3)
Check that [Execute] has been
selected, and press the <OK>
button.
(4)
The color tuning pattern will be
printed.