THE NEW PIPER AIRCRAFT, INC.
PA-32-301FT / 301XTC
MAINTENANCE MANUAL
PAGE 13
Jun 1/03
5C19
74-10-00
(d) Tum T-handle until the bearing
cap bottoms in the frame. Place
cap over end of rotorshaft first.
(e) Place T-151 cam and rotor set
onto the end of the rotor shaft
and turn T-handle until the shaft
bottoms in magneto frame.
(f) Install bearing clamps and the
hold-down screws.
(g) Torque screws to 20-24 in-lbs.
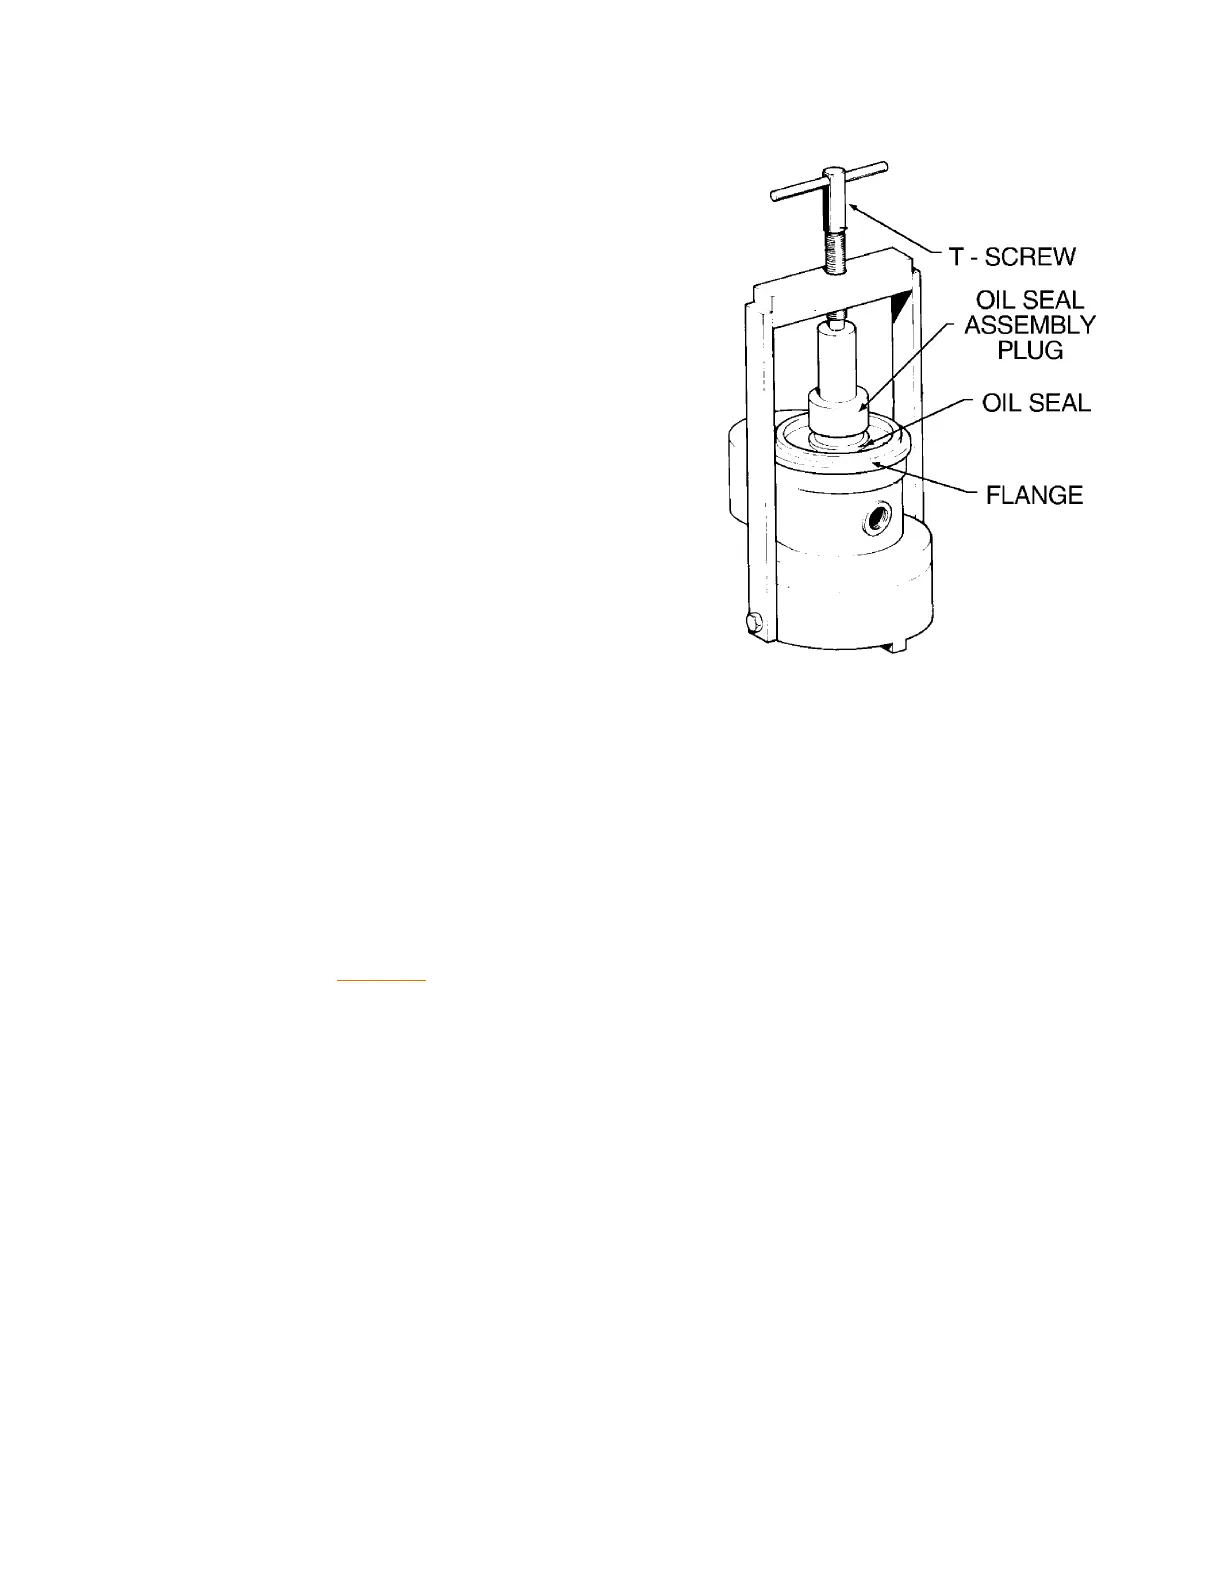
(3) Install oil seal (see Figure 11.)
(a) Lubricate oil seal with engine oil.
(b) Reverse the magneto on the
T-125 assembly fixture so the
flange is facing up.
(c) Insert the oil seal over the rotor
shaft.
(d) Press the oil seal flush into the
frame using the oil seal assembly
plug (T-103) and the T-handle
screw.
(4) Install Woodruff Key by pressing
Woodruff Key into the key slot of the
rotor shaft.
(5) In the left magnetos only (i.e. - impulse coupled), assemble impulse coupling:
(a) Assemble inner eye of the impulse spring into the grooves in the impulse hub.
(b) Set the impulse shell and untensioned impulse spring on the hub.
(c) Holding the shell in one hand and the pawls with the thumb and forefinger of the other
hand, pull the hub slowly, straight back, until its far enough to clear the projections on the
shell.
CAUTION: DO NOT WIND THE IMPULSE SPRING MORE THAN 1/4 TURN.
(d) Hold the shell stationary and rotate the hub to wind the impulse spring until the
projections on the other section of the pawl plate pass the projections on the shell.
(Approximately 1/4 revolution or 90 degrees.)
(e) Ensure the shell is seated squarely on the hub and turns freely.
(6) In the left magnetos only (i.e. - impulse coupled), install impulse coupling:
(a) Install impulse coupling assembly onto the rotor shaft and install impulse washer.
(b) Install coupling nut and torque to 120 to 320 in. lbs. to seat the coupling on the rotor shaft.
If cotter pin will not align with pin hole within the specified torque range, remove the nut
and lightly lap its bottom surface with emory cloth.
(c) Verify that the coupling is free by snapping it through 3 or 4 times.
Oil Seal Installation
Figure 11