3
9929399 R01 - 2018-2019 RANGER XP/ CREW 900/1000 Service Manual
© Copyright Polaris Industries Inc.
3.71
9. Carefully lower the crankshaft into upper crankcase.
Guide connecting rods onto the rod journals of
crankshaft as necessary.
10. Adjust the PTO crankshaft seal so it rests properly in
the upper crankcase.
11. Clean bolt hole threads in connecting rod to remove
all oil.
12. Install matching rod cap on connecting rod using
markings made upon disassembly.
13. Install new bolts and tighten evenly until snug.
14. Torque connecting rod bolts to specification.
TORQUE
Connecting Rod Bolts:
Step 1: 9 lb-ft (12 Nm)
Step 2: 22 lb-ft (30 Nm)
Step 3: Additional 90°
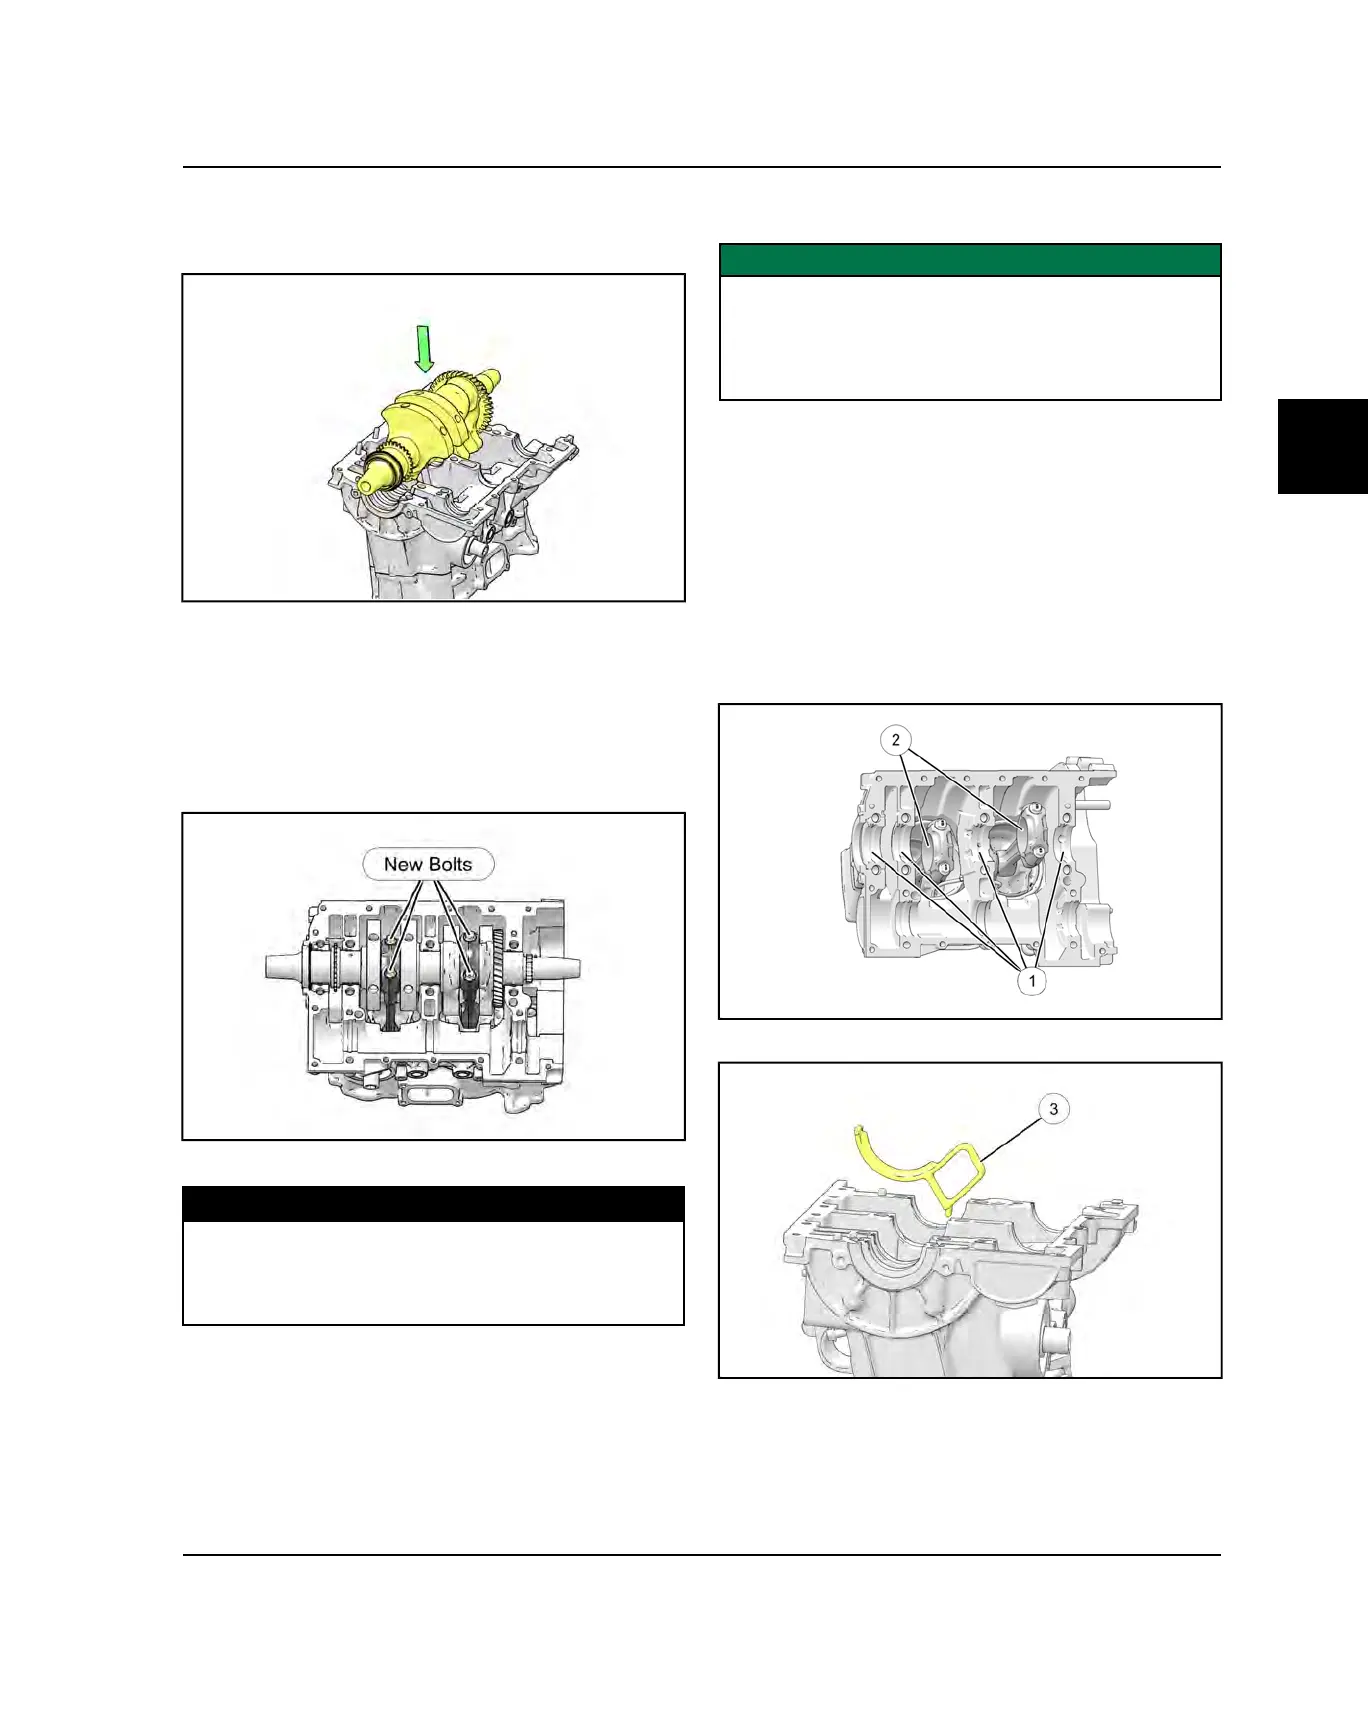
CRANKSHAFT INSTALLATION (1000)
IMPORTANT
Whether installing a new crankshaft or re-installing the
original, refer to the bearing selection charts in the
“Crankshaft Main Bearing Selection”page 3.65 and
“Connecting Rod Bearing Selection”page 3.65
procedures.
1. Rotate the engine so the cylinder is facing down.
2. Clean the bearing bore surfaces of upper crankcase
(main bearings), connecting rods and connecting rod
caps.
3. Align tab of new main bearing
q
with the slot in main
bearing bore of crankcase. Press bearing insert
firmly into place. Repeat for all main bearings.
4. Align tab of new connecting rod bearings
w
with the
slot in the connecting rod stem and connecting rod
end cap. Press bearing insert firmly into place.
Repeat for the other connecting rod.
5. Install oil drain diverter
e
into the upper crankcase.
ENGINE / COOLING / HVAC SYSTEM
 Loading...