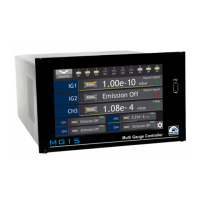
STEP BY STEP MULTI GAUGE CONTROLLER
4 STEP BY STEP
This chapter descries the coniguration procedure and irst start-up of the MG15 device.
4.1 QUICK START
1. Install the device on the vacuum system and make all the necessary connections - see chapter
2.5.
2. Switch on the device - see chapter 3.1.
3. Conigure the measuring channels - select appropriate gauges and set their parameters - see
sub-chapter 3.6.1.
4. Set the threshold pressure values (setpoints) for both channels - see chapter 3.4.1.1.
5. In the event of working with gases other than nitrogen or air, enter the appropriate correction
factor - see chapter 3.6.4.
6. If necessary, degas the ion gauges - see chapter 3.6.2.
7. Choose the automatic or manual emission control type for each channel - see chapter 3.6.3.
8. Check whether the threshold pressure values (setpoints) have been achieved and if the man-
ual emission control has been selected, press the Emis. button, to activate the ion gauge emis-
sion. Achieving the set setpoints is signalled by the green Setpoints diodes on the main win-
dow, and if emission is active the Emis. text appears - see chapter 3.4.1.
4.2 COMMUNICATION INTERFACE CONFIGURATION
The following procedure let to conigure the RS232 module to work with 19200bps baud rate:
1. Press the Menu button.
2. Click on the Setup menu.
3. In the Setup menu select the Device Settings -> Communication -> Interface 2.
4. From the Interface list select the RS232.
5. Click on Baud Rate.
6. In the displayed list, select the appropriate transmission speed, e.g. 19200bps.
Page 74 User manual rev. 03