2. Remove the mounting screw.
If the mounting screw is attached to the adjusting screw hole, unfasten it.
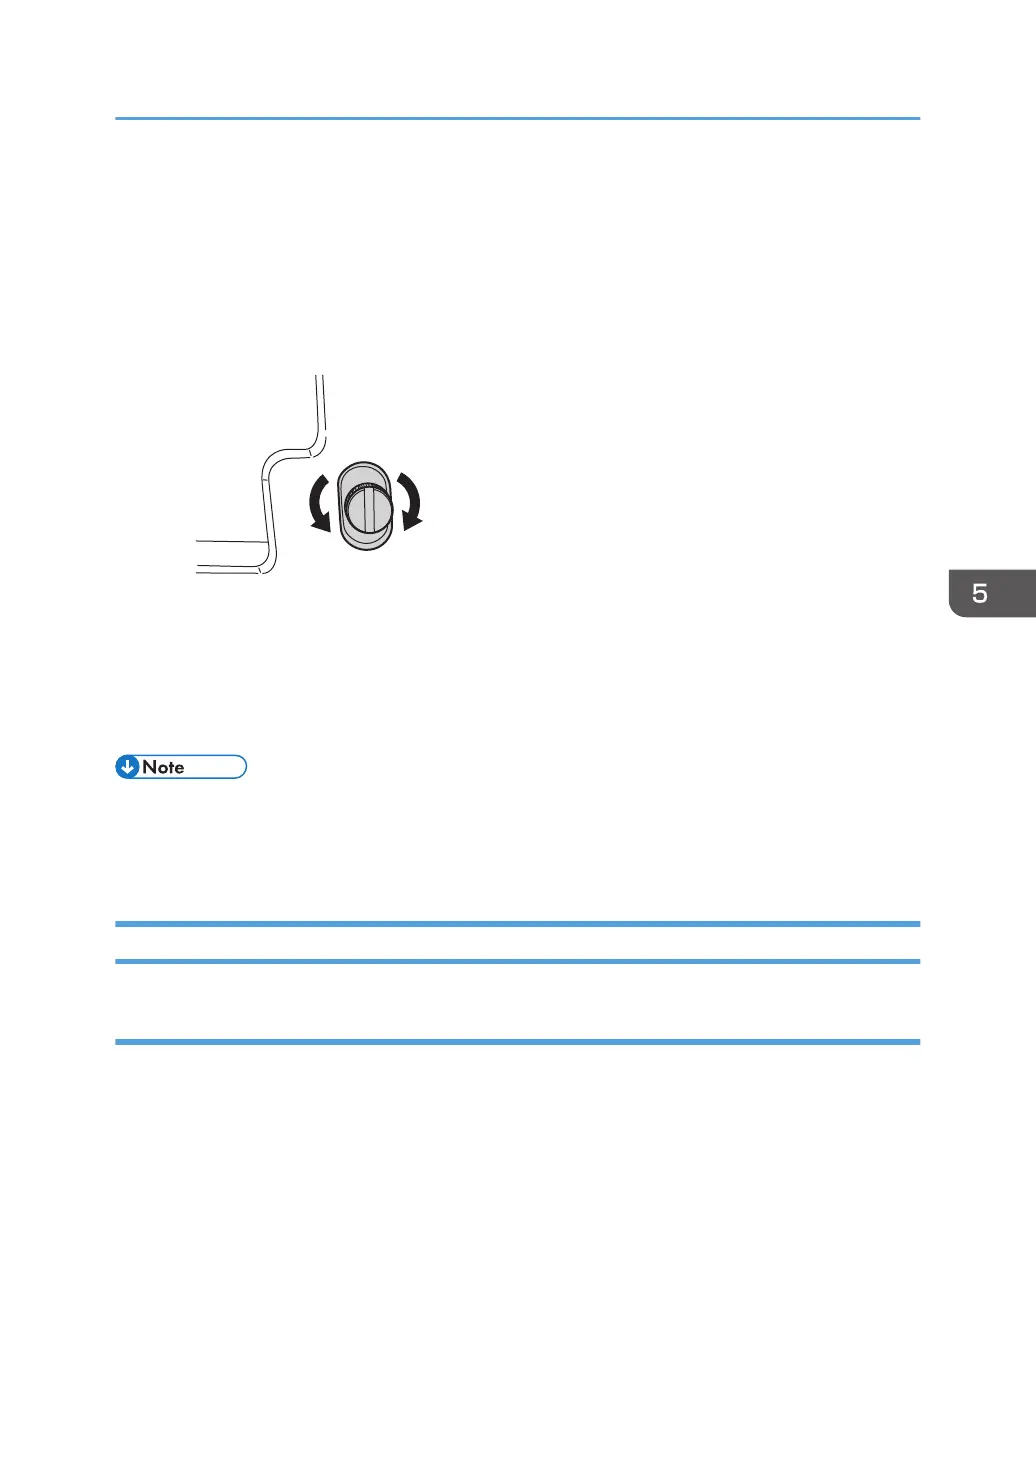
3. Turn the adjusting screw to adjust the deviation.
• To increase the length at the bottom part of paper, turn the screw clockwise.
• To decrease the length at the bottom part of paper, turn the screw counterclockwise.
4. Attach the mounting screw to fasten the adjusting screw.
If the mounting screw is attached to the adjusting screw hole, fasten it.
5. Close the front cover of the multi-folding unit.
• For multi-sheet folding, the folding deviation that appears in the center of paper will be adjusted.
• If the deviation is large, the paper may be skewed. For further information, see page 70 "Paper
Skew".
Folds soiled by multi-sheet folding
Cause:
If multi-sheet folding is performed after a large number of Z-folds have been performed, the tip of the
blade used for the multi-sheet folding may be soiled, resulting in soiled paper.
Multi-Folding Unit
101
 Loading...


