• Click or tap the Windows button in the function navigation menu or in the
toolbar to enter the Add Window menu. In the Diagram menu, click or tap XY >
Add to enable the XY display mode.
• Click or tap the XY button in the function navigation menu or in the toolbar to
enable the XY display mode.
• In the "Horizontal" menu, tick XY to enable the XY mode.
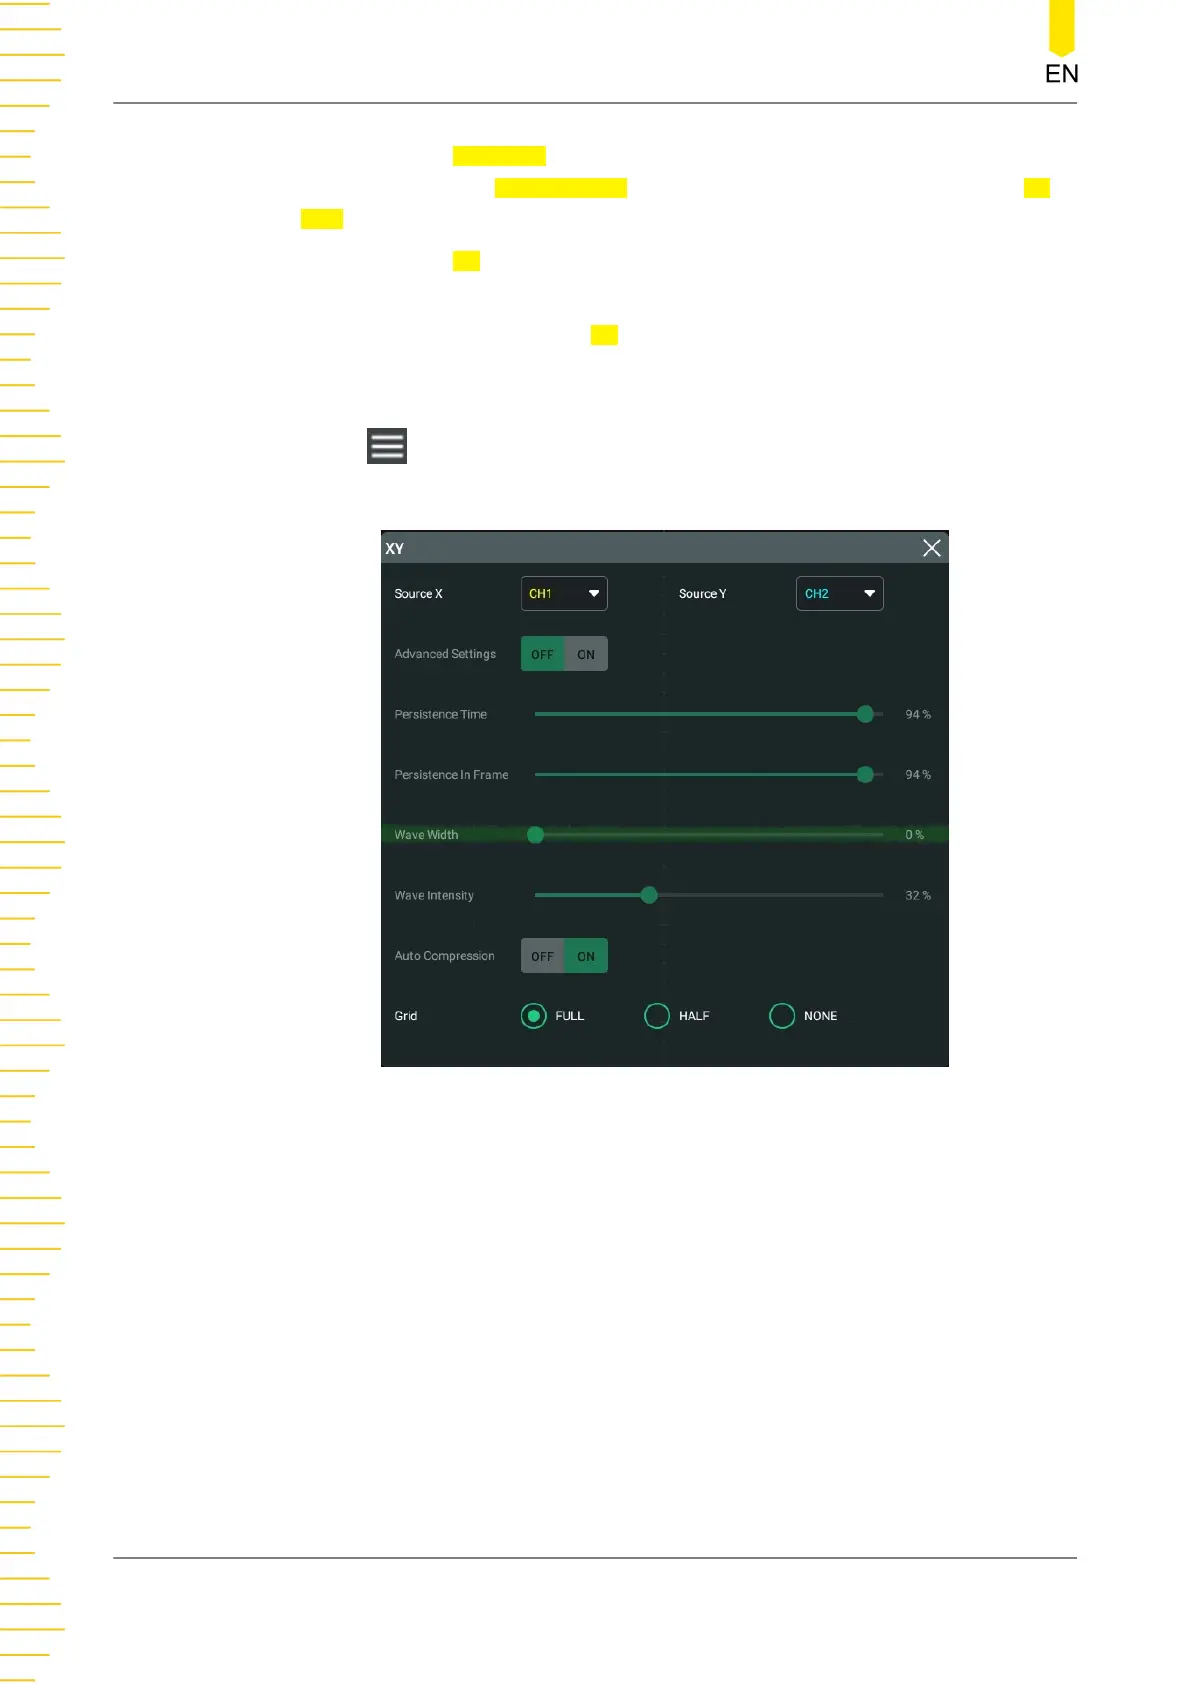
Configure the XY Mode
Click or tap at the upper-right corner of the XY display window to enter the XY
configuration menu.
Figure 7.4 XY Menu
• Source: Click or tap the drop-down button of "Source X" to select the source
channel of the X-axis in the XY window. Click or tap the drop-down button of
"Source Y" to select the source channel of the Y-axis in the XY window.
In the
Add Window
menu, you can also configure Source Z. Source Z, as the Z-
axis input in the XY display mode, is used to control whether to display the X-Y
waveforms in the XY display mode. This function is called "blanking".
- When "None" is selected for "Source Z", the blanking function is disabled,
and you can only see the X-Y waveforms.
- When you select "CH1-CH4" for "Source Z", the blanking function is
enabled. The Z-axis input from the external connector determines whether
to display the X-Y waveforms. When Z is high (the input level is greater than
Acquisition System
HDO1000 User Guide
62
Copyright ©RIGOL TECHNOLOGIES CO., LTD. All rights reserved.
 Loading...