2-21
After Processing
6. Pressing the "Set" button displays the setting time
change screen.
To change the hours, press the value of hours.
Press the ""/" buttons among the "Value Change"
buttons to change the value of hours.
In the case of 24-hour display, hours is displayed in a range
of 0 to 23 and minutes, as a multiple of 15 minutes.
In the case of 12-hour display, hours is displayed in a range
of 1 to 12 and minutes, as a multiple of 15 minutes, with
am/pm also shown.
7. Press the "Enter" button to return to the next operation
start time setting screen.
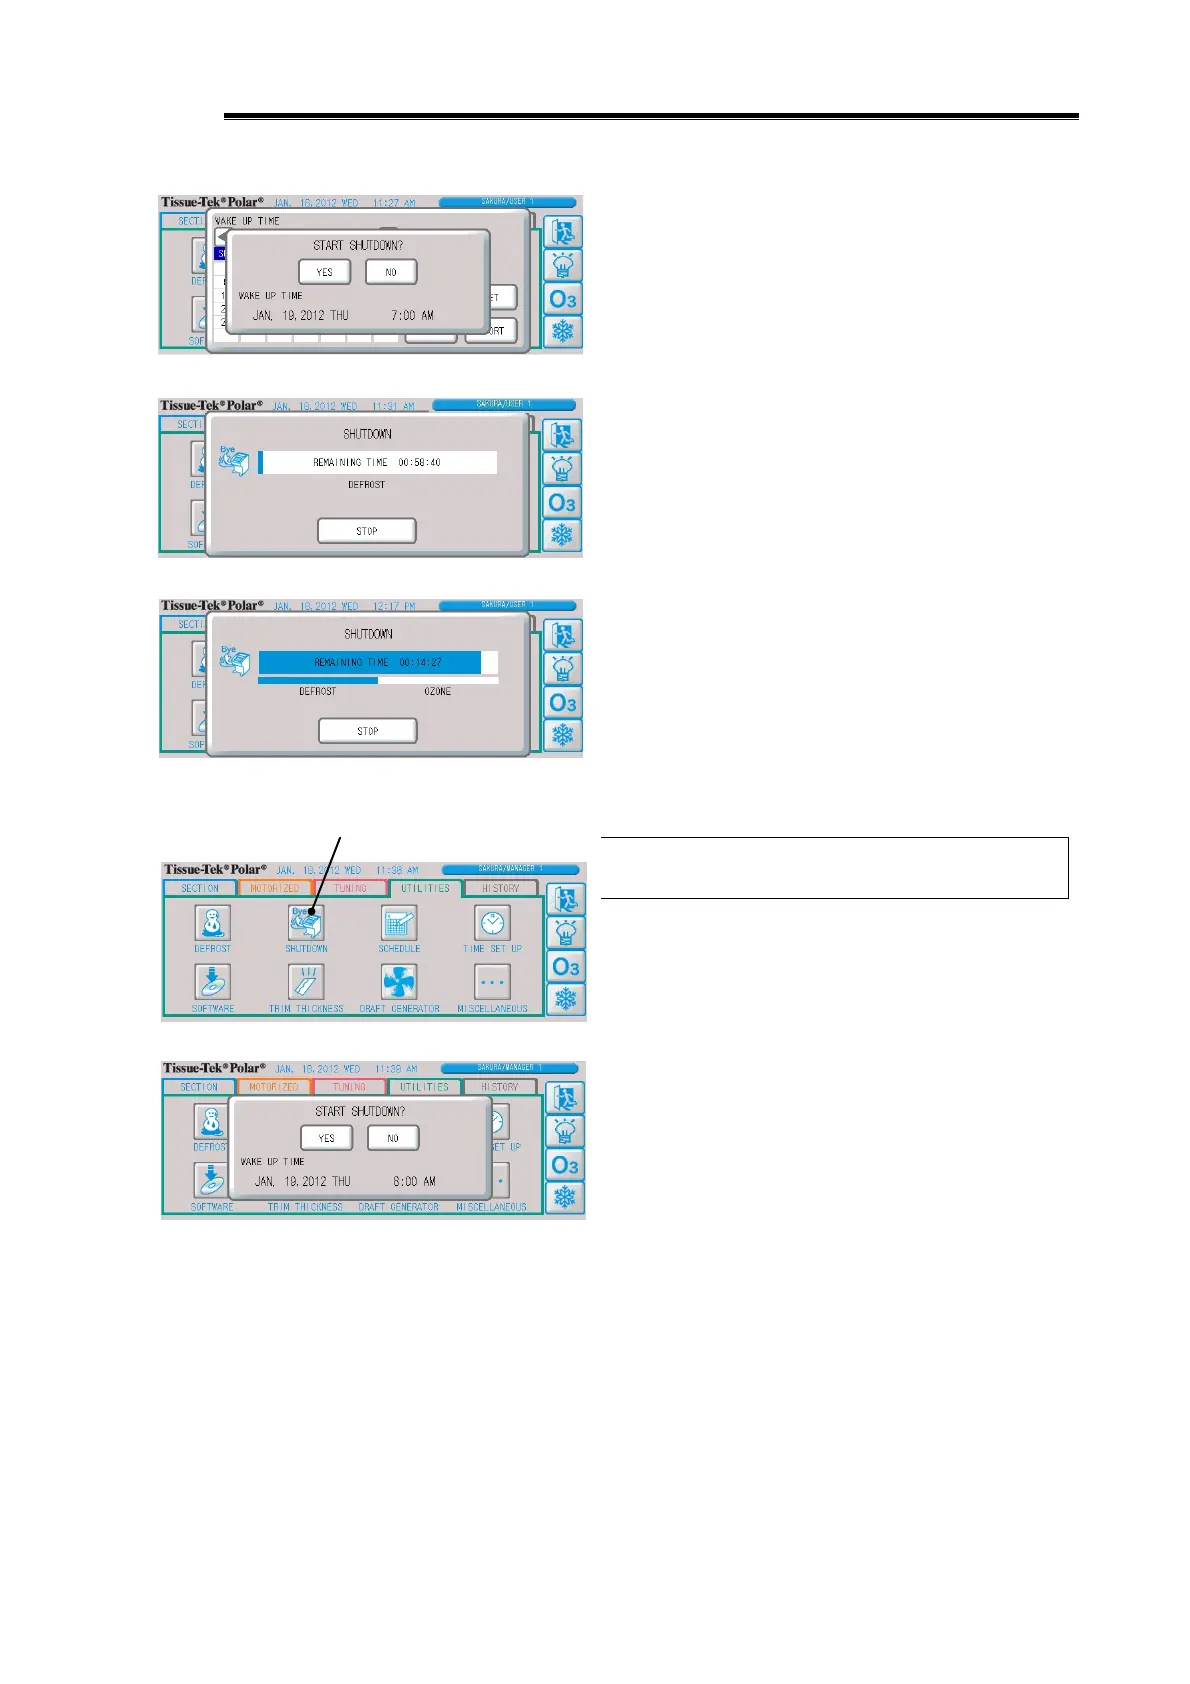
8. Press the "Start" button, and the shutdown confirmation
screen will appear.
Pressing the "Abort" button here cancels the shutdown.
9. Select "Yes," and shutdown will start and the shutdown
progress screen will appear.
On this screen, the progress of shutdown is indicated by the
progress bar and remaining time. If the check box for
automatic ozone cycle is selected in the schedule, the
ozone cycle will be performed after defrost cycle.
Once the processing is complete, the display changes to
the sleep screen.
Refer to p. 2-22 if you want to cancel manual shutdown.
Manual Shutdown under "Scheduled
Operation"
The shutdown schedule for the day is brought forward.
Unlike under always-on operation, you don't set the next
start time. Instead, the next start time in the schedule is set
automatically.
1. Press the “shutdown” button, and the shutdown
confirmation screen will appear.
2. Select "Yes" and shutdown will start and the shutdown
progress screen will appear.
On this screen, the progress of shutdown is indicated by the
progress bar and remaining time. If the check box for
automatic ozone cycle is selected in the schedule, the
ozone cycle will be performed after defrost cycle.
Once the processing is complete, the display changes to
the sleep screen.
Refer to p. 2-22 if you want to cancel manual shutdown.
 Loading...