Mounting
26 © SICK AG • Subject to change without notice • 8024484/2019-06-06
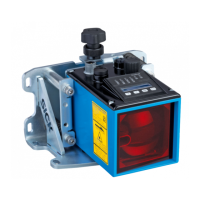
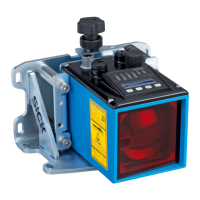
6 Mounting
6.1 Mounting procedure
1. Choose a mounting site, bearing in mind the mounting instructions.
→ See the following chapter.
2. Mount the alignment bracket and distance measuring device.
→ See Page 33, Chapter 6.7.
3. Make the electrical connection.
→ See Page 36, Chapter 7.
4. Alignthedistancemeasuringdeviceandreectortoeachother.
→ See Page 32, Chapter 6.6.
5. Alignthedistancemeasuringdevicetothereectorbyadjustingthe
alignment bracket precisely. → See Page 35, Chapter 6.8.
6. Fix the alignment of the distance measuring device.
→ See Page 35, Chapter 6.8.
6.2 Mounting instructions
To ensure trouble-free operation, observe the following mounting instruc-
tions:
• Comply with technical data such as the measuring range.
→ See Page 117, Chapter 15.3.
• At lower ambient temperatures (e.g. in deep-freeze warehouses) the
distance measuring device should have integrated heating.
• Use a distance measuring device with an optional cooler housing at
higher temperatures. → See Page 118, Chapter 15.4.
• Protect the distance measuring device from direct sunlight.
• To prevent condensation, avoid exposing the distance measuring device
to rapid changes in temperature.
• Followthemountinginstructionsforthereector.
→ See Page 26, Chapter 6.2.
• Maintainasucientdistancetootherdistancemeasuringdevices.
→ See Page 28, Chapter 6.4.
• Maintainasucientdistancetodatatransferphotoelectricsensors.
→ See Page 30, Chapter 6.5.