Page 85
16.3 CPAP Set-up
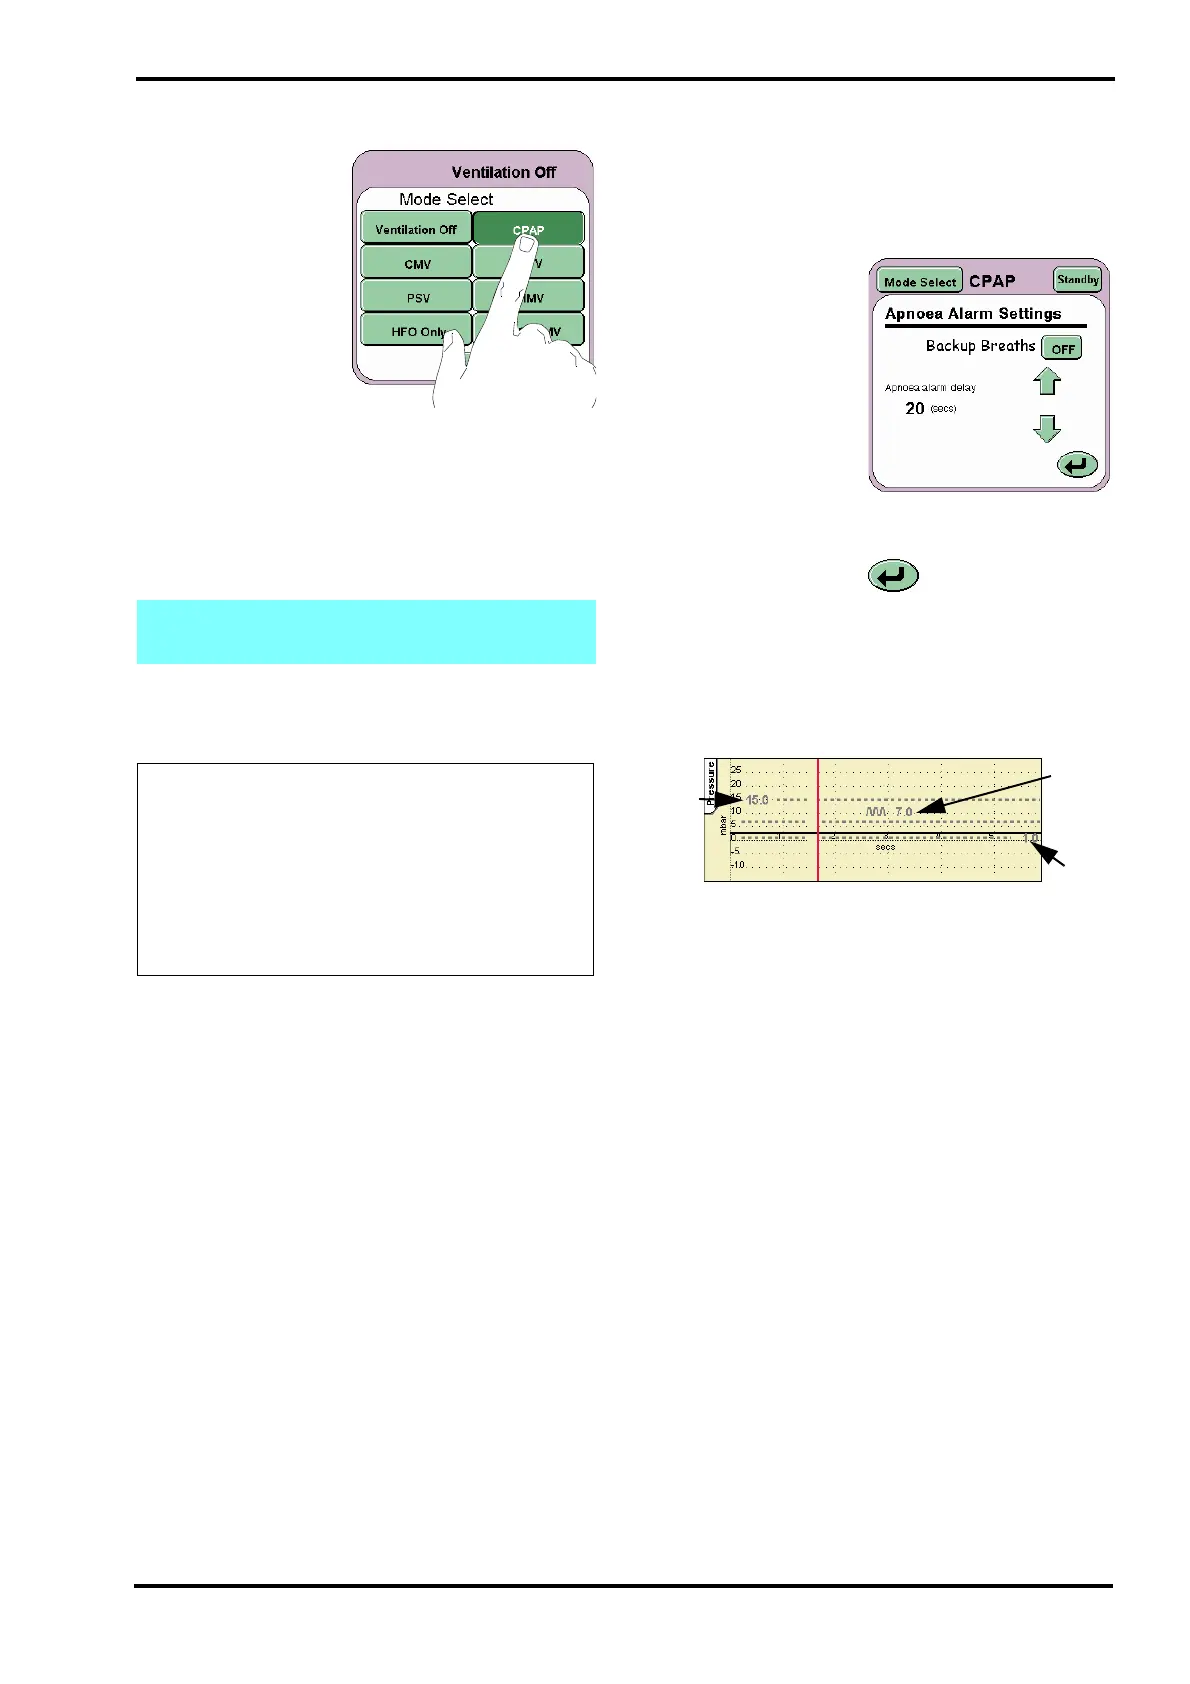
Step 1. From the
Mode Select panel
select CPAP.
Step 2. Default parameters in the preview mode:
Ti 0.4 sec. (for manual breaths)
CPAP 2 mbar
PIP 10 mbar (for manual breaths)
O
2
% As per prescription
Step 3. Press the Confirm button to enter the CPAP
mode. The ventilator will now start to ventilate at the
set parameters.
16.3.1 Actions after connection to patient in
CPAP
Step 4. To adjust the Apnoea alarm delay and to
activate backup breaths in the event of Apnoea
press the Apnoea Setup button on the Mode Panel.
The Apnoea Alarms
Settings panel should
now be displayed.
Set the Apnoea alarm
delay.
Set the Backup
Breaths button to ON
Press the Return button to return to the mode
panel.
Step 5. The High/Low Pressure Alarm thresholds
auto track the pressure waveform by 5 mbar. The
alarm thresholds can be adjusted if required. The
thresholds are found in the pressure waveform
window.
Step 6. The Cycle Fail Alarm threshold auto tracks
the PIP setting. The alarm threshold can be
adjusted if required. The threshold is found in the
pressure waveform window.
16.3.2 Interactive and limiting controls in CPAP
The user needs to be aware that the following
controls interact.
The CPAP control interacts with the PIP control.
When increasing the CPAP pressure, the PIP
pressure will track accordingly, if initially below the
starting CPAP level.
The PIP control is limited by the CPAP. The user
cannot decrease the PIP level below the CPAP
level. The CPAP parameter control displays a
warning stating the limiting pressure.
Note: Ti (Insp. time) and PIP parameters are
for the Manual and Backup Breaths.
The ventilator is now ready to be
connected to the patient under user
supervision. Prior to and after
connection, it is the user’s
responsibility to adjust and monitor
the ventilation parameters to suit the
patient’s medical condition.