Installation
18 Hardware Installation
2.1.3 Recommended Installation Process
To save time, it is recommended that all the IP Phone 310s are installed and
connected to a suitable power outlet at the same time. For example, if ten IP
Phone 310s are required for an office setup, perform the installation in the fol-
lowing order.
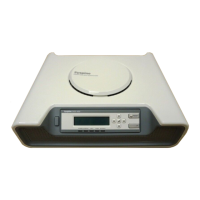
1. Locate the DOS-A50 (desktop, upright, or wall mount). See Locating the
DOS-A50 on page 19.
2. Connect the DOS-A50 to the LAN and power outlet. See Connecting the
DOS-A50 to the LAN on page 22.
3. Connect the DOS-A50 to the PSTN. See Connecting the DOS-A50 to the
PSTN on page 24.
4. Locate all ten IP Phone 310s (desktop or wall mount). See Locating IP
Phone 310s on page 25.
5. Connect all ten IP Phone 310s to the LAN and suitable outlet. See Con-
necting IP Phone 310s to the LAN on page 27.
N
OTE: Take note of each IP Phone 310's settings (IP address, location, and
proposed user) as the information is required during Adding a Phone and
New User.
6. Install the Microsoft
®
Response Point™ phone system software. See
Response Point Software Installation on page 28.
7. Change the DOS-A50 password and set the date and time. See Changing
the DOS-A50 Password on page 36 and Setting the DOS-A50 Date and
Time on page 37.
8. Add Users and Phones to the DOS-A50 using Administrator. See Adding a
Phone and New User on page 38.
9. Configure user’s available options using Administrator. See Microsoft
Response Point Administrator on page 69.
10. Assist users to configure their personal settings using Assistant. See
Microsoft Response Point Assistant Features on page 137.