Installation
Hardware Installation 25
2.1.7 Locating IP Phone 310s
The IP Phone 310 provides two distinct setup options—desktop and wall
mounted.
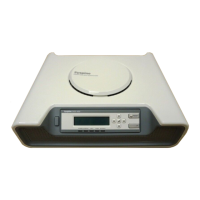
2.1.7.1
DESKTOP INSTALLATION
1. Insert the two locating tabs (1) into the slots
as shown.
2. Push the stand (2) toward the top of the IP
Phone 310 until it clicks into place.
2.1.7.2
WALL MOUNTED INSTALLATION
The IP Phone 310 wall mounting solution is designed to reduce clutter by locat-
ing the IP Phone 310 in an otherwise unused area.
The wall mounting slot is located on the underside of the IP Phone 310 (see
Rear View on page 13) for mounting purposes.
N
OTE: The handset hook is supplied in the upright position, suitable for desktop
or wall mounting. If the phone is installed on a desktop without the stand,
remove the hook and install it point down.
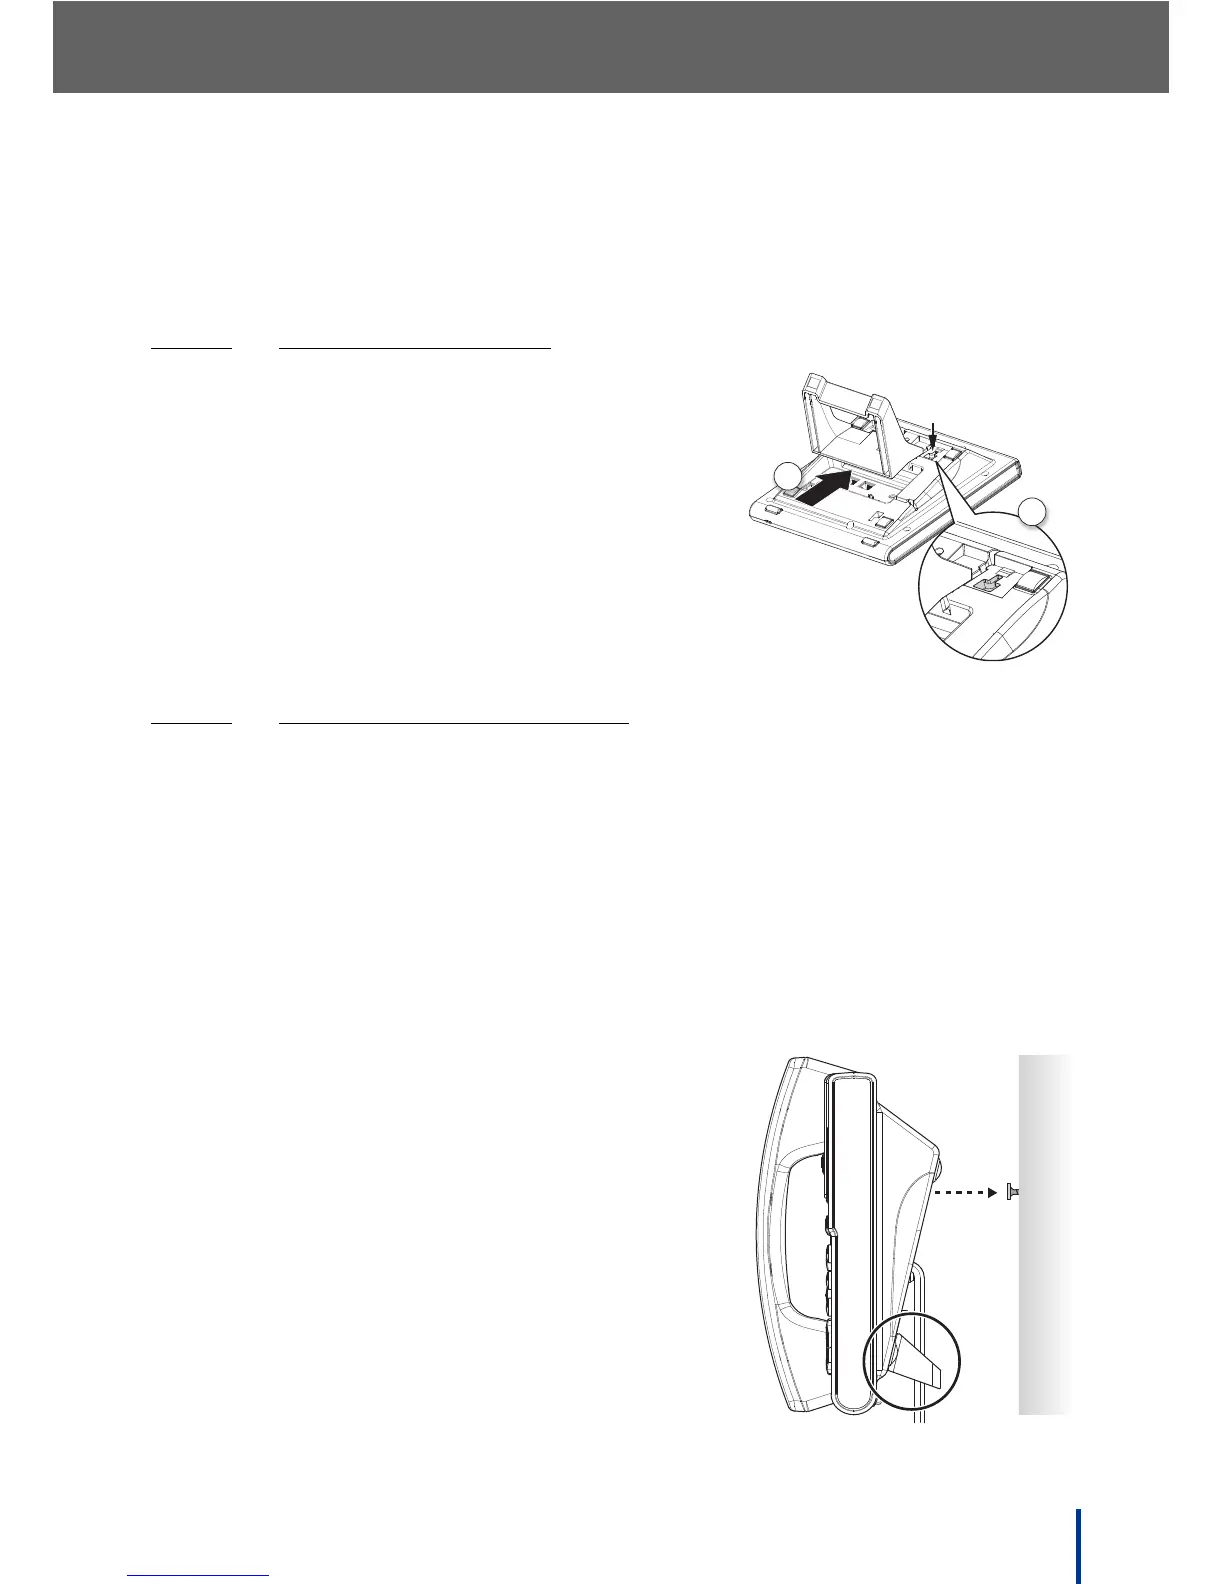
Perform the following steps to wall mount an IP Phone 310:
1. Insert the two stand locating tabs in to the
slots on the phone.
2. Push the stand toward the bottom of the IP
Phone 310 to until it clicks into place.
3. Locate a clean, even wall space with ade-
quate room for cabling.
4. Drill a hole and insert a suitable wall-fixing
plug.
5. Insert a suitable screw and tighten, leaving a
5 mm (0.2 inches) gap.
2
1