5 First steps
75
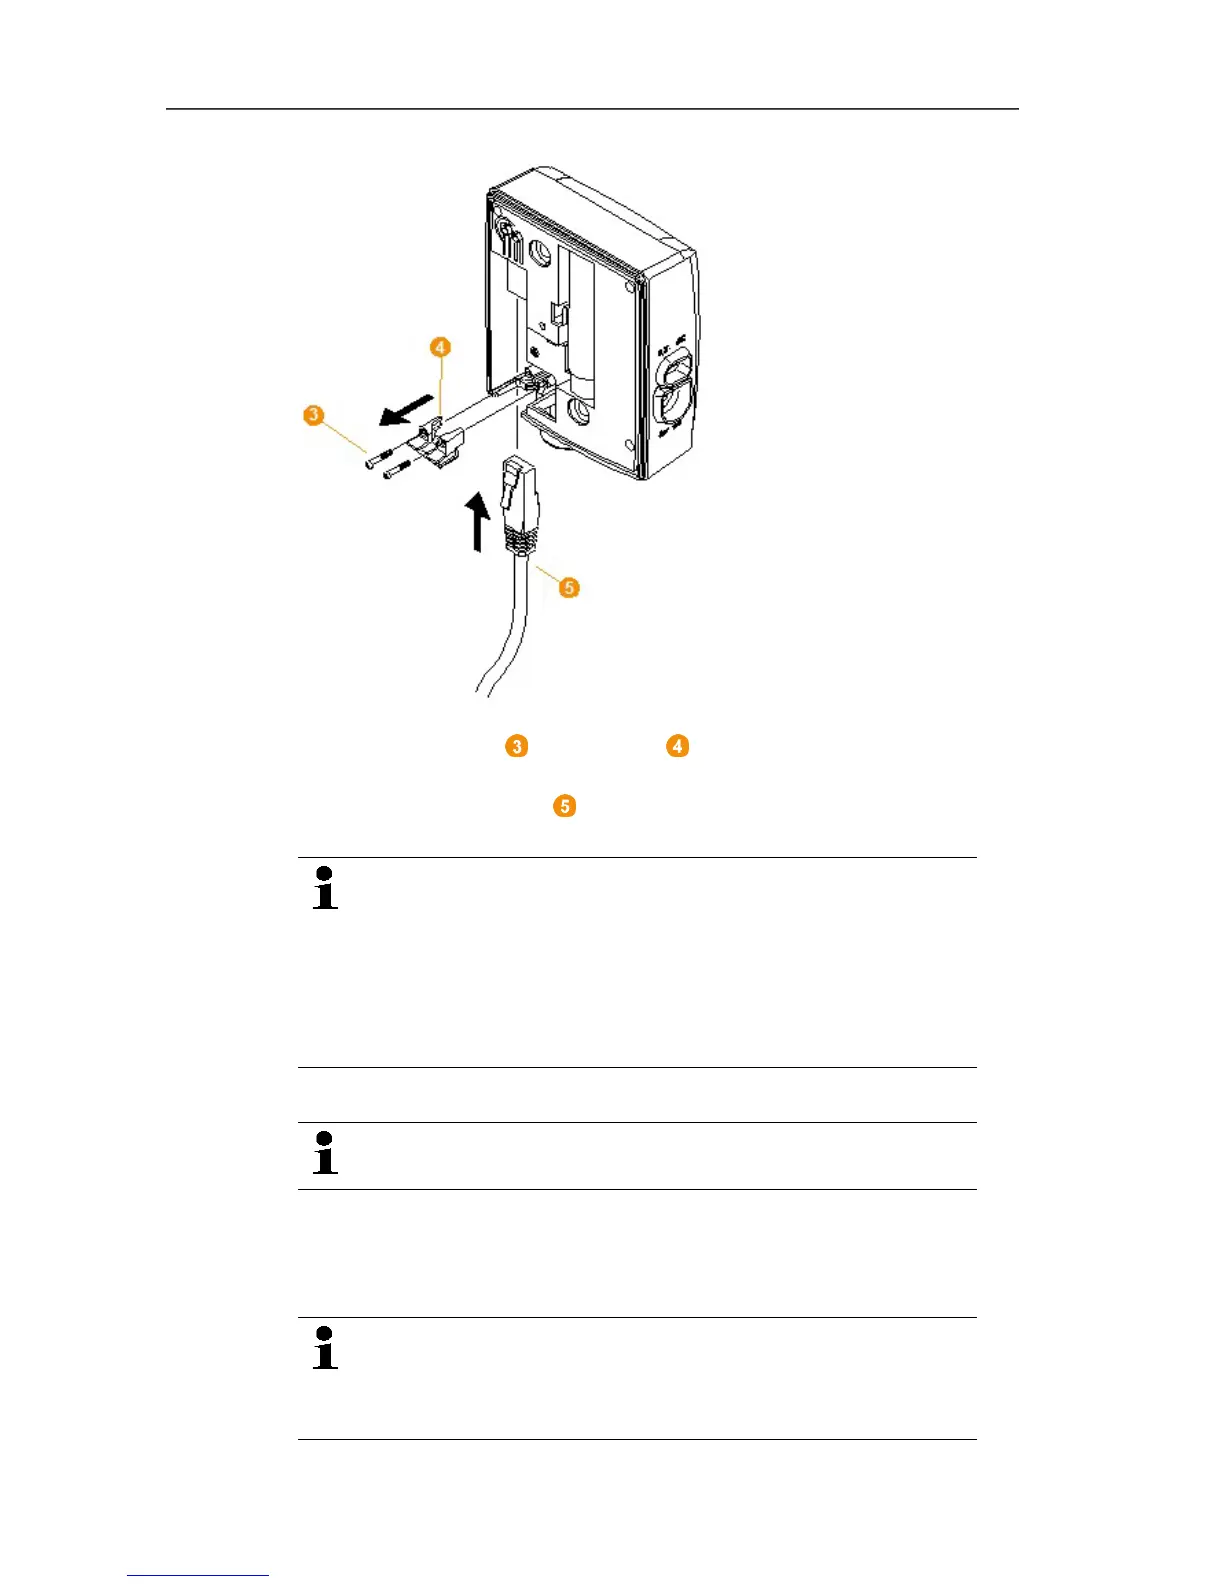
2. Loosen screws at the panel for the network cable and
remove panel.
3. Slide network cable with the tongue pointing up into the
Ethernet jack until it engages.
If you wish to connect the Saveris Ethernet probe to the
power supply via the 24 V AC/DC plug-in/screw terminal
and not via the mains adapter, do not screw on the
housing cover until after connecting the power supply.
The connection for the power supply via plug-in/screw
terminal is performed as with the Saveris router; see
Connecting router with power supply (AC/DC), page 60.
4. Place the housing cover on the probe and screw it down.
You can connect the probe to the network via a network
hub or directly at the Saveris base via the Ethernet jack.
Pos: 82 /TD/Erst e Schritte/testo Saver is/Hardware erwei tern/03 Ethernet-Fühler einbinden/01c Strom versorgung @ 1\mod_1203423 817781_79.docx @ 8270 @ 4 @ 1
5.14.4.2. Connecting Ethernet probe with power supply (mains unit)
The connection for the power supply via 24 V AC/DC
plug-in/screw terminal is performed as with the Saveris
router; see Connecting router with power supply
(AC/DC), page 60.