7-6
dummyheaddummyhead
CHARGING SYSTEM
ALTERNATOR REMOVAL/
INSTALLATION
REMOVAL
Remove the following:
– Engine cover
– Alternator cover (page 7-5)
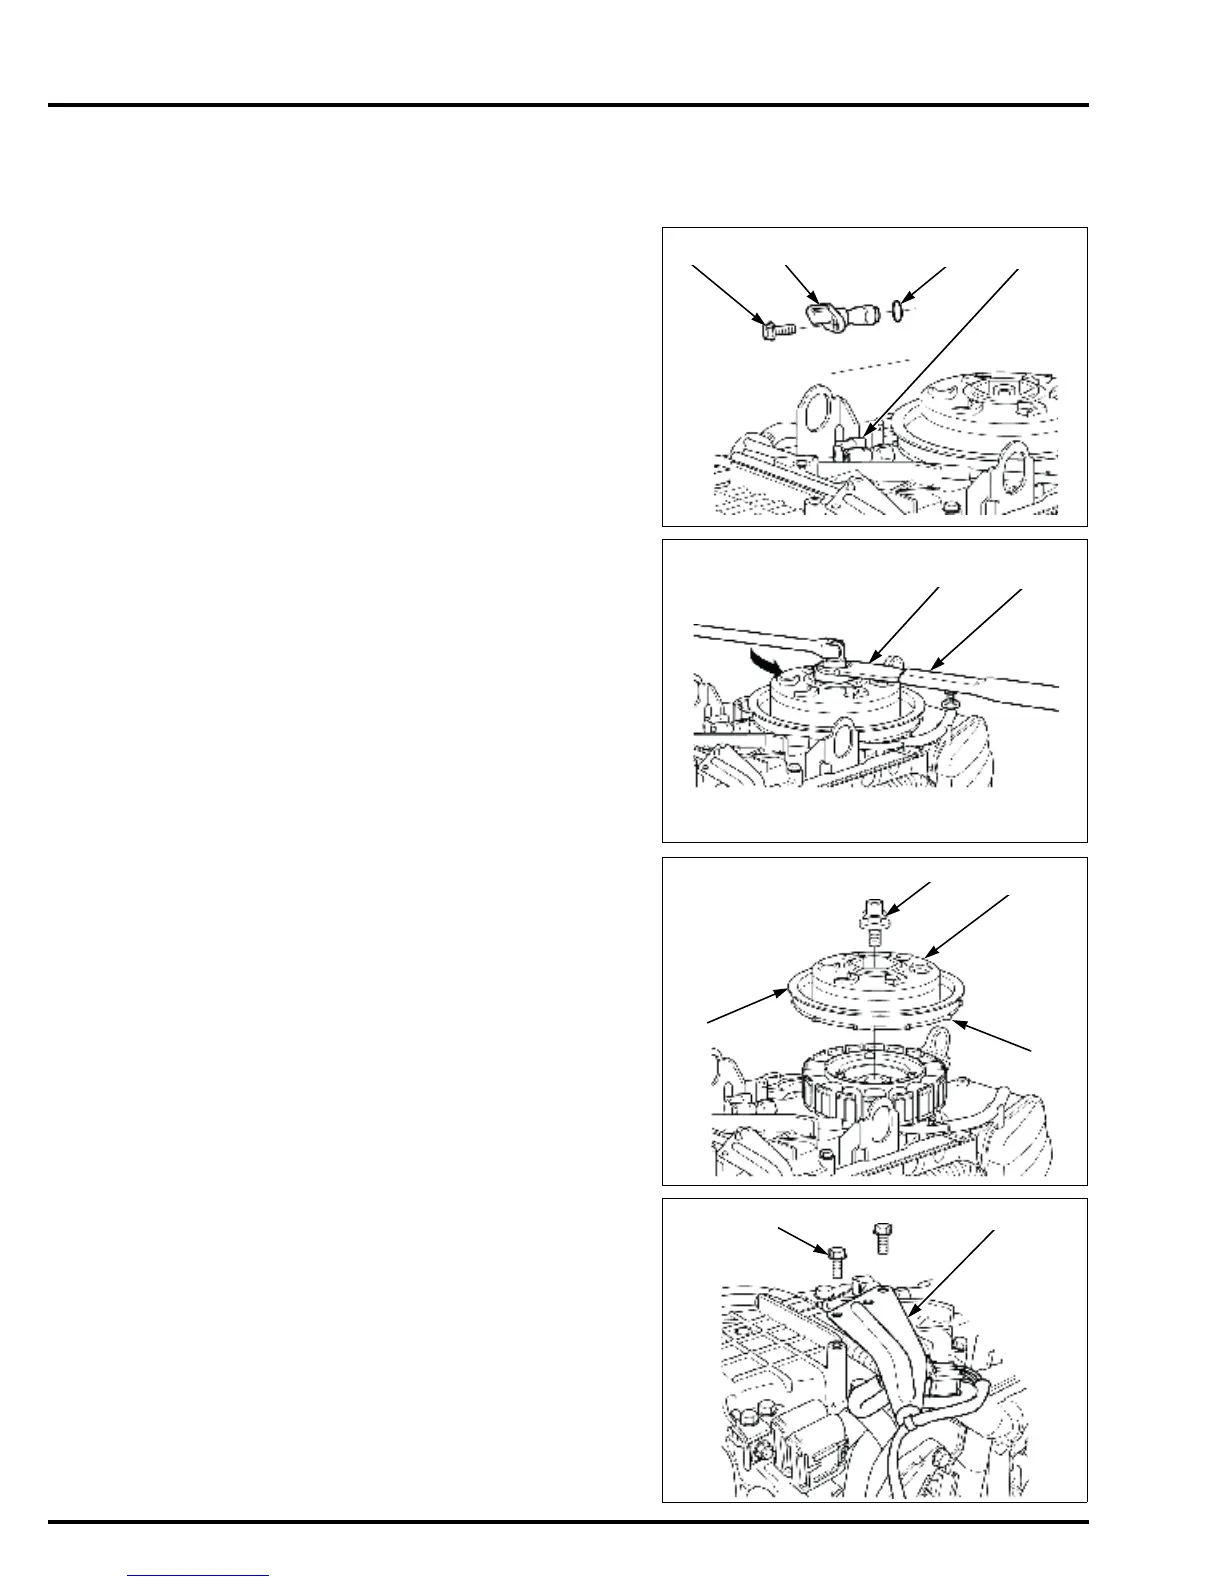
Disconnect the CKP sensor 3P connector.
Remove the bolt [1] and CKP sensor [2] from the chain
case [3].
Remove the O-ring [4] from the CKP sensor.
Loosen the bolt/washer using the pulley holder
attachment and the holder handle (special tools) as
shown.
Remove the bolt/washer [1], and remove the alternator
rotor [2].
• Note that the alternator rotor has very strong
magnetic force. Hold the alternator rotor [3] by the
pulley during installation and removal and do not
hold it by the rotor pulser plate [4] so you don’t pinch
your fingers with the rotor.
Remove the two bolts [1] and harness clip bracket C [2].
TOOLS:
Pulley holder attachment,
hex 50 mm [1]
070PB-0010100 or
07NAB-001040A
Holder handle [2] 07JAB-001020A
 Loading...