43
BASIC OPERATIONS
MEASUREMENT
In the Selection of examination interface, measurement is taken automatically in "Auto Mode".
When the screen is switched to the measurement screen, the measurement course in
progress (such as screen) is displayed for a few seconds at the top of the screen.
• See page 68 for the measurement operation when Pupillometry course is selected.
• See page 66 for the measurement operation when serial measurement courseis selected.
1 Confirm the waiting status for measurement.
Confirm that the button of the control panel is displayed in orange. If not, tap the
button, select Auto mode (Full Auto), and set the waiting status for measure-
ment.
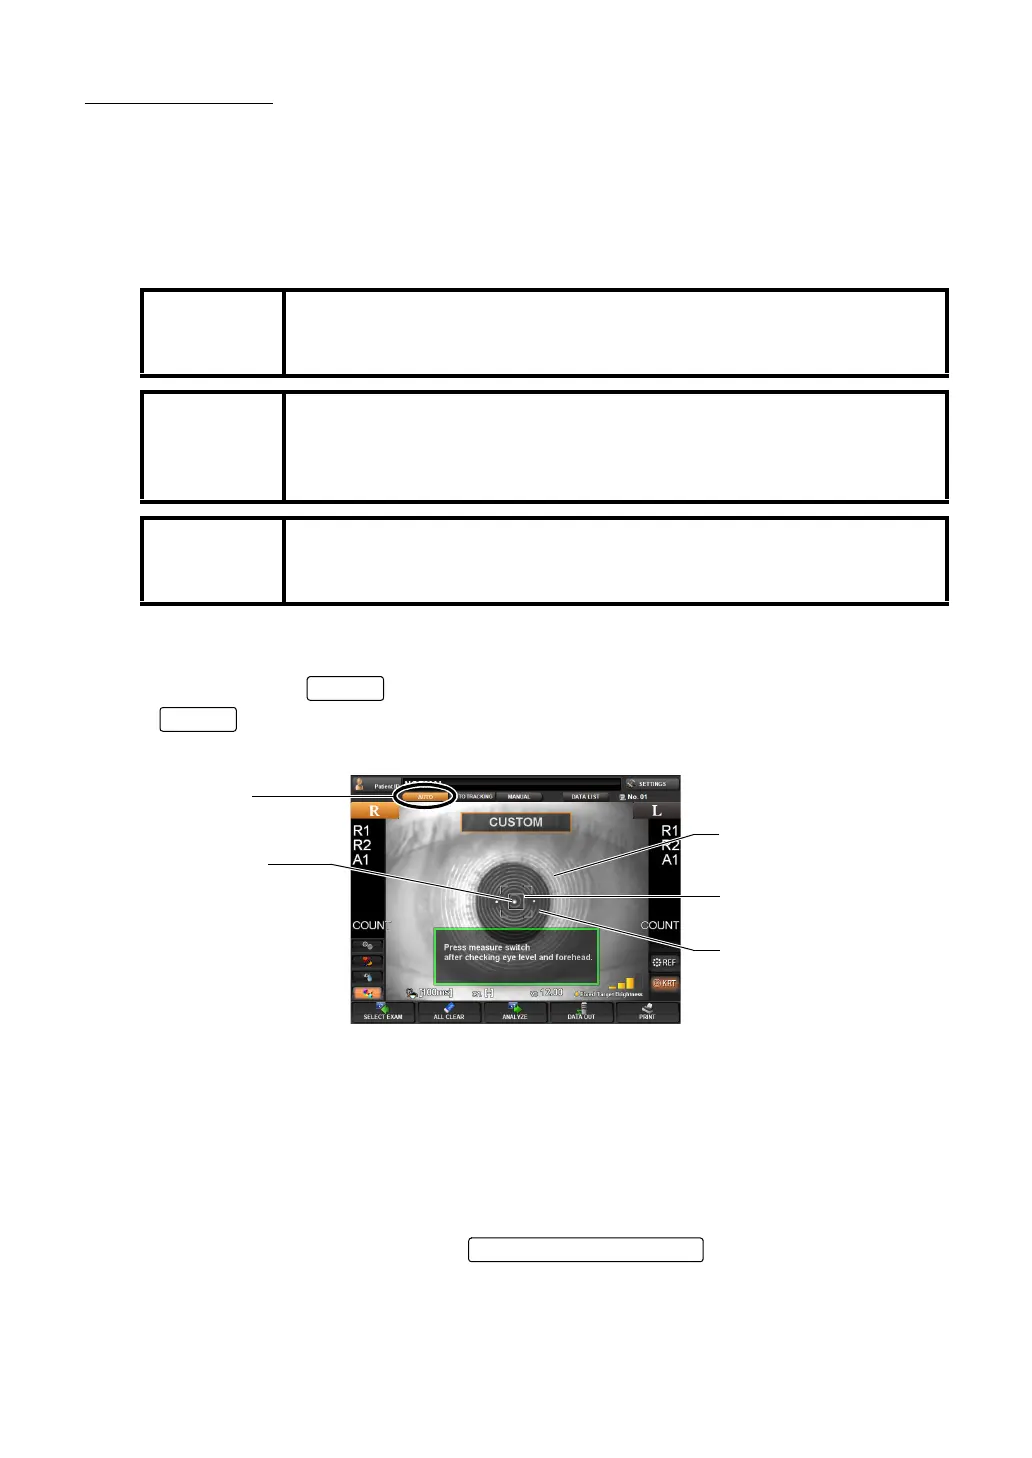
2 A message "Press measure switch after checking eye level and forehead." is displayed.
Confirm that the pupil image and luminous point are displayed on the screen.
• If the image of the pupil is not shown on the screen, use the control lever to move the
measuring head into the proper position, locating the patient's pupil.
For the operation of the control lever, see "OPERATING THE CONTROL LEVER" on
page 35.
3 When the pupil image is seen on the screen, tap the luminous point of the center part to
start measurement, or press the
on the control lever. The
main body will move into the position where the pupil image and luminous point come on
the screen center.
MEMO
Adjust the height of the automatic instrument table so that the patient
can sit on the chair comfortably and correct measurement values can be
obtained.
MEMO
If measurement is not available with auto mode, set the arbitrary opera-
tion interface and measure the eye in manual mode.
Measurement in auto mode may not be possible due to existing abnor-
malities in the corneal surface caused corneal disease.
MEMO
When operating the instrument, be careful not to touch the patient's face
or nose. If touched, clean the instrument following "
CLEANING THE
INSTRUMENT" on page 180.
AUTO
Alignment mark
Luminous point
AUTO button
Pupil image
Ring image