71
INDIVIDUAL OPERATIONS
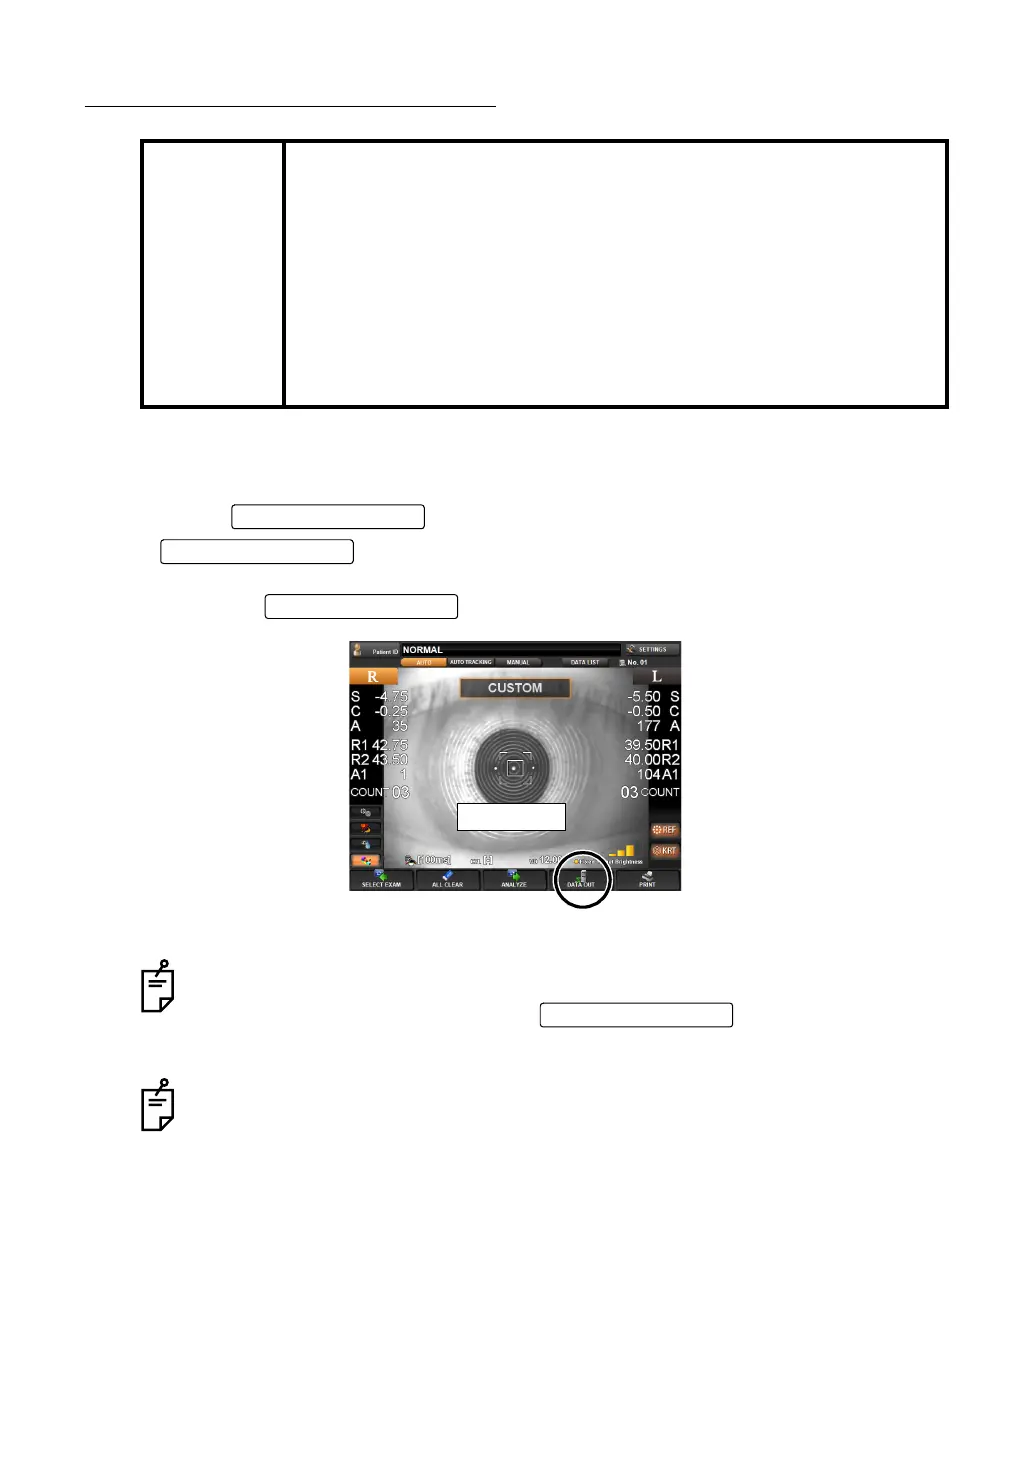
PRINTING MEASUREMENT VALUES
This instrument is equipped with a built-in printer.
1 Make sure the MEASUREMENT screen is on.
2 Tap the of the control panel.
lights, and measurement values on the control panel screen are
printed out.
The light of is turned off.
MEMO
• To avoid paper jam in the internal printer, do not feed the paper into
the printer if it is partly cut/torn or wrinkled.
• To avoid discoloration of the printing paper (particularly the recording
area) during storage, use a polypropylene holder; avoid a container
made of plasticizer (PVC, etc.).
• To avoid discoloration of the printing paper (particularly the recording
area) after pasting, use water-soluble glue.
• Since the printer paper is thermosensitive, it is not suitable for long
periods of storage. If necessary to keep records for long periods, pre-
pare separate copies.
Even after the printing operation is complete and the results displayed on the
screen is deleted, the results are stored within the instrument. So you can repeat
printing out the data by tapping the
until a new measure-
ment is started. The data is cleared at the start of new measurement.
The "ERROR" mark is not printed. Also, printing is not done if there are no mea-
surement values.
When red lines appear on both sides of the printer paper, replace it with a new one
earlier. For details about the replacement of printer paper, see "
SETTING THE
PRINTER PAPER" on page 33. Additionally, a 58mm wide printer paper (example:
TF50KS-E2C (Nippon Paper) is recommended.
DATA OUT button
DATA OUT button
Finish
DATA OUT button