53
INDIVIDUAL OPERATIONS
MEASUREMENT
PREPARATION BEFORE MEASUREMENT
TURN ON THE POWER
1 Make sure the power cable is properly connected.
For connection, see "CONNECTING THE POWER CABLE" on page 31.
2 Turn on the .
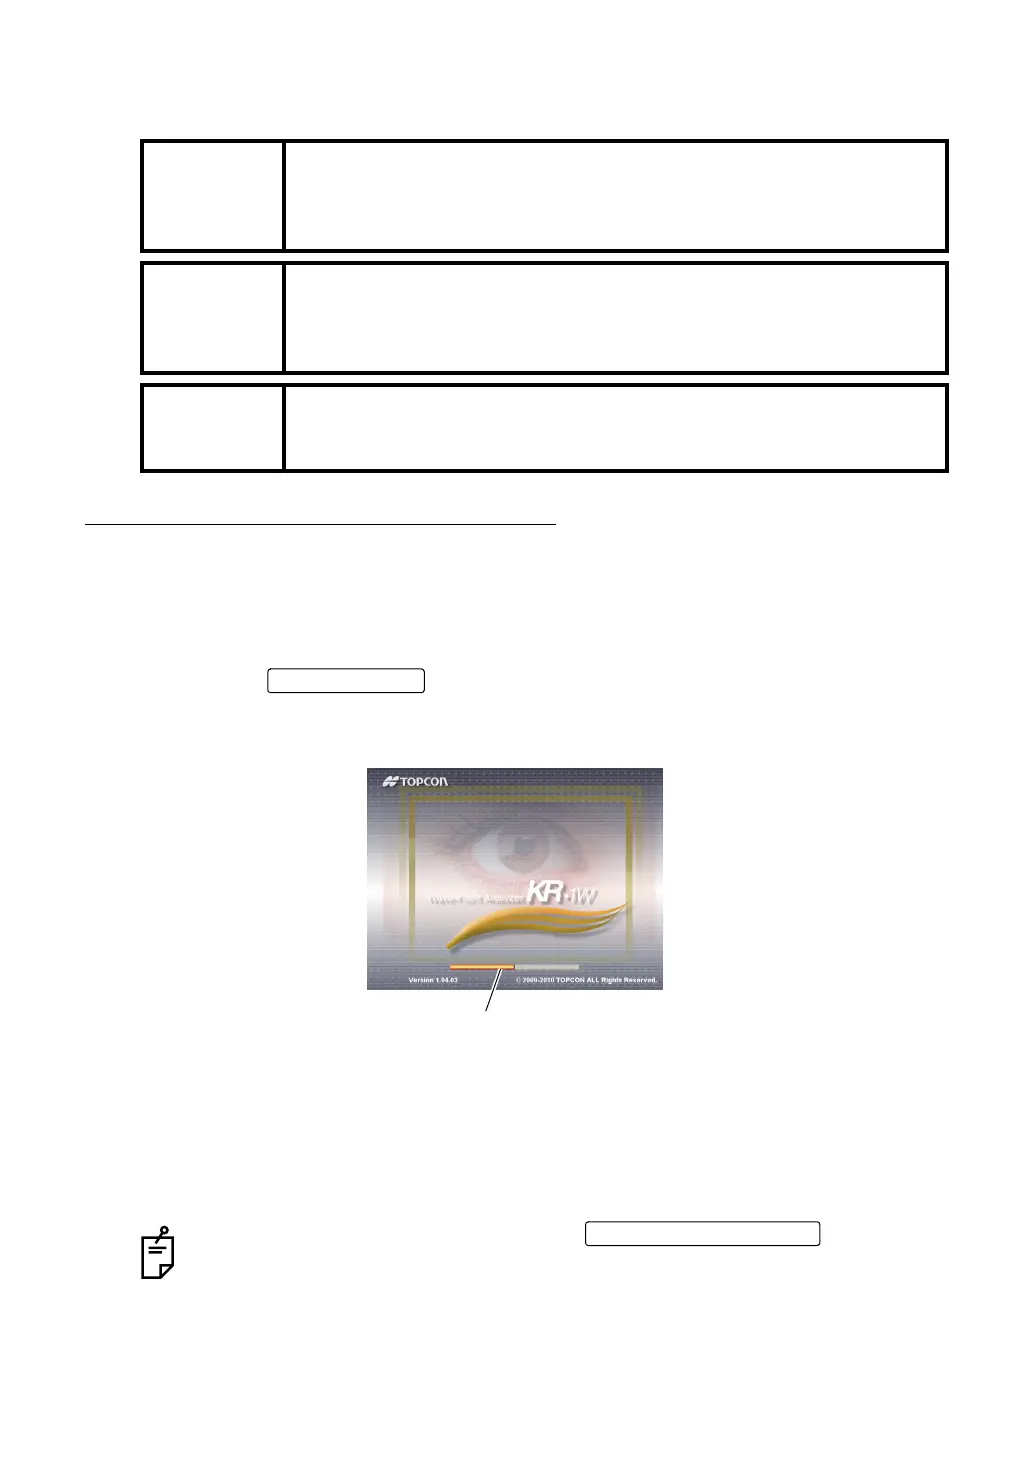
3 Confirm that the title screen is displayed. The MEASUREMENT screen will be displayed
shortly after.
4
When the initial setting is Auto mode, and when the MEASUREMENT screen is displayed, a
message "Get the eye aligned and press the MEASUREMENT switch" is displayed on the
screen: the waiting status starts.
In this case, alignment operation is not done even when the setting of alignment mode is
"Auto."
MEMO
The measurement in auto mode may not be possible due to the eyelid
and the eyelashes over to the pupil.
If this occurs, the operator should tell the patient to open their eyes wide
enough, or lift the eyelid to allow for measurement.
MEMO
The measurement in auto mode may not be possible due to the frequent
blinks or existing abnormalities in the corneal surface caused by corneal
disease etc.
In this case, use manual mode.
MEMO
The automated alignment function might not work appropriately when
the patient is doing the shining make-up around her eyelid.
In this case, please change into the manual mode of operation.
The message disappears by pressing the or by touch-
ing the screen, following the message.
When the initial setting of alignment mode is "Auto," alignment operation starts.
The orange-colored progress bar shows the progress of startup operation.
When it reaches the rightmost position, the measurement screen is displayed.
MEASUREMENT switch