Workman HDX AutoPage 7 − 34Hydraulic System
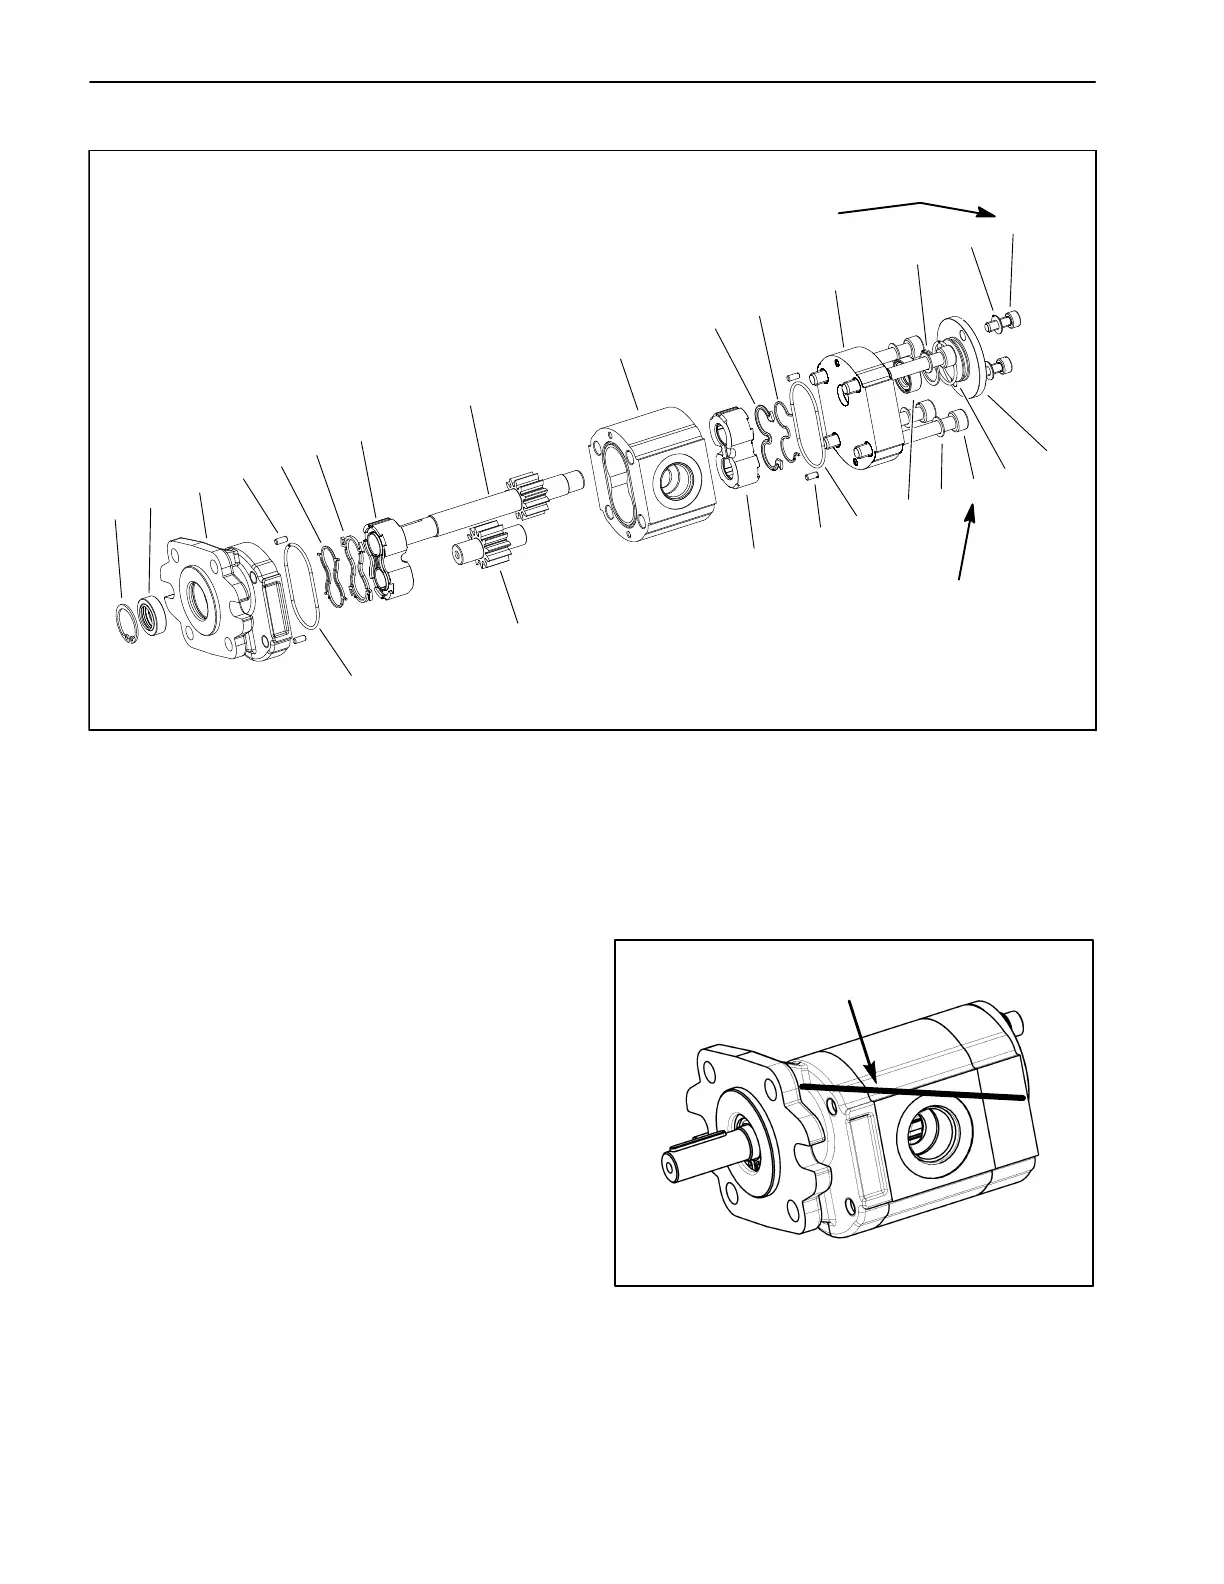
Gear Pump Service (Vehicles with Standard Hydraulics)
1. Retaining ring
2. Shaft seal
3. Front cover
4. Dowel pin
5. O−ring (2)
6. Back−up seal
7. Pressure seal
8. Front thrust plate
9. Drive shaft
10. Idler shaft
11. Body
12. Rear thrust plate
13. Pressure seal
14. Back−up seal
15. Rear flange
16. Lock washer (4)
17. Screw (4)
18. Shaft seal
19. Retaining ring
20. O−ring
21. Cover
22. Washer (2)
23. Socket head screw (2)
Figure 28
1
2
3
4
5
6
7
8
9
10
16
17
18
19
20
21
22
23
11
13
14
15
12
5
4
130 in−lb
(15 N−m)
220 in−lb
(25 N−m)
STANDARD HYDRAULICS GEAR PUMP
NOTE: If vehicle is equipped with High Flow Hydraulics,
refer to High Flow Hydraulics Gear Pump Service later
in this section.
NOTE: The Workman HDX Auto gear pump includes a
rear flange that will allow the installation of a second
pump section for the High Flow Hydraulics system.
Disassembly (Fig. 28)
1. Plug pump ports and clean the outside of the pump
thoroughly. After cleaning, remove plugs and drain any
oil out of the pump.
2. Use a marker to make a diagonal line across the
front thrust plate, body and rear flange for assembly pur-
poses (Fig. 29).
IMPORTANT: Prevent damage when clamping the
gear pump in a vise; clamp on the front thrust plate
only. Also, use a vise with soft jaws.
3. Clamp front thrust plate of pump in a vise with soft
jaws with the shaft end down.
Figure 29
MARKER LINE
4. Remove socket head screws (item 23), washers
(item 22) and cover (item 21) from rear flange.
5. Loosen, but do not remove, screws that secure rear
flange to pump.