Workman HDX Auto
Page 3 − 16
Kohler Gasoline Engine
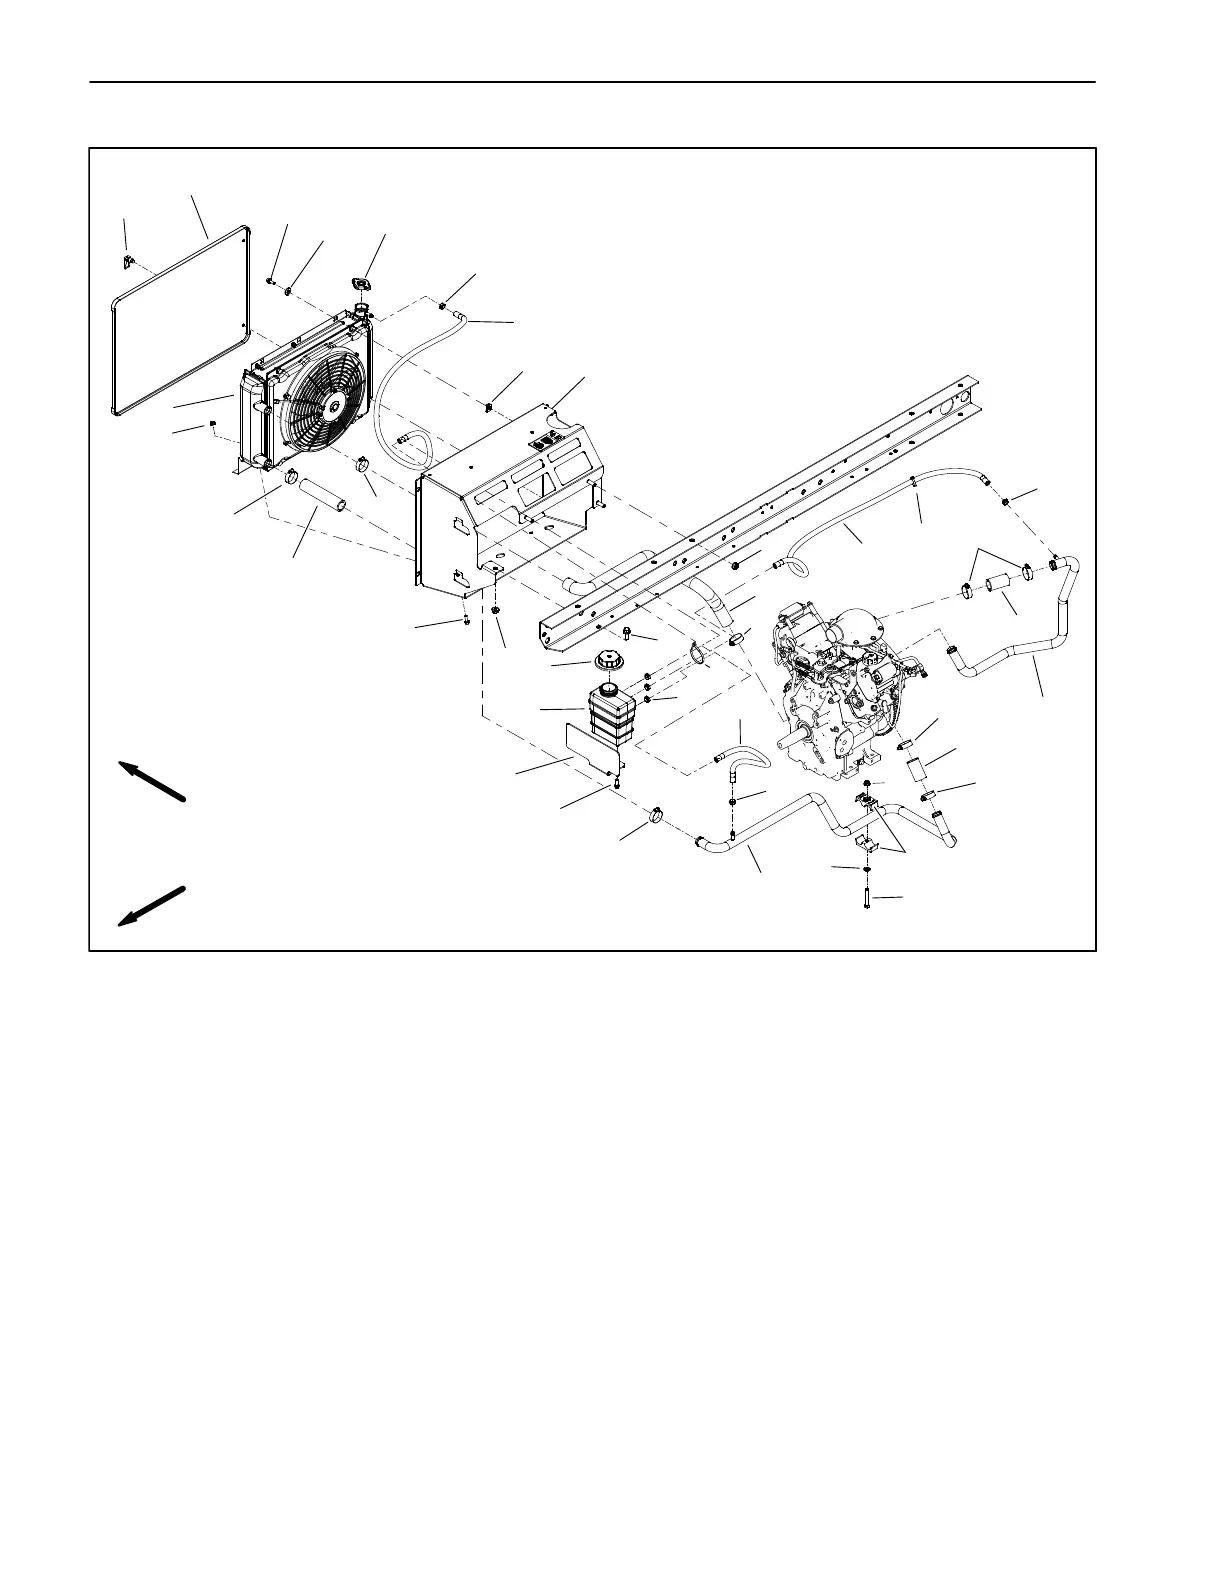
Radiator
Figure 17
1. Radiator mount
2. Clip (2)
3. Radiator and fan assembly
4. Flange head screw
5. Flange nut (4)
6. Flat washer (2)
7. Flange head screw (4)
8. Flange nut (2)
9. Upper coolant hose
10. Hot coolant pipe
11. Cold coolant pipe
12. Straight hose
13. Straight hose (2)
14. Tank mount plate
15. Surge tank
16. Washer head screw (2)
17. Hose clamp (6)
18. Tank cap
19. Hose clamp (8)
20. Radiator screen
21. Swell latch (4)
22. Radiator cap
23. Cable tie (2)
24. Tube clamp (2)
25. Flat washer
26. Cap screw
27. Flange nut
28. Coolant hose
29. Coolant hose (2)
FRONT
RIGHT
2
3
6
8
9
10
11
13
1
5
7
12
14
15
16
17
18
19
20
4
21
22
23
24
25
26
27
28
29
7
19
19
19
19
19
13
17
29
19
17
17
5
23
Removal (Fig. 17)
1. Park vehicle on a level surface and engage parking
brake.
2. Raise or remove the cargo bed or other attach-
ment(s). If bed is raised, place safety support on lift cylin-
der.
3. Make sure that the engine is stopped and the key is
removed from ignition switch. Allow engine to cool.
4. Unlatch and remove radiator screen from front of ra-
diator.
5. If vehicle is equipped with high flow hydraulics kit, ro-
tate oil cooler latches and place oil cooler away from ra-
diator.