Workman HDX AutoPage 5 − 44Chassis
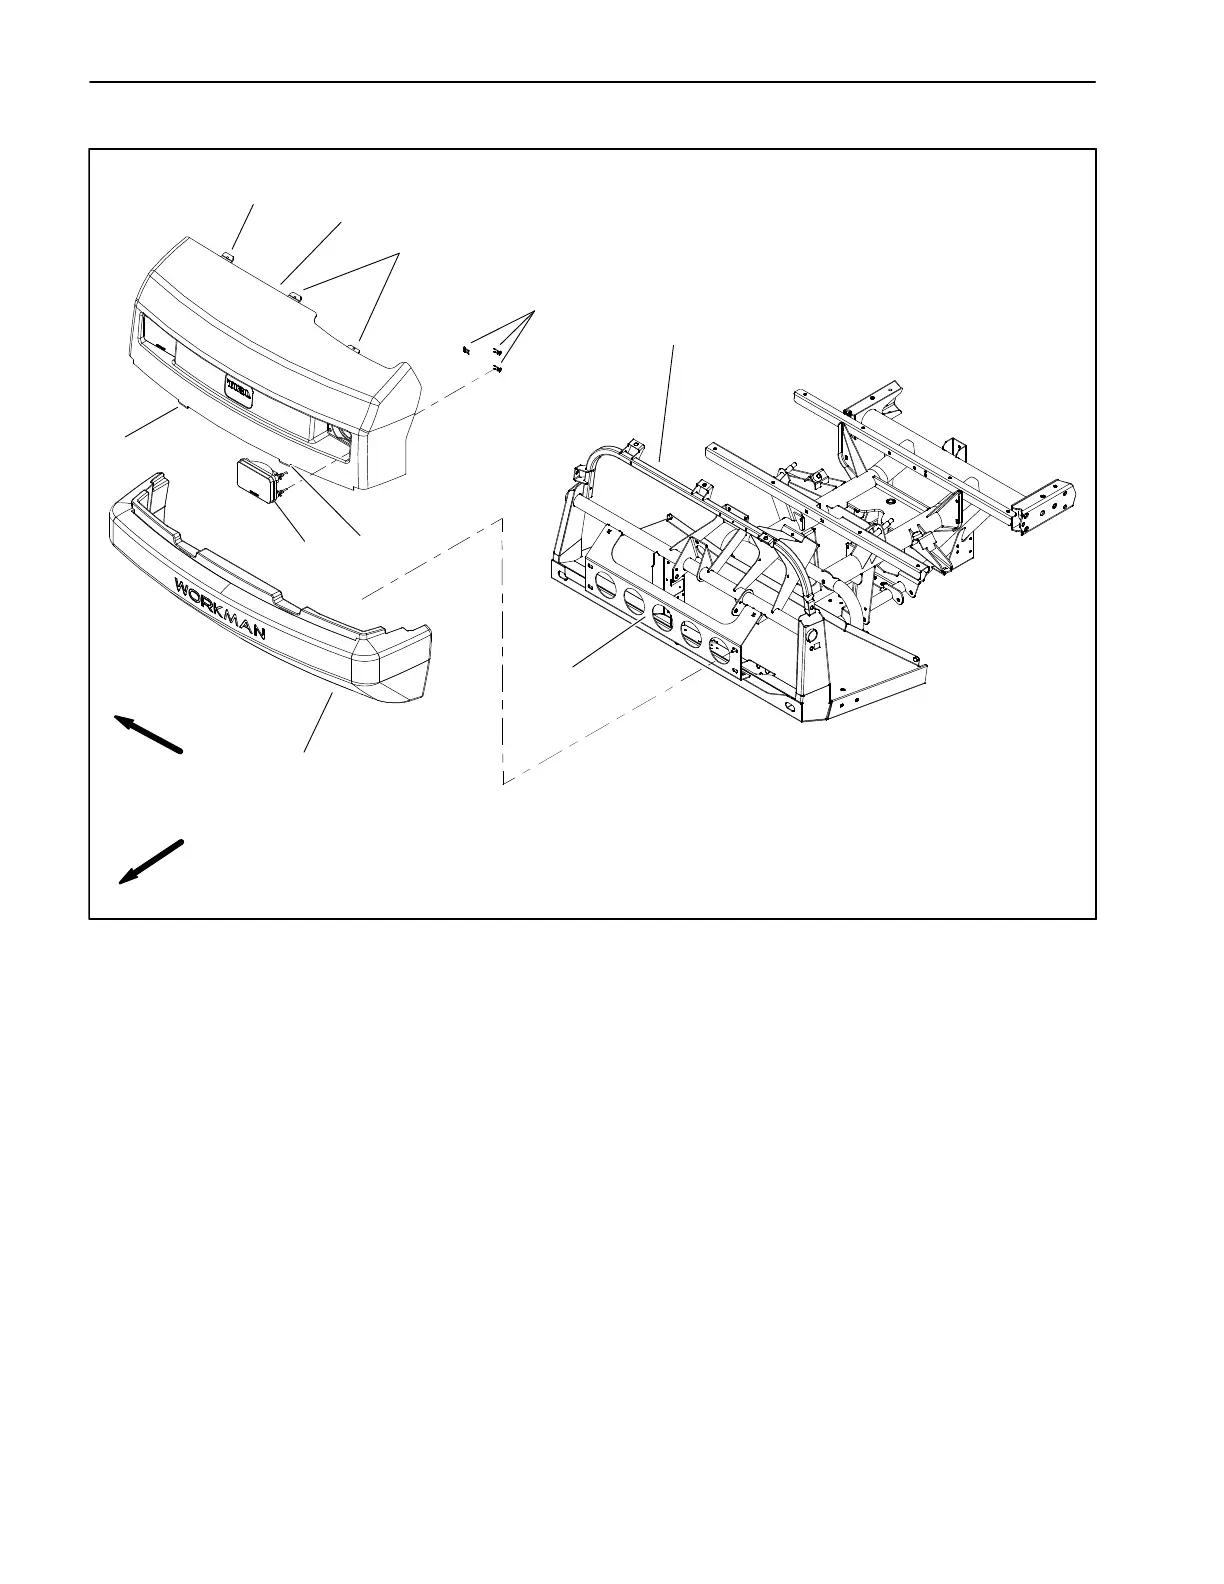
Hood
1. Hood
2. Clip (3 used per headlight)
3. Headlight (2)
4. Bumper
5. Bumper bracket
6. Operator frame
7. Hood mounting tab
Figure 37
FRONT
RIGHT
3
6
5
1
4
2
7
7
7
7
Removal (Fig. 37)
1. Park vehicle on a level surface, shut engine off and
apply the parking brake. Remove key from ignition
switch.
2. While grasping the hood in the headlight openings,
lift up on the hood to release the lower mounting tabs
from the frame slots.
3. Pivot the bottom of the hood upward until the top
mounting tabs can be pulled from the frame slots.
4. Pivot the top of hood forward and unplug the wire
harness connectors from the head lights.
5. Remove hood from vehicle.
Installation (Fig. 37)
1. Position hood to operator frame.
2. Plug the wire harness connector to the two (2) head-
lights. Insert the top mounting tabs into the frame slots.
3. Insert the lower mounting tabs (item 7) into the frame
slots.
4. Ensure that the hood tabs are fully engaged in the
top, side and bottom frame slots.