Workman HDX AutoPage 5 − 42Chassis
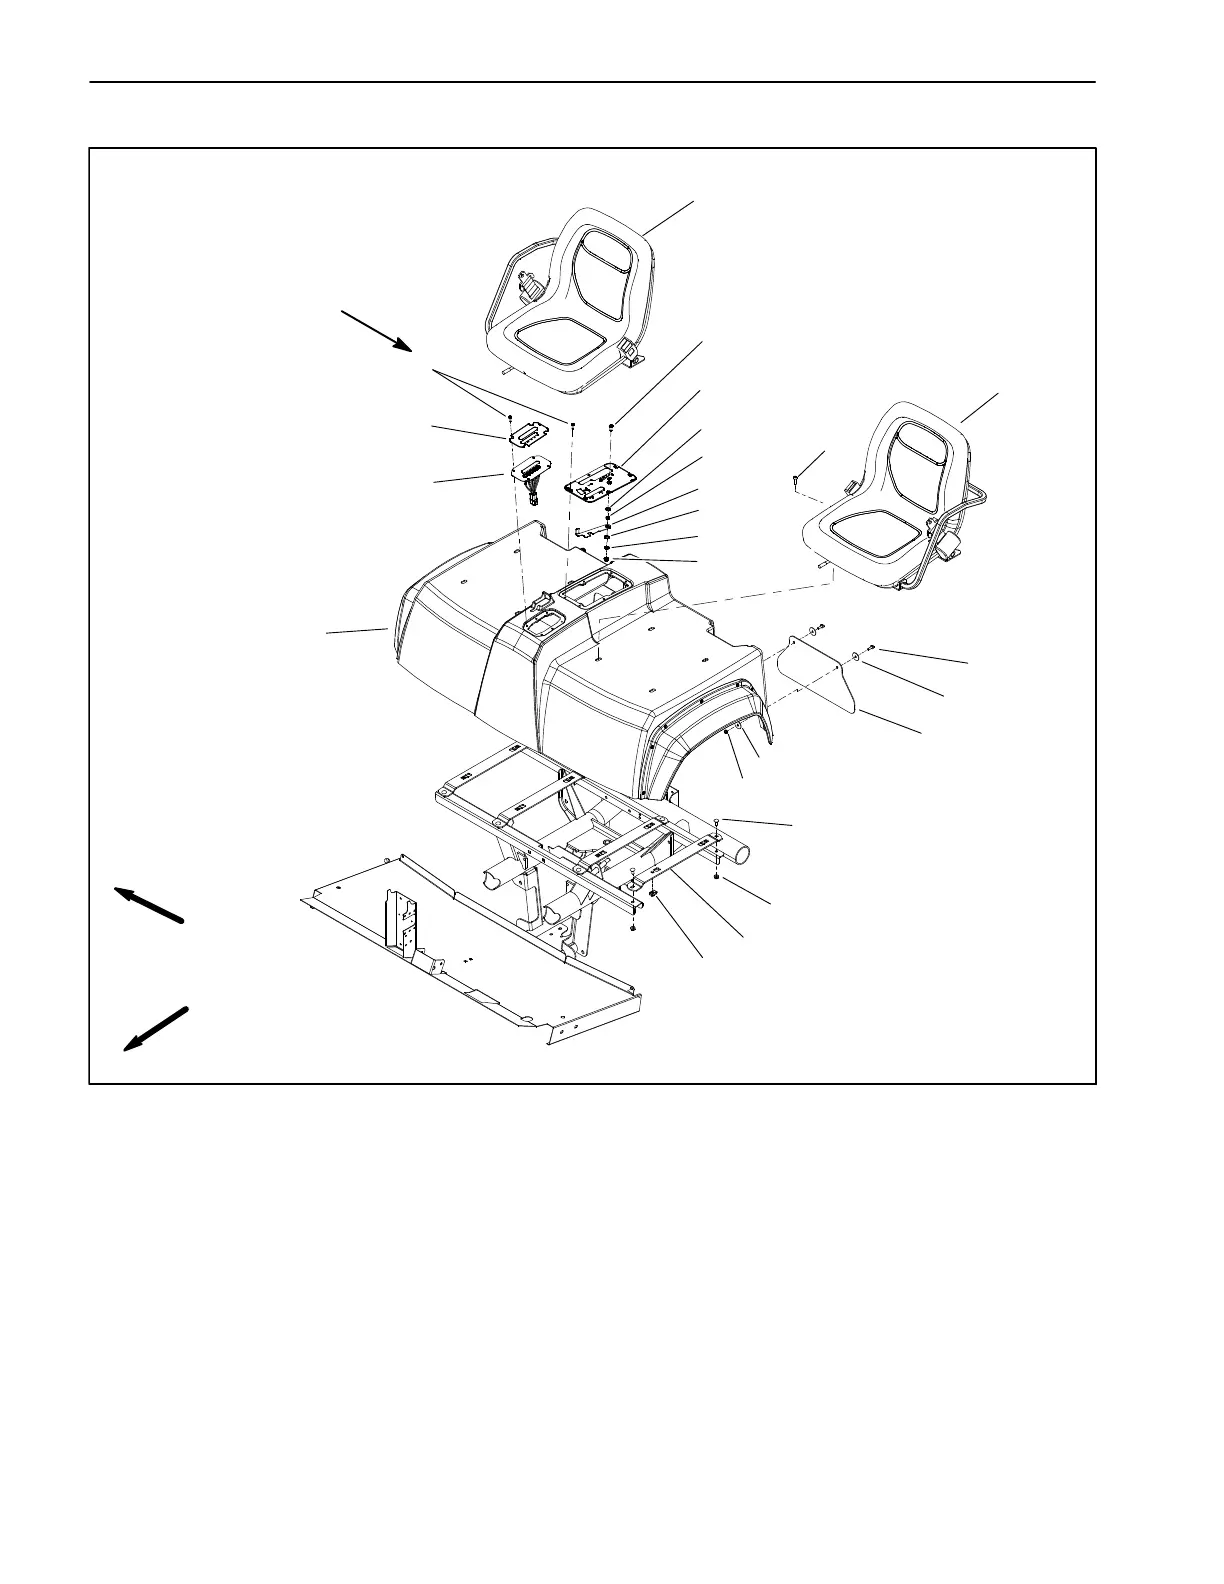
Seat Base
1. LH (operator) seat
2. RH (passenger) seat
3. Washer head screw (10)
4. Shift decal
5. Shift plate
6. Carriage bolt (8)
7. Seat bracket (4)
8. Seat base
9. Flange nut (8)
10. U−clip nut (8)
11. Mudflap (2)
12. Flat washer (8)
13. Flange head screw (4)
14. Flange nut (4)
15. Control plate
16. Socket head screw
17. Spacer
18. Nylon washer
19. Flat washer
20. Spring washer
21. Detent lever
22. Flange head screw
23. Socket head screw (8)
Figure 33
18
19
15
17
16
20
13
12
14
11
10
3
6
8
9
5
1
4
2
7
23
21
12
22
12 in−lb (maximum)
(1.3 N−m)
FRONT
RIGHT
Removal (Fig. 33)
1. Park vehicle on a level surface, raise and support
bed (if installed), shut engine off and apply the parking
brake. Remove key from ignition switch.
2. Loosen hose clamps and remove CVT intake hose
from ROPS cover and CVT enclosure cover (Fig. 34).
3. Lift engine coolant overflow tank from slots in rear of
ROPS cover. Position overflow tank away from seat
base.
4. Remove six (6) carriage screws and flange nuts that
secure ROPS cover to ROPS frame. Remove cover
from vehicle (Fig. 35).