• Sensor_3 is for Zone 3
• Sensor_4 is for Zone 4
To configure a sensor:
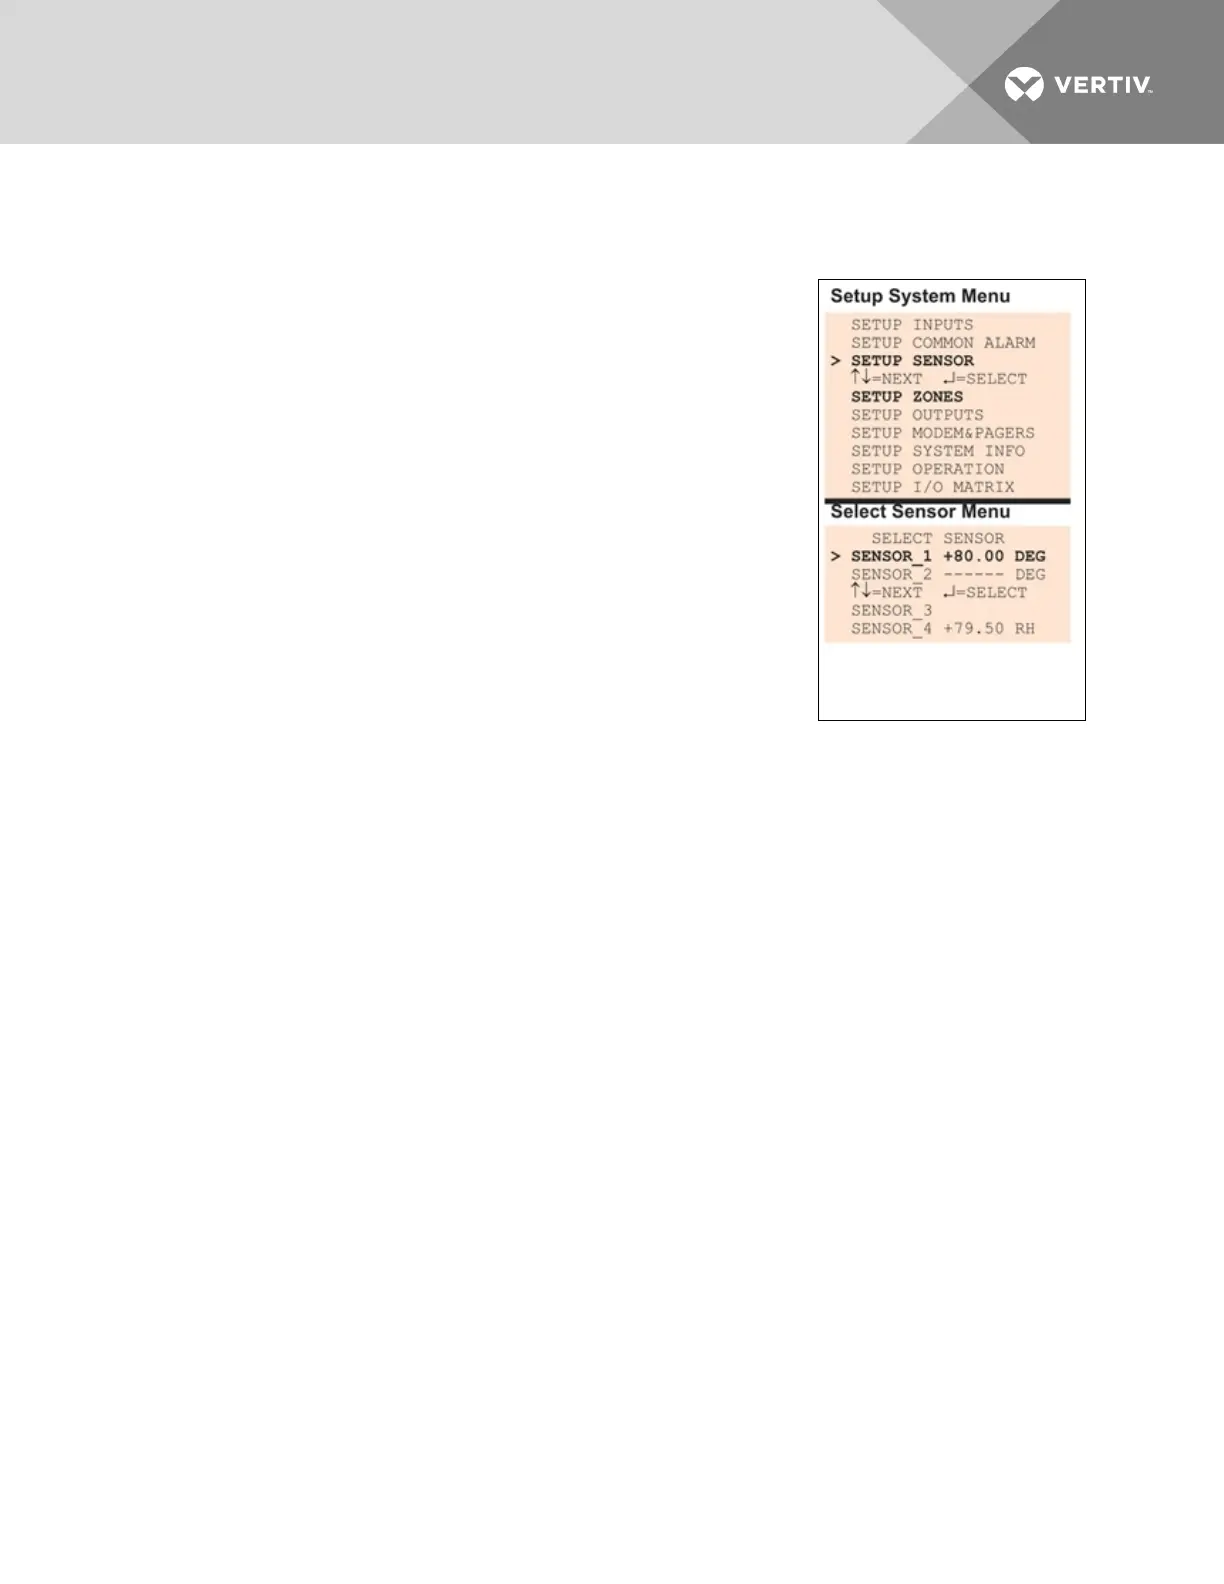
Log In and Choose Setup System
• From the Main Menu, use the arrows to choose System and
Control, then press Enter (see Login on page53 for help).
• Enter your password at the Login screen.
• From the System and Control Menu, use the arrows to choose
Setup System, then press Enter.
Select a Sensor to Configure
• From the Setup System Menu, shown at right, use the arrows to
choose Setup Sensor and press Enter.
• From the Select Sensor Menu, choose the sensor you want—for
example, Sensor_1—and press Enter.
Table 7.4 on the next page shows sensor features that may be changed,
along with the default settings. By default, sensor inputs are not connected.
To activate a sensor input, you must specify it as connected and enter
corresponding values for 4and 20mA, as well as high and low setpoints. Other features that may be
altered include the name of the sensor, the abbreviation for the units, and defining the sensor as
alarmable or as an event.
• Alarmable sensors may be Latched (Y) or Unlatched (N).
• Event status allows you to monitor a sensor’s high and low setpoints—and use those setpoints
to change the status of an output, if desired—without triggering an alarm. Events are always
Unlatched.
• You may also specify a time delay before the Liebert AC8 responds to an alarm or event.
Use the steps following Table 7.4 on the next page to change the default settings for any analog sensor
input.
Vertiv | Liebert® AC8 User Manual | 61