Maintenance
5556−1/A1
Winterthur Gas & Diesel Ltd.
3/ 18
CAUTION
Damage Hazard: Do not operate the engine with a fuel pump
removed. This will decrease the supply of oil, i.e. there could be a
decrease of lubrication to the other fuel pumps. Damage to
equipment can then occur.
Note: Read the data in 0012−1 General Guidelines for Lifting Tools.
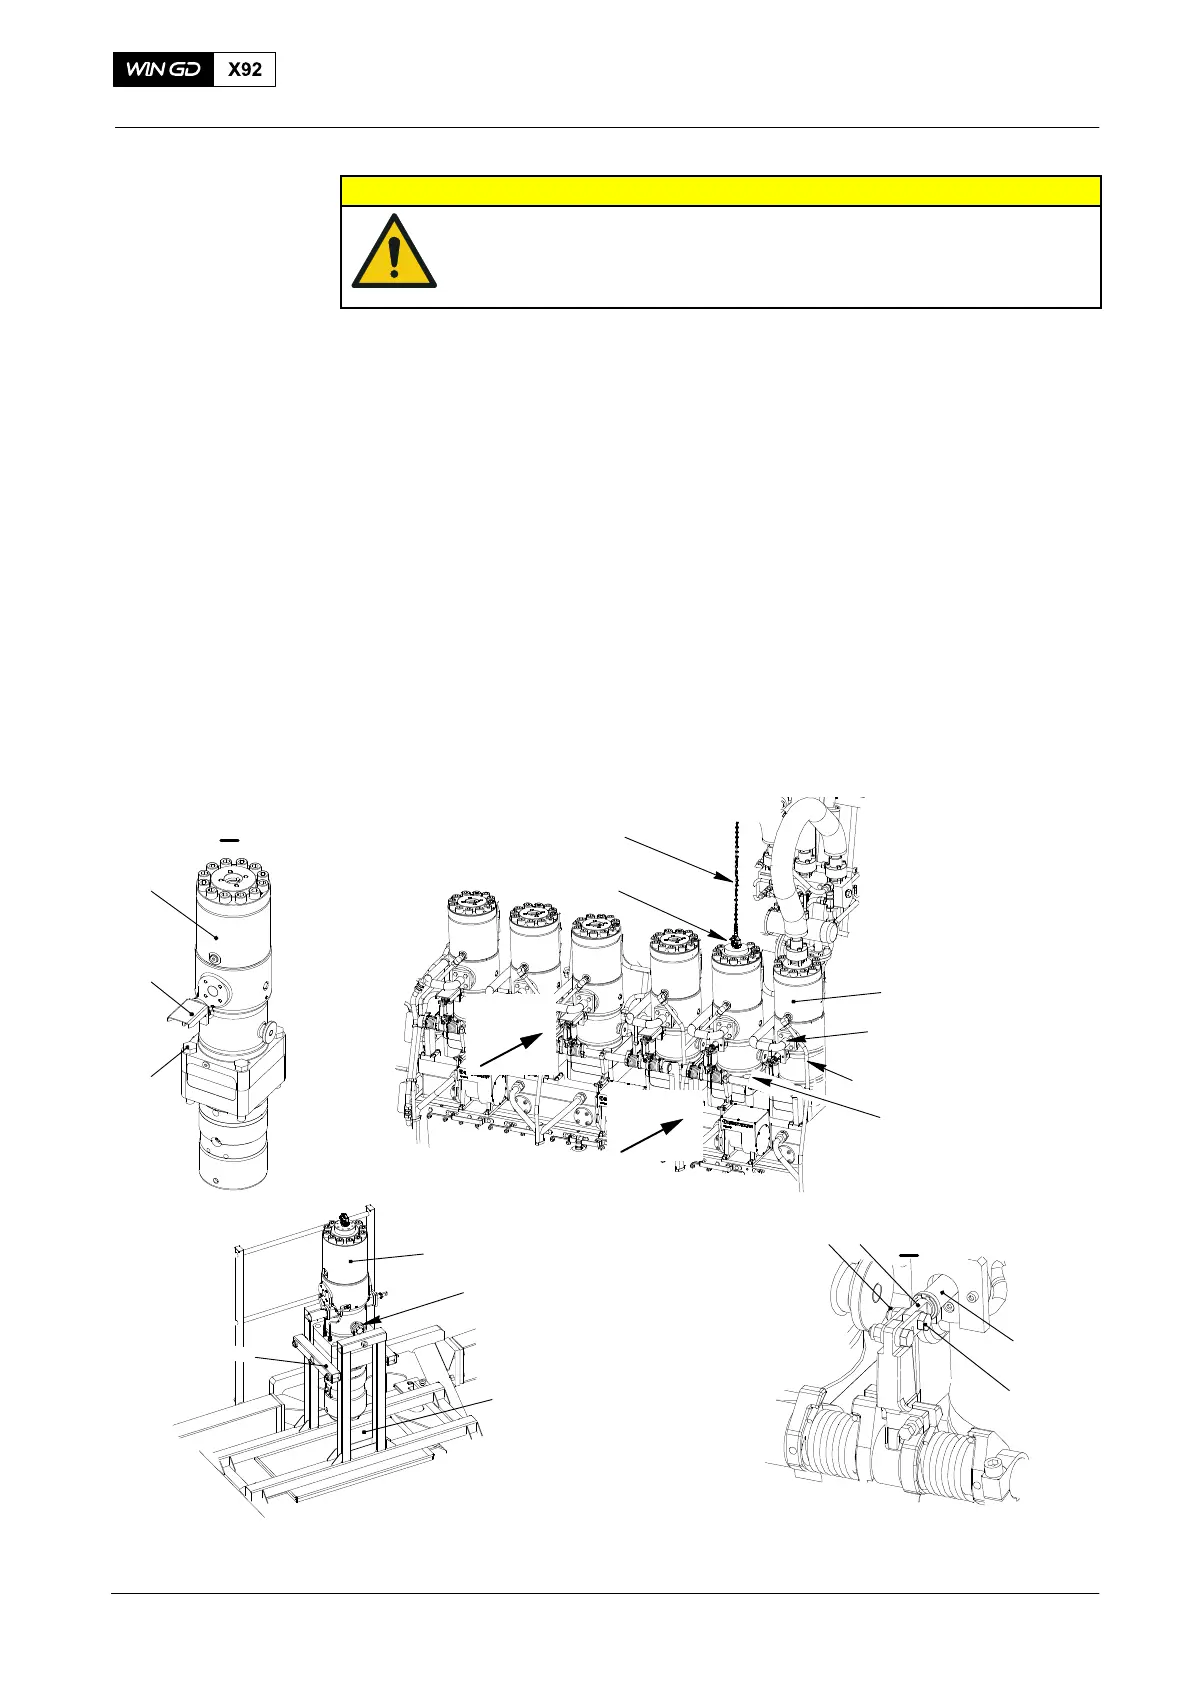
1) Use the turning gear to get the applicable cam in the supply unit to BDC.
2) Disconnect the oil pipes (1 and 2, Fig. 2)
3) Remove the cover (4) from the fuel pump (3).
4) Remove the nut (8) and screw (7) then carefully disconnect the connecting element
(7) from the toothed rack (6).
5) Attach the lifting tool 94552 to the pump cover.
6) Attach the manual ratchet 94016−003 to the engine room crane.
7) Attach the manual ratchet 94016−003 to the lifting tool 94552.
8) Remove the four bolts (5) from the fuel pump (3).
9) Carefully lift the fuel pump (3).
10) Attach covers to all open flanges (pipes and pump) to prevent contamination.
11) Attach the fuel pump to the fuel pump rack 94592 with the screws 94592C.
12) Put the limiters 94592B on each side of the fuel pump rack 94592.
13) Put the oil tray 94592A below the fuel pump (3).
14) Remove the manual ratchet (94016-003).
94592C
94592A
3
II
5
94016−003
94552
II
7
6
8
I
I
4
3
Fig. 2
2
1
WCH03052
WCH03053
WCH02790
3
5
9
94592B
Fig. 2 Fuel Pump Removal
Fuel Pump: Disassemble, Assemble
2015