Scan
Xerox
®
DocuCentre
®
SC2020
User Guide
135
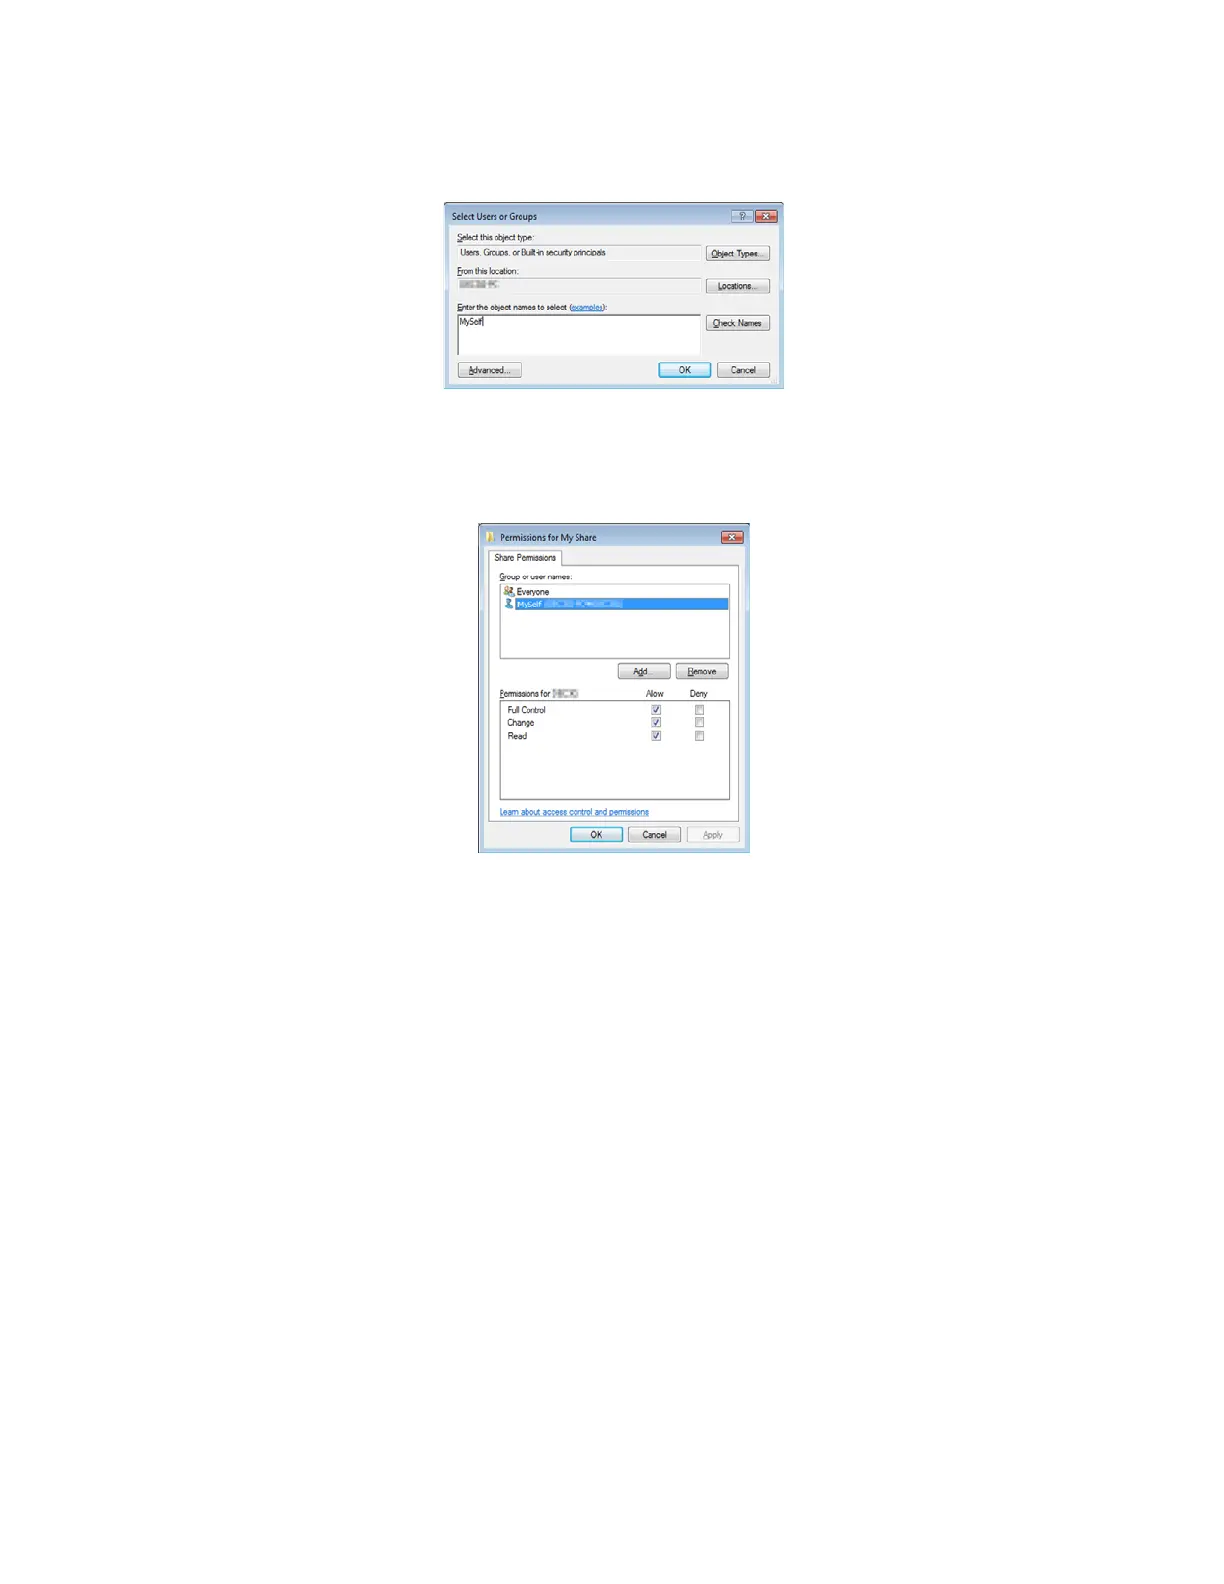
7. Search user login name by clicking [Advanced], or enter the user login name in the [Enter the object
names to select] box and click [Check Names] to confirm (Example of user login name: MySelf).
8. Click [OK].
9. Click the user login name that you have just entered. Select the [Full Control] check box. This will grant
you permission to send the document into this folder.
Note: Do not use [Everyone] as the user login name.
10. Click [OK].
11. Click [OK] to exit the [Advanced Sharing] dialog box.
12. Click [Close].
Notes:
•
To add sub-folders, create new folders in the shared folder you have created.
• Example: Folder name: MyShare, Second-level folder name: MyPic, Third-level folder name:
John
• You should now see MyShare\MyPic\John in your directory.
After you created a folder, go to
Setting a Destination Using an Address Book on page 135.
Setting a Destination Using an Address Book
You can configure the device settings to use the Scan to Server/Computer feature with the CentreWare
Internet Services or Address Book Editor.
The following procedure uses Windows 7 as an example. The procedure differs depending on the OS.
Before beginning to setup a destination, make sure you have the IP addresses you need such as device and
computer.

 Loading...


