January 2010
2-66
Phaser 7760 Color Laser Printer
007-110
Revised
Status Indicator RAP’s
Check that the voltage at P/J542 pins 1, 2, 5, and 6 each drop to approximately +22
VDC. The voltage at P/J542 pins 1, 2, 5, and 6 all drop to approximately +22
VDC when [008-036] is entered.
YN
Replace the Tray Module PWB (PL 16.15 - TTM or PL 15.9 - 3TM).
Replace the Takeaway Motor 1 (PL 16.15 - TTM or PL 15.9 - 3TM).
Check the Takeaway Motor 1 (PL 16.15 - TTM or PL 15.9 - 3TM) and its associated gears
for damage, contamination and misalignment.
The Tray 3 Feed/Lift Motor energizes.
YN
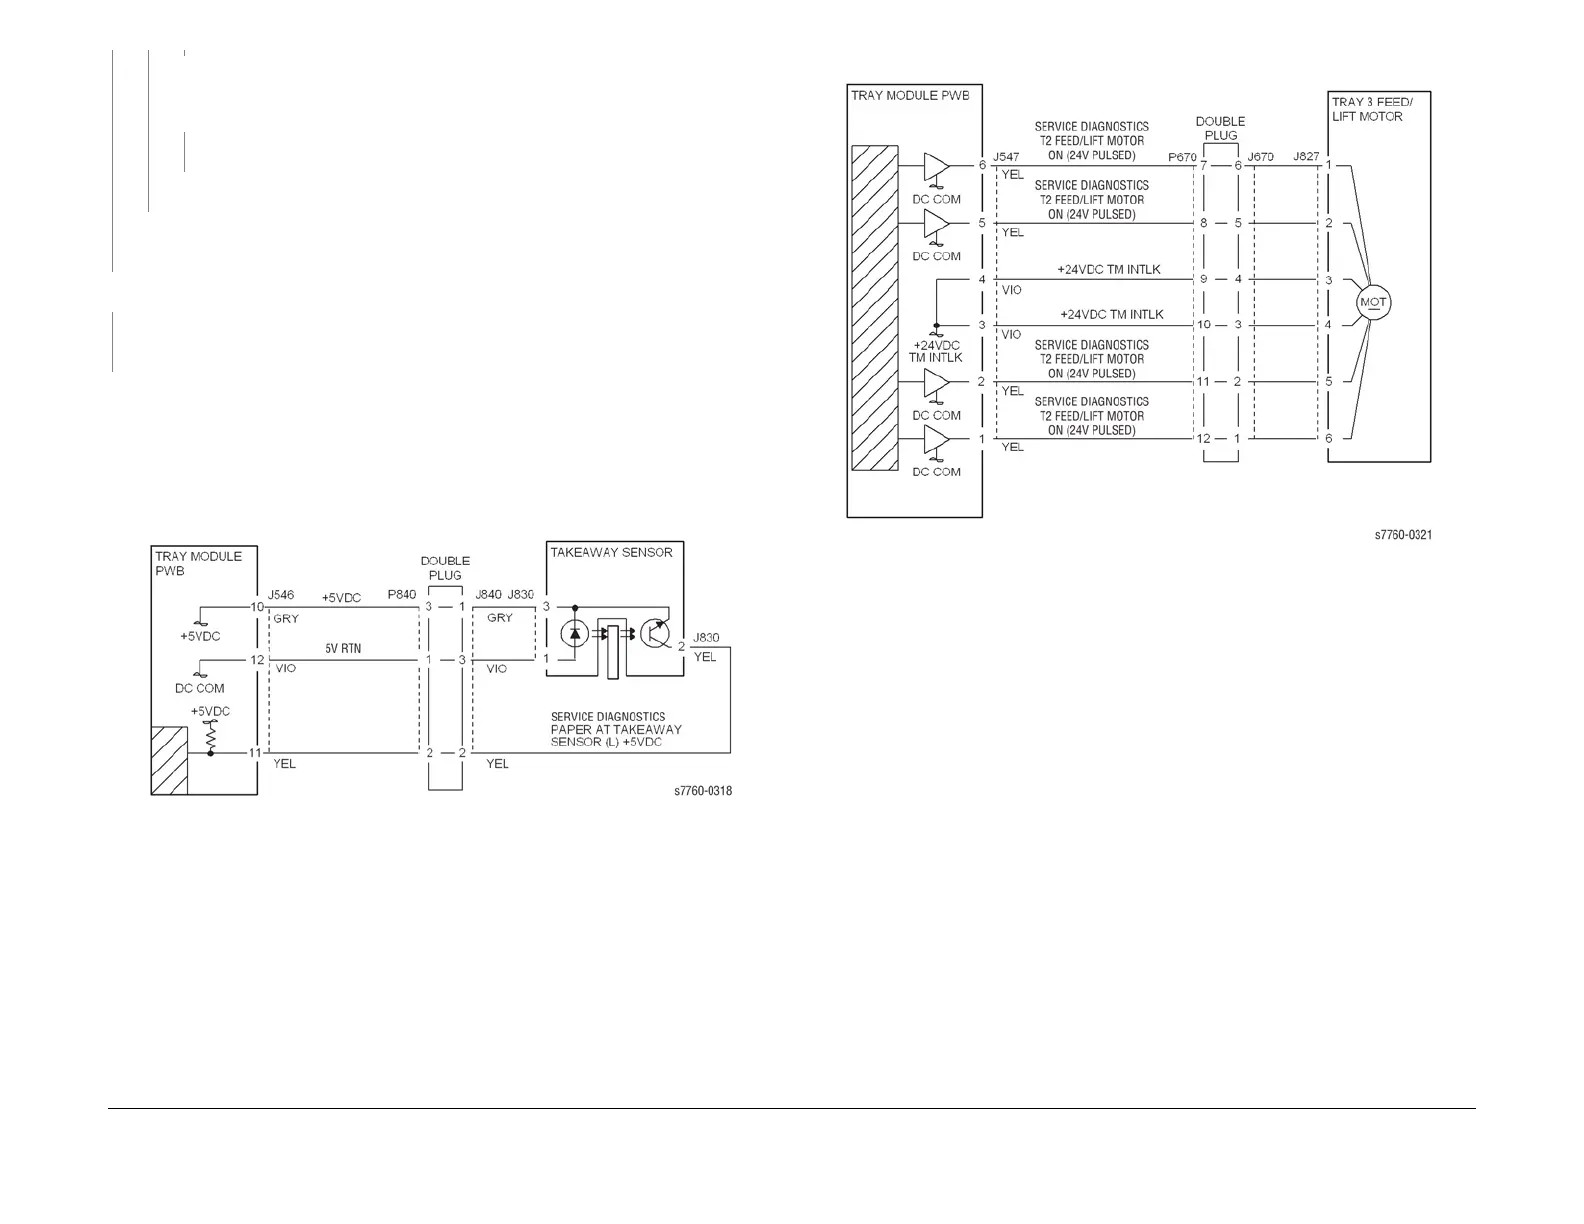
Check the circuit of the Tray 3 Feed/Lift Motor (Figure 2). Refer to the OF 99-9 RAP for
troubleshooting procedure.
• Check the Tray 3 Feed / Lift Motor and its associated gears (PL 2.4) for damage and mis-
alignment.
• Ensure that the Tray 3 Chute (PL 16.6) is properly seated and not damaged.
• Ensure that the connectors shown in the circuit diagrams (Figure 1, Figure 2, Figure 3)
are securely connected and that the wires are not damaged.
• If these checks are OK, replace the Tray Module PWB (PL 16.15 - TTM or PL 15.9 - 3TM).
Figure 1 007-110 Takeaway Sensor
Figure 2 007-110 Tray 3 Feed/Lift Motor
A B C





 To Next Page