January 2010
4-60
Phaser 7760 Color Laser Printer
REP 9.27
Revised
Repairs and Adjustments
REP 9.27 Accumulator Belt Mounting Frame
Parts List on PL 5.6
Removal
1. Open the Front Cover.
2. Remove the Fuser Cover (REP 14.8).
3. Remove the Waste Toner Cartridge.
4. Remove the Waste Toner Cartridge Cover (REP 9.3).
5. Remove the Inner Cover (REP 14.10).
6. Release and move the IBT Cam Lever down.
7. Remove the Imaging Units.
8. Remove the Dispense Cover (Imaging Unit Plate Cover) (REP 9.6).
9. Remove the IBT Steering Drive Assembly (REP 9.12).
10. Remove the Agitator Motor Assembly (REP 9.13).
11. Remove the MOB Sensor Assembly (REP 9.14).
12. Remove the Right Cover (REP 14.3).
13. Remove the IBT Belt Assembly (Accumulator Belt) (REP 9.15).
14. Remove the IBT Cam Lever (REP 9.18).
15. Remove the Rear Cover (REP 14.2).
16. Remove the Rear Left Middle Cover (REP 14.4).
17. Remove Tray 1 (MPT) (REP 7.1).
18. Remove the Left Cover Assembly (Left-Hand Door A) (REP 8.1).
19. Remove the Fuser.
20. Remove the Registration Transport Assembly (REP 8.6).
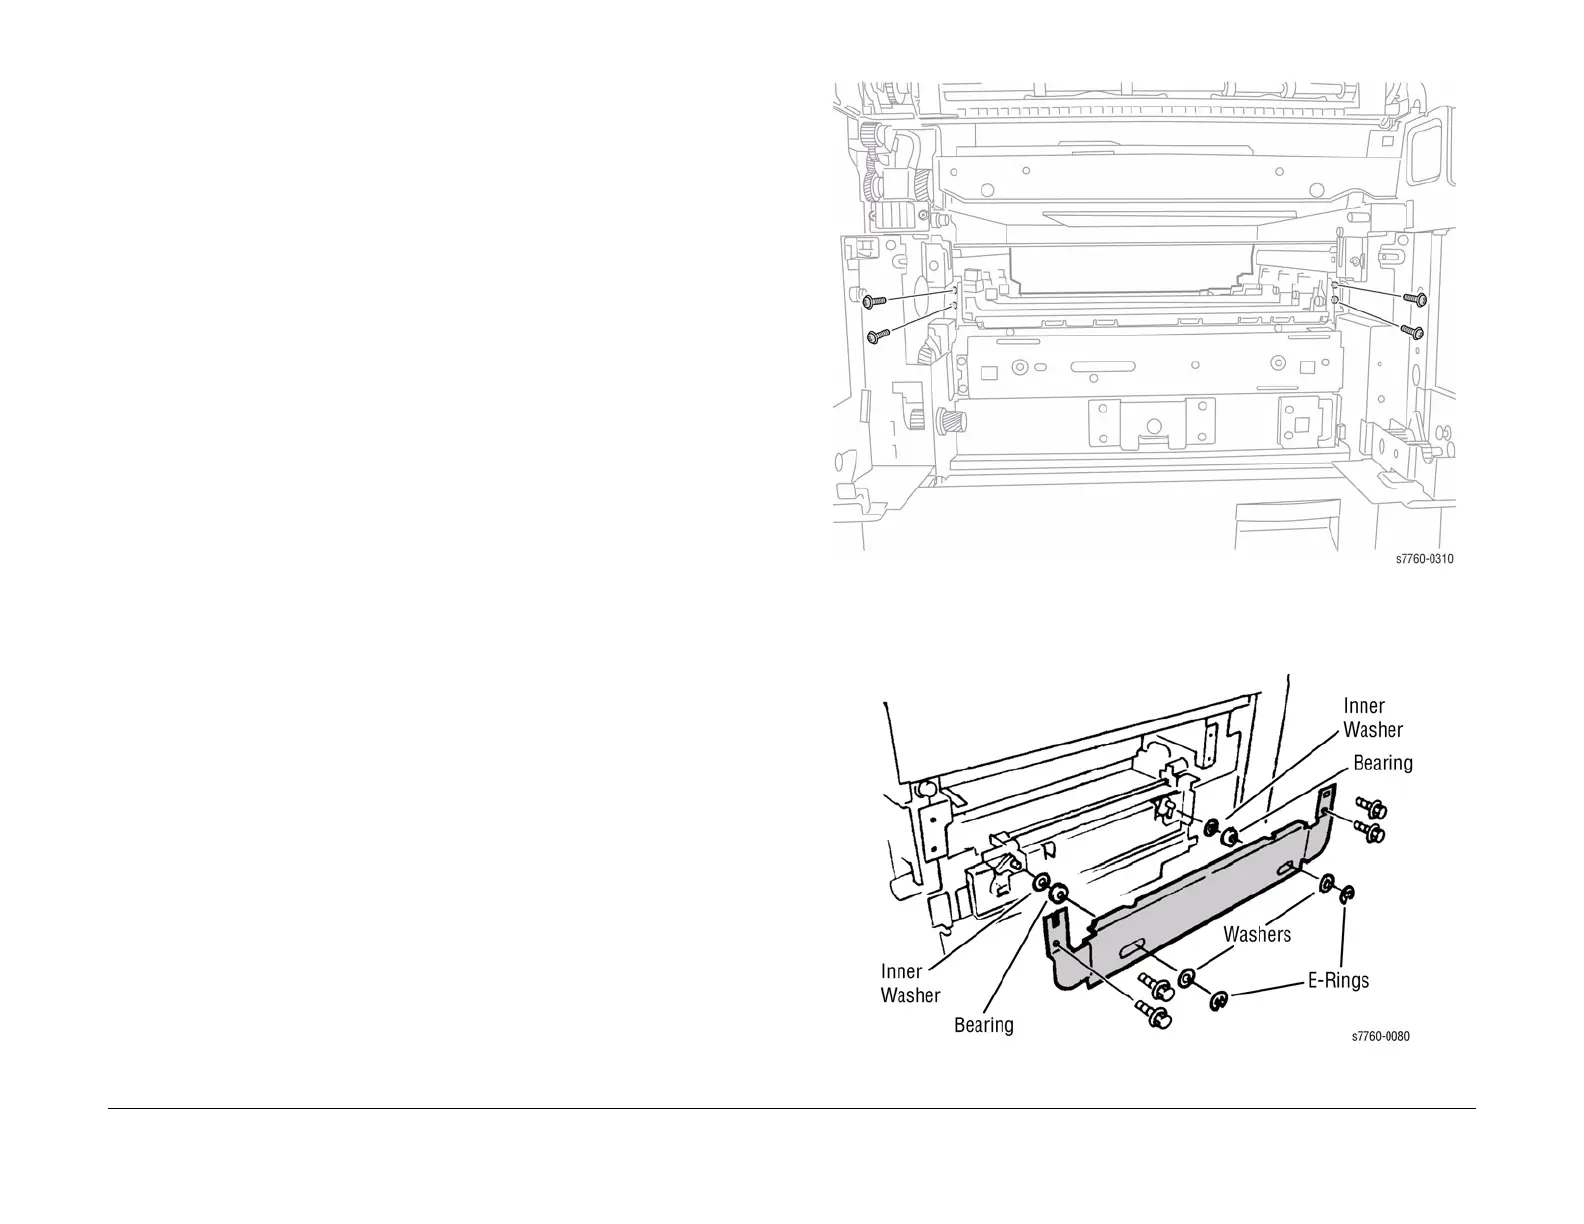
21. Removing the Accumulator Belt Mounting Frame
a. Remove the mounting screws from the Main Drive Assembly and push it 1/4 inch to
the rear of the Printer.
b. Remove the 4 black screws securing the Accumulator Belt Frame to the Left Lift Jack
Assembly.
Figure 1 Mounting screws for Accumulator Belt Frame on the Left Lift Jack Assembly
c. Remove the E-Clips and washers from the right-hand Lift Jack Roller Guides.
Figure 2 E-Clips and Washers on right-hand Lift Jack Assembly