January 2010
4-81
Phaser 7760 Color Laser Printer
REP 12.61, REP 12.62
Repairs and Adjustments
Revised
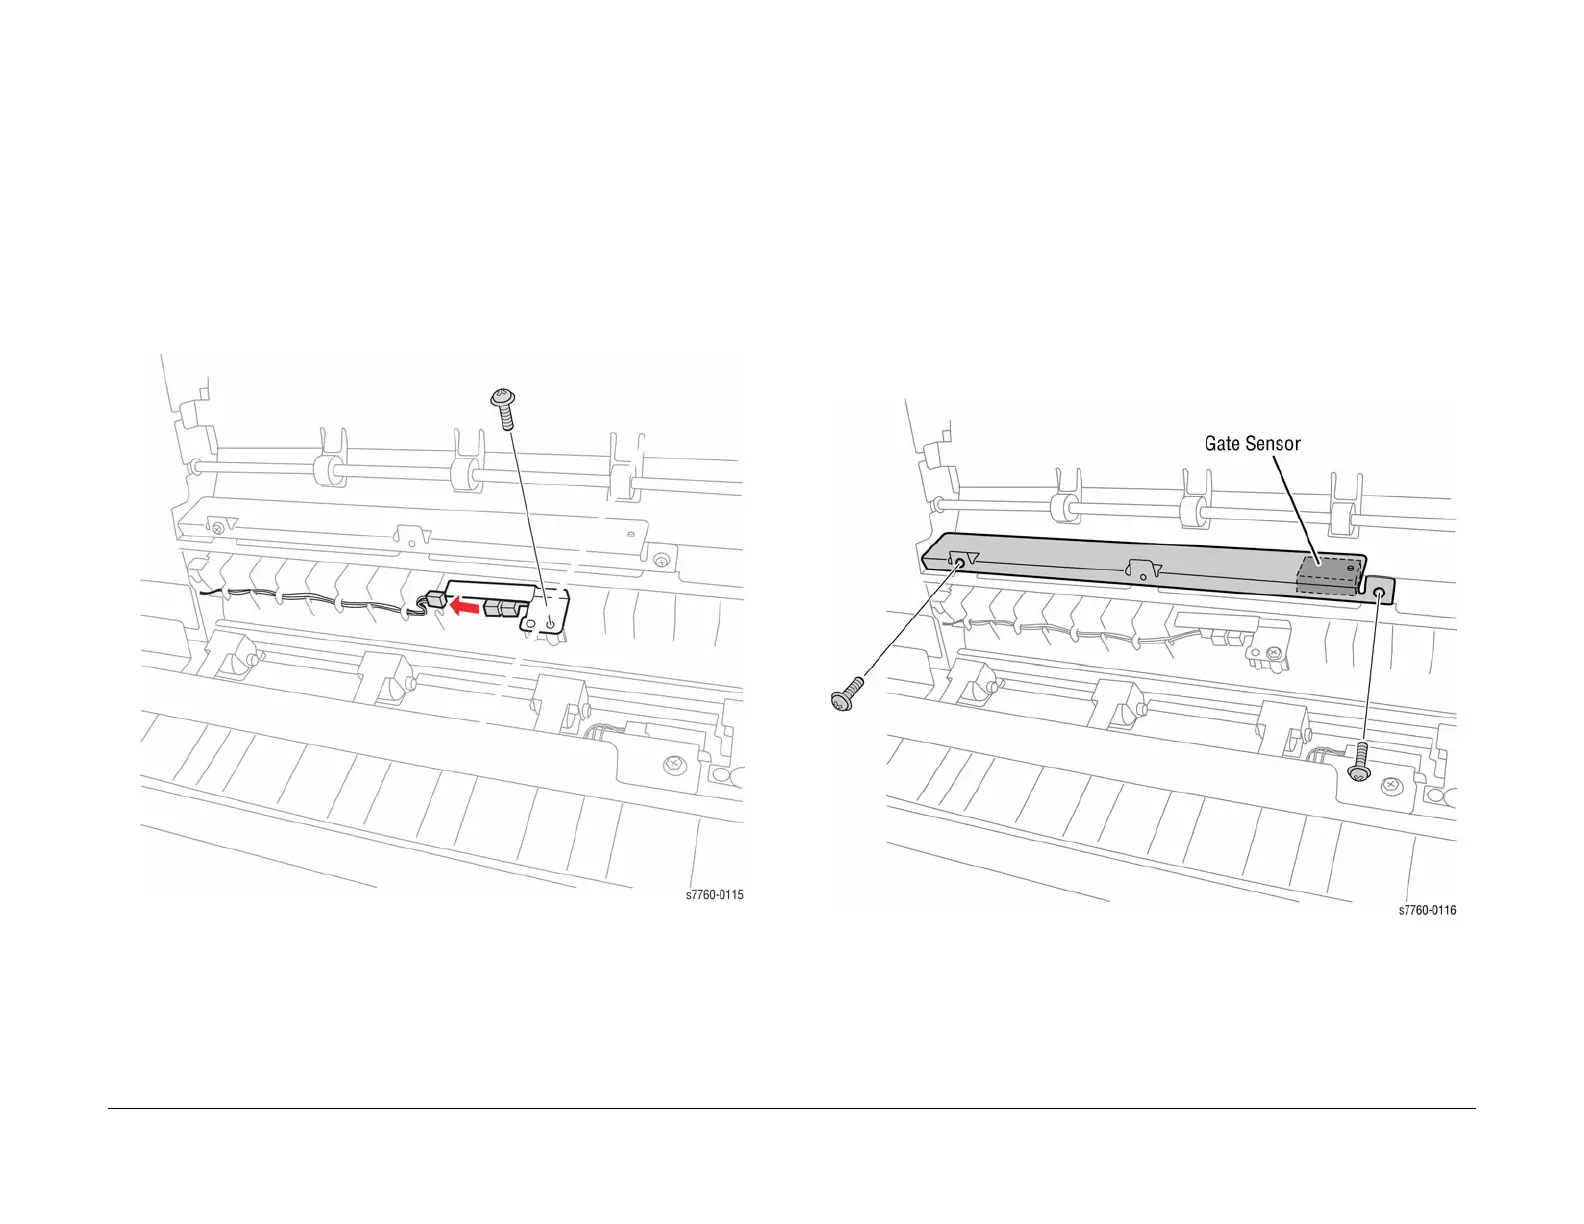
REP 12.61 Finisher Buffer Path Sensor
Parts List on PL 21.10
Removal
1. Remove the Finisher from the Printer (REP 12.50).
2. Remove the Punch Assembly (REP 12.52).
3. Remove the Left Top Cover (REP 12.49).
4. Removing the Buffer Path Sensor (Figure 1).
NOTE: Ensure to use a stubby screwdriver in order to remove screws because of angle.
a. Disconnect the wiring harness connector.
b. Remove 1 screw and the Buffer Path Sensor.
Figure 1 Removing Buffer Path Sensor
REP 12.62 Finisher Gate Sensor
Parts List on PL 21.11
Removal
1. Remove the Finisher from the Printer (REP 12.50).
2. Remove the Punch Frame Assembly (REP 12.52).
3. Remove the Left Top Cover (REP 12.49).
4. Removing the Gate Sensor (Figure 1).
NOTE: Use a stubby screwdriver to remove the screws because of angle of the screw
locations.
a. Remove the 2 screws securing the Bracket.
b. Disconnect the wiring harness connector and remove 1 screw. Remove the Gate
Sensor.
Figure 1 Removing the Gate Sensor