January 2010
4-13
Phaser 7760 Color Laser Printer
REP 4.1
Repairs and Adjustments
Revised
REP 4.1 Main Drive Motor Assembly
Parts List on PL 1.1
Removal
1. Remove the Fuser Module. Remove Tray 1 (MPT) (REP 7.1).
2. Remove the 24 VDC LVPS Chassis (REP 1.9).
3. Remove the HBTR1 HVPS (Developer HVPS) (REP 1.10).
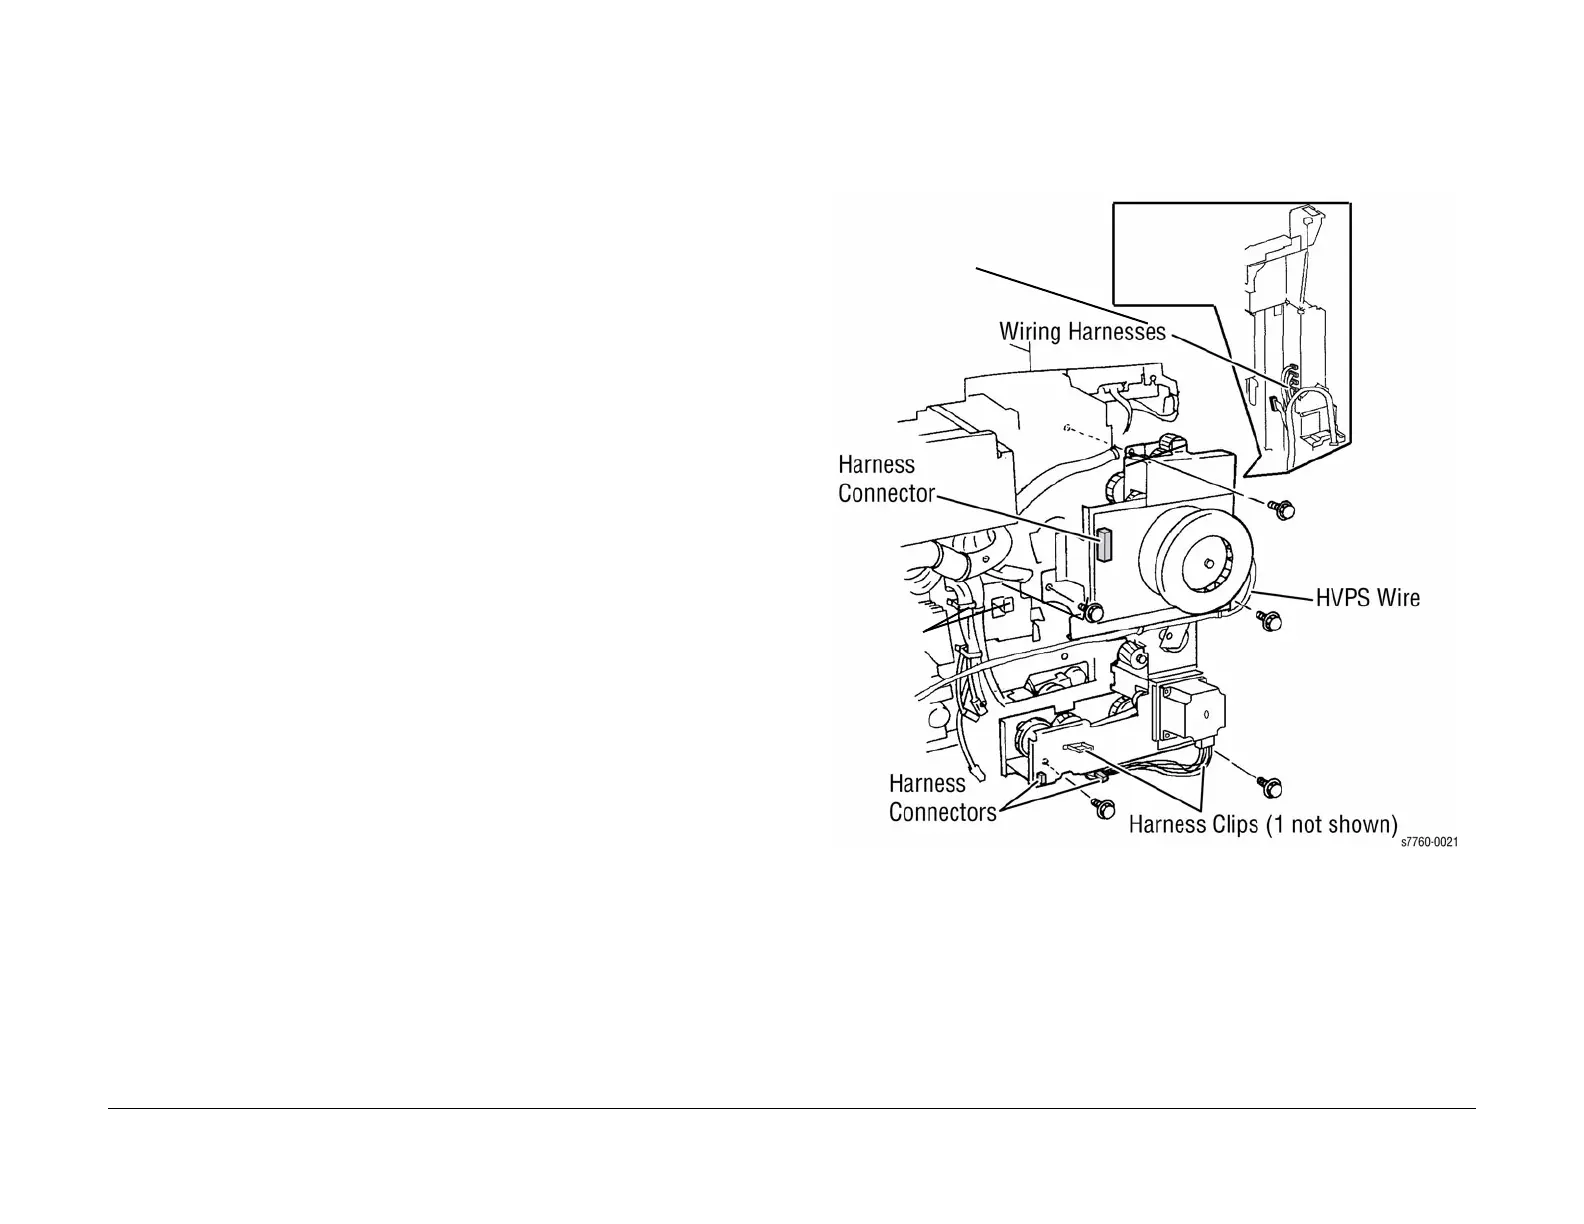
4. Removing the Main Drive Motor Assembly (Figure 1).
a. Disconnect the 8 harness connectors and release them from the Retainers.
b. Remove the 3 screws and lift the Assembly from the Printer.
c. Ensure to move the wiring harnesses out of the way. Disconnect the wiring har-
nesses from the Main Drive Motor Assembly.
d. Disconnect the 3 wiring harnesses from the right side of the Printer Chassis. Open
the Retainers to release the wires.
e. Disconnect the small wiring harness near the bottom of the Main Drive Assembly.
f. Unplug the Retainer.
g. Disconnect the High Voltage Power Supply wire and release it from the Retainers.
h. Remove the AC Assembly Bracket.
CAUTION
There are 5 black screws that hold the Main Drive Assembly to the machine. DO NOT
REMOVE these screws. (Figure 2)
i. Remove the 5 screws and lift the Main Drive Motor Assembly up and out of the
Printer.
Figure 1 Removing Main Drive Motor Assembly