January 2010
4-105
Phaser 7760 Color Laser Printer
ADJ 9.12
Repairs and Adjustments
Revised
ADJ 9.12 RegiCon #2 In/Out Skew Adjustment
Purpose
This test makes magnification adjustments for registration. Magnification is the length of the
scan line for the four colors, so that each scan line for each color is the same length.
The data output can indicate PASSED, or READJUST (PASSED), or FAILED. If the result is
READJUST, the indicated adjustment values for the skew adjustment should be done. It should
not be necessary to rerun the test after making this adjustment.
Procedure
1. Enter the hidden Service Menu: Printer Menu > Troubleshooting > Service Tools >
Printer Status Page > hold the Up and Down buttons simultaneously > RegiCon Setup
Cycle > OK.
NOTE: The first time any RegiCon test is requested, the pages used to perform the test
must be created, so there is a short delay. During this time the Control Panel displays Pro-
cessing Data - Please Wait.
2. Select Do #2: In/Out Skew Setup and press OK. The Control Panel displays: Testing -
Please Wait.
3. Wait until the test results are displayed as follows:
In/Out Skew Setup
Passed Readjust
Min A Blocks: 24
Min B Blocks: 0
Yellow 6 Clicks CCW
Magenta 4 Clicks CW
Cyan 12 Clicks CCW
Black 27 Clicks CCW
NOTE: Only 5 lines will be displayed at a time under the Information header. Use the
arrow buttons to scroll down or up as required to see the rest of the data.
NOTE: If the block counts are not the same number as presented here, the printer has a
print-quality problem. Refer to Streaks in Direction of Paper Travel procedure (Section 3)
to resolve the problems before proceeding further with RegiCon.
4. If an adjustment is needed, adjust by the amounts displayed on the Control Panel.
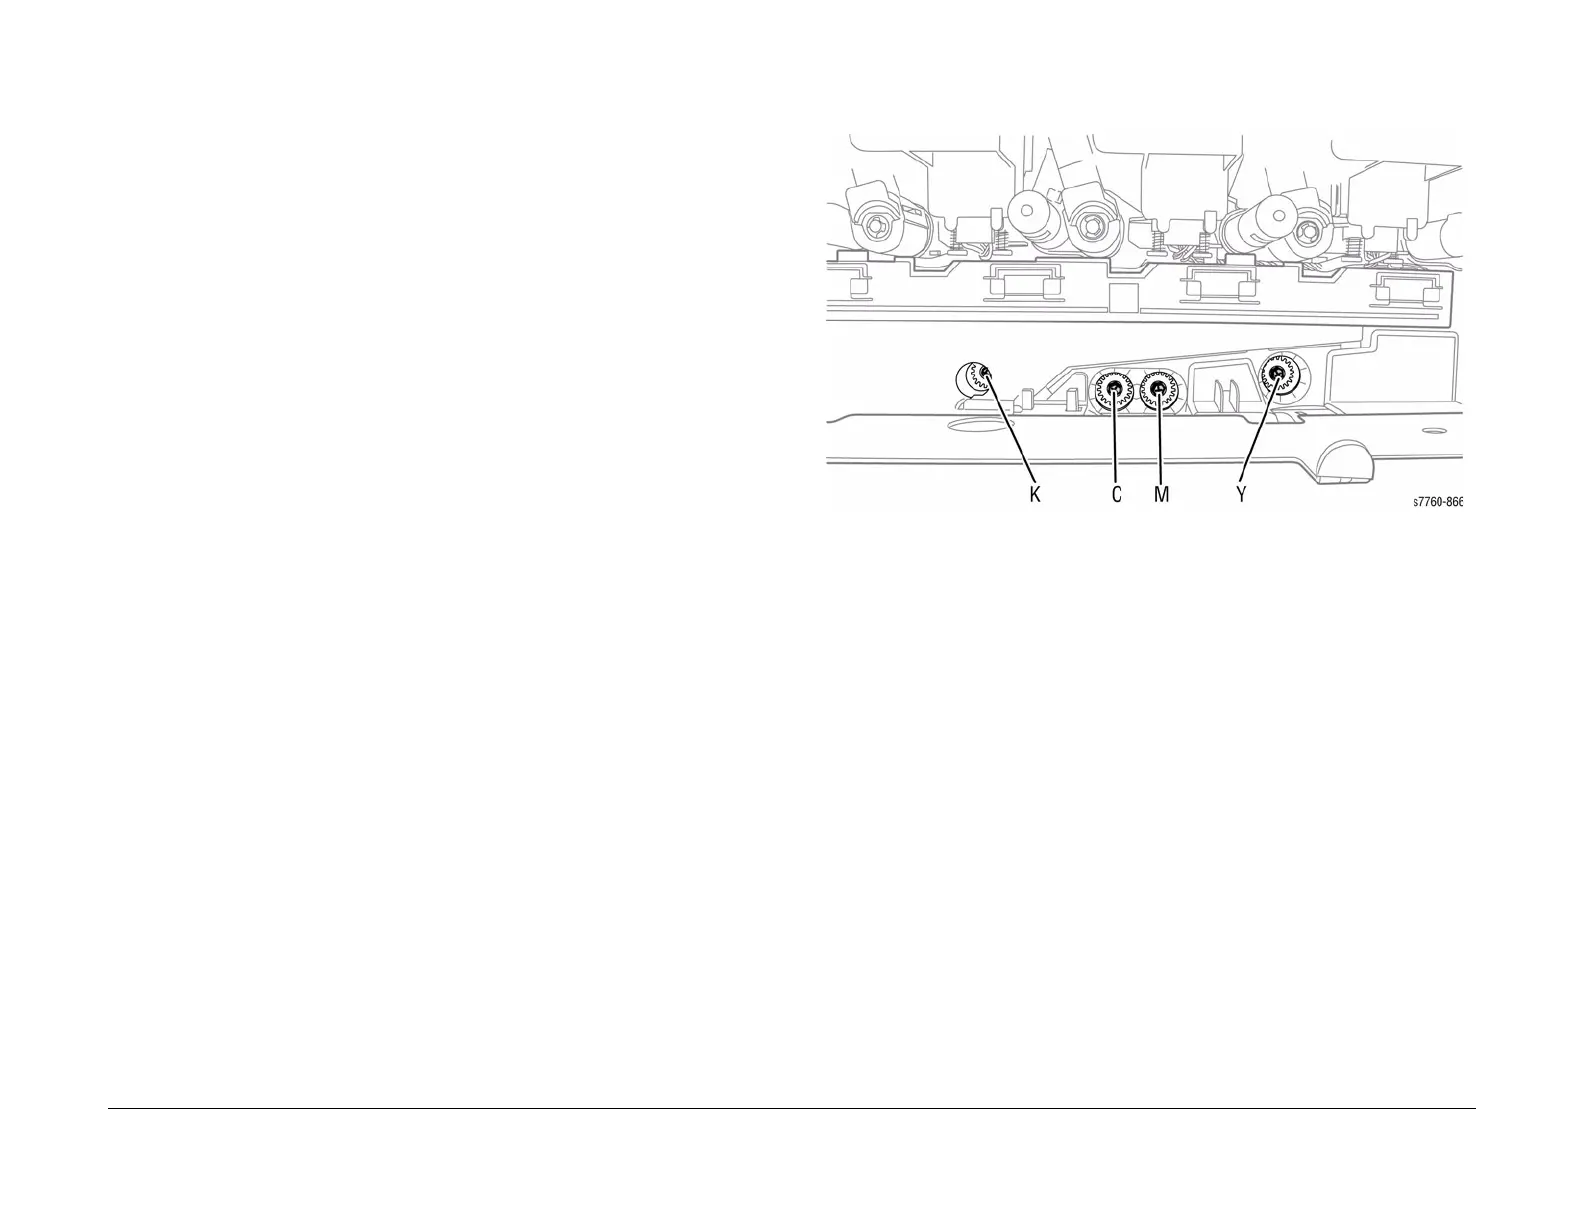
NOTE: Adjustment screws are located behind the Waste Cartridge, which must be
removed for access. From left to right, the adjustment screws are: K, C, M, and Y.
Figure 1 Adjustment Screws
5. After 2 minutes, the test selection menu will re-appear. To examine the test results after
this occurs, highlight the appropriate test and select Information Setup.
When RegiCon #1 or RegiCon #2 Fails
The horizontal alignment error is excessive and a manual adjustment is required before the
diagnostics test routines for fine skew can pass. Perform the Coarse RegiCon Ini procedure,
ADJ 9.8 (Section 4).