January 2010
3-9
Phaser 7760 Color Laser Printer
Initial Actions Before Troubleshooting
Image Quality
Revised
Initial Actions Before Troubleshooting
1. Print a Paper Tips Page (Printer Menu > Information > Information Pages > Paper
Tips Page) to verify the media being used is supported by the printer and the tray being
used.
2. Verify the media settings are correct in both the printer driver software and at the printer’s
Control Panel.
3. Check the Color Correction and Print Mode settings in the printer driver.
4. Cycle power to the printer, this will run an Auto Density Control cycle.
5. Run the test prints and compare the results to the customer problems.
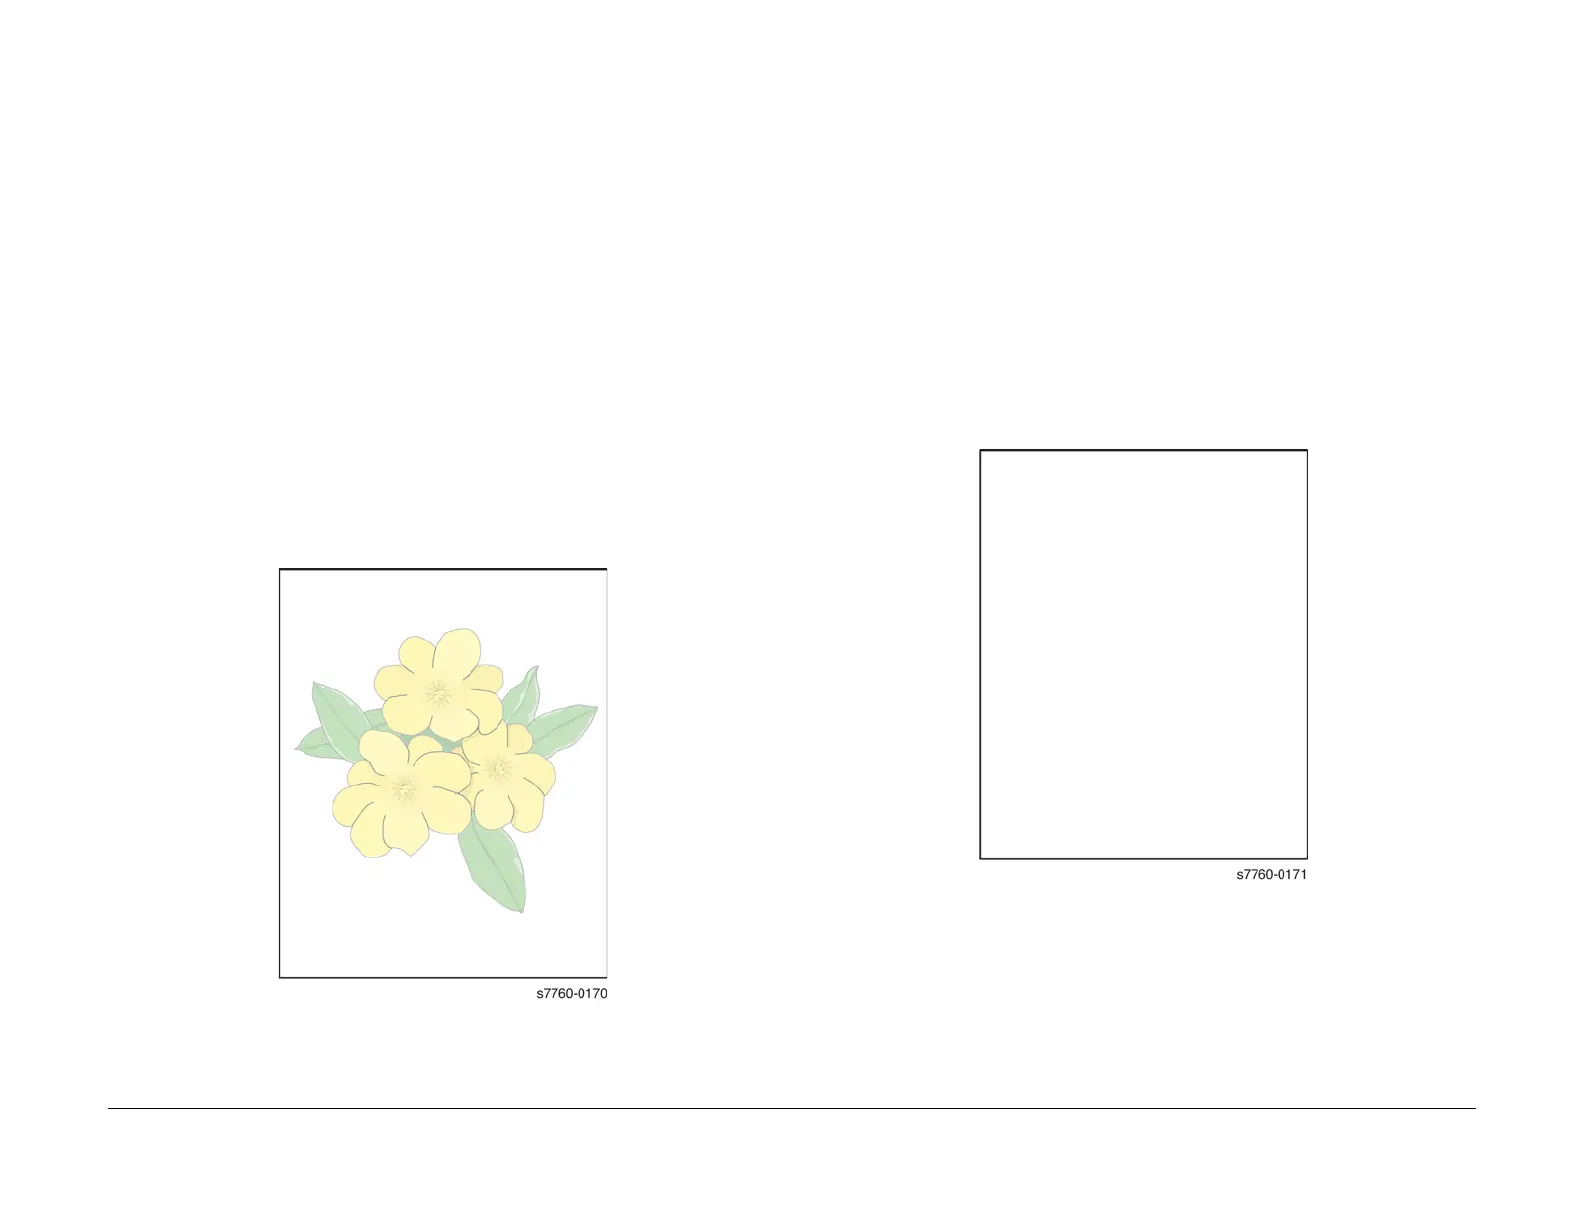
Light or Undertone Prints in All Colors
The overall image density is too light in all colors.
1. Verify the Transfer Roller has not reached its end-of-life.
2. Perform Calibrate for Paper procedure (ADJ 9.16) (Printer Menu > Troubleshooting >
Print Quality Problems > Calibrate for Paper > Calibrate for Paper Pages). The printer
prints 9 pages of the Calibrate for Paper process. Follow the instructions on the Calibrate
for Paper to perform the procedure.
3. Check the Accumulator Belt Assembly for mis-alignment.
4. Replace the Transfer Roller.
5. Replace the High-Voltage Power Supply.
Figure 1 Light or Undertone Prints in All Colors
Blank Prints
The entire image area is blank.
1. Perform Solid Fill Pages procedure (Printer Menu > Troubleshooting > Print Quality
Problems > Solid Fill Pages). The printer prints 6 pages of Solid Fill Pages.
2. Open the Door in the middle of the print job.
• Is there toner on the Accumulator Belt?
3. Enter Service Diagnostics Menu: Printer Menu > Troubleshooting > Service Tools >
Printer Status Page > hold the Up and Down buttons simultaneously > Run Service
Diagnostics > OK. Test the Shutter Motor. Does the Laser Shutter Motor work properly?
a. Remove an Imaging Unit and check to see if the Shutter opens and closes freely.
4. Inspect the wiring harness for loose or disconnected wiring connectors. Check the wiring
connectors on the Engine Control Board.
5. Perform the Engine Test Prints procedure.
• If the test prints are free from defects, replace the Image Processor Board.
• If the test prints show defects, replace the PWBA MCU (Engine Control Board).
Figure 2 Blank Prints