January 2010
4-80
Phaser 7760 Color Laser Printer
REP 12.60
Revised
Repairs and Adjustments
REP 12.60 Finisher Stacker Drive Belt
Parts List on PL 21.4
Removal
1. Remove the Front Door (REP 12.40).
2. Remove the Rear Upper Cover (REP 12.41).
3. Remove the Rear Lower Cover (REP 12.42).
4. Perform REP 12.58 Stacker Tray (position the Stacker Tray in the lowest position).
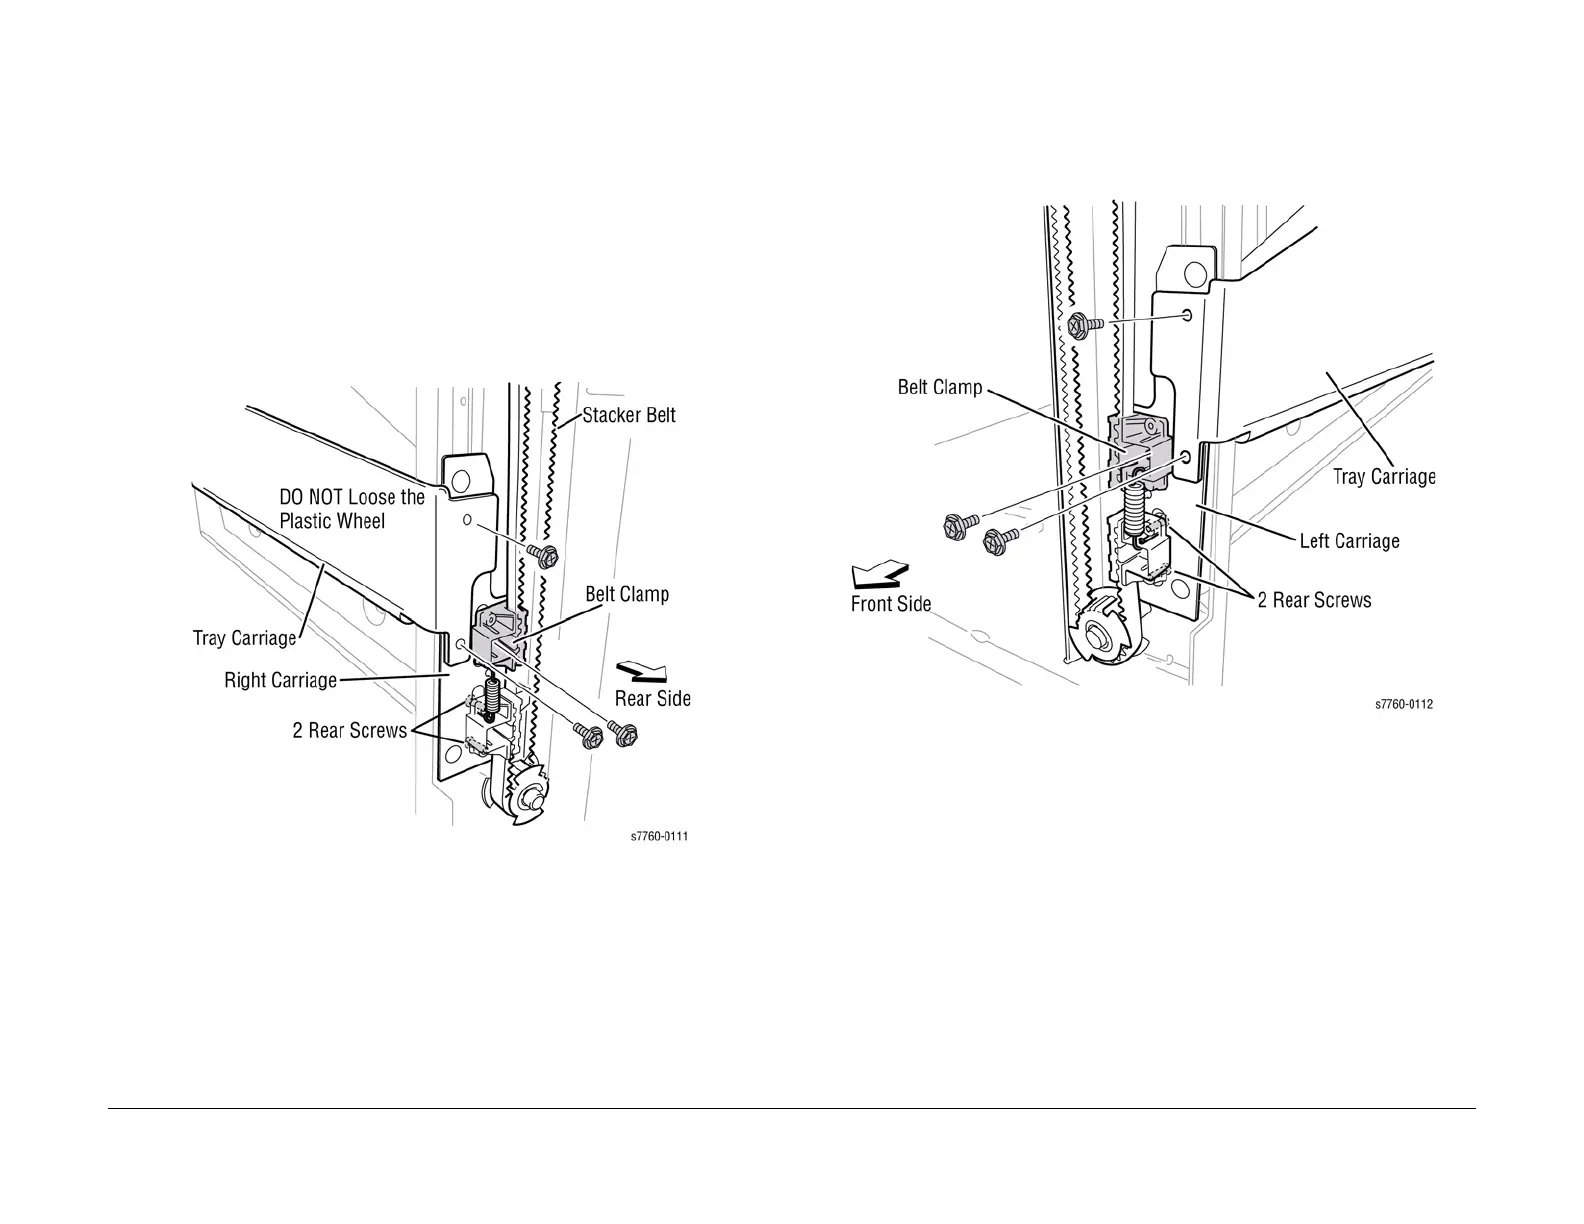
5. Removing the rear Stacker Drive Belt (Figure 1).
a. Remove the 2 screws securing the Tray Carriage.
b. Loosen the 3 screws (2 from rear on lower Clamp, 1 from front) securing the Belt
Clamp.
c. Release the 2 Tabs on the Belt Clamps and remove the rear Stacker Drive Belt.
Figure 1 Removing Rear Stacker Belt
6. Removing the front Stacker Drive Belt (Figure 2).
a. Remove the 2 screws securing the Tray Carriage.
b. Loosen the 3 screws (2 from rear on lower Clamp, 1 from front) securing the Belt
Clamp.
c. Release the 2 Tabs on the Belt Clamps and remove the front Stacker Drive Belt.
Figure 2 Removing Front Stacker Belt
Replacement
NOTE: Ensure the Belt Clamps are at the top position in order to access the Tray Carriage
screws. Verify the Front and Rear alignments.
1. Reinstall the components in the reverse order of the removal procedure. Refer to Figure 1
and Figure 2 for Stacker Drive Belt positioning in the Belt Clamps.