January 2010
4-47
Phaser 7760 Color Laser Printer
REP 9.14, REP 9.15
Repairs and Adjustments
Revised
REP 9.14 MOB Sensor Assembly
Parts List on PL 1.3
Removal
1. Open the Front Cover.
2. Remove the Waste Toner Cartridge.
3. Remove the Fuser Cover (REP 14.8).
4. Release and move the IBT Cam Lever half way down.
5. Remove the Dispenser Cover (REP 9.6).
6. Remove Agitator Motor Assembly (REP 9.13).
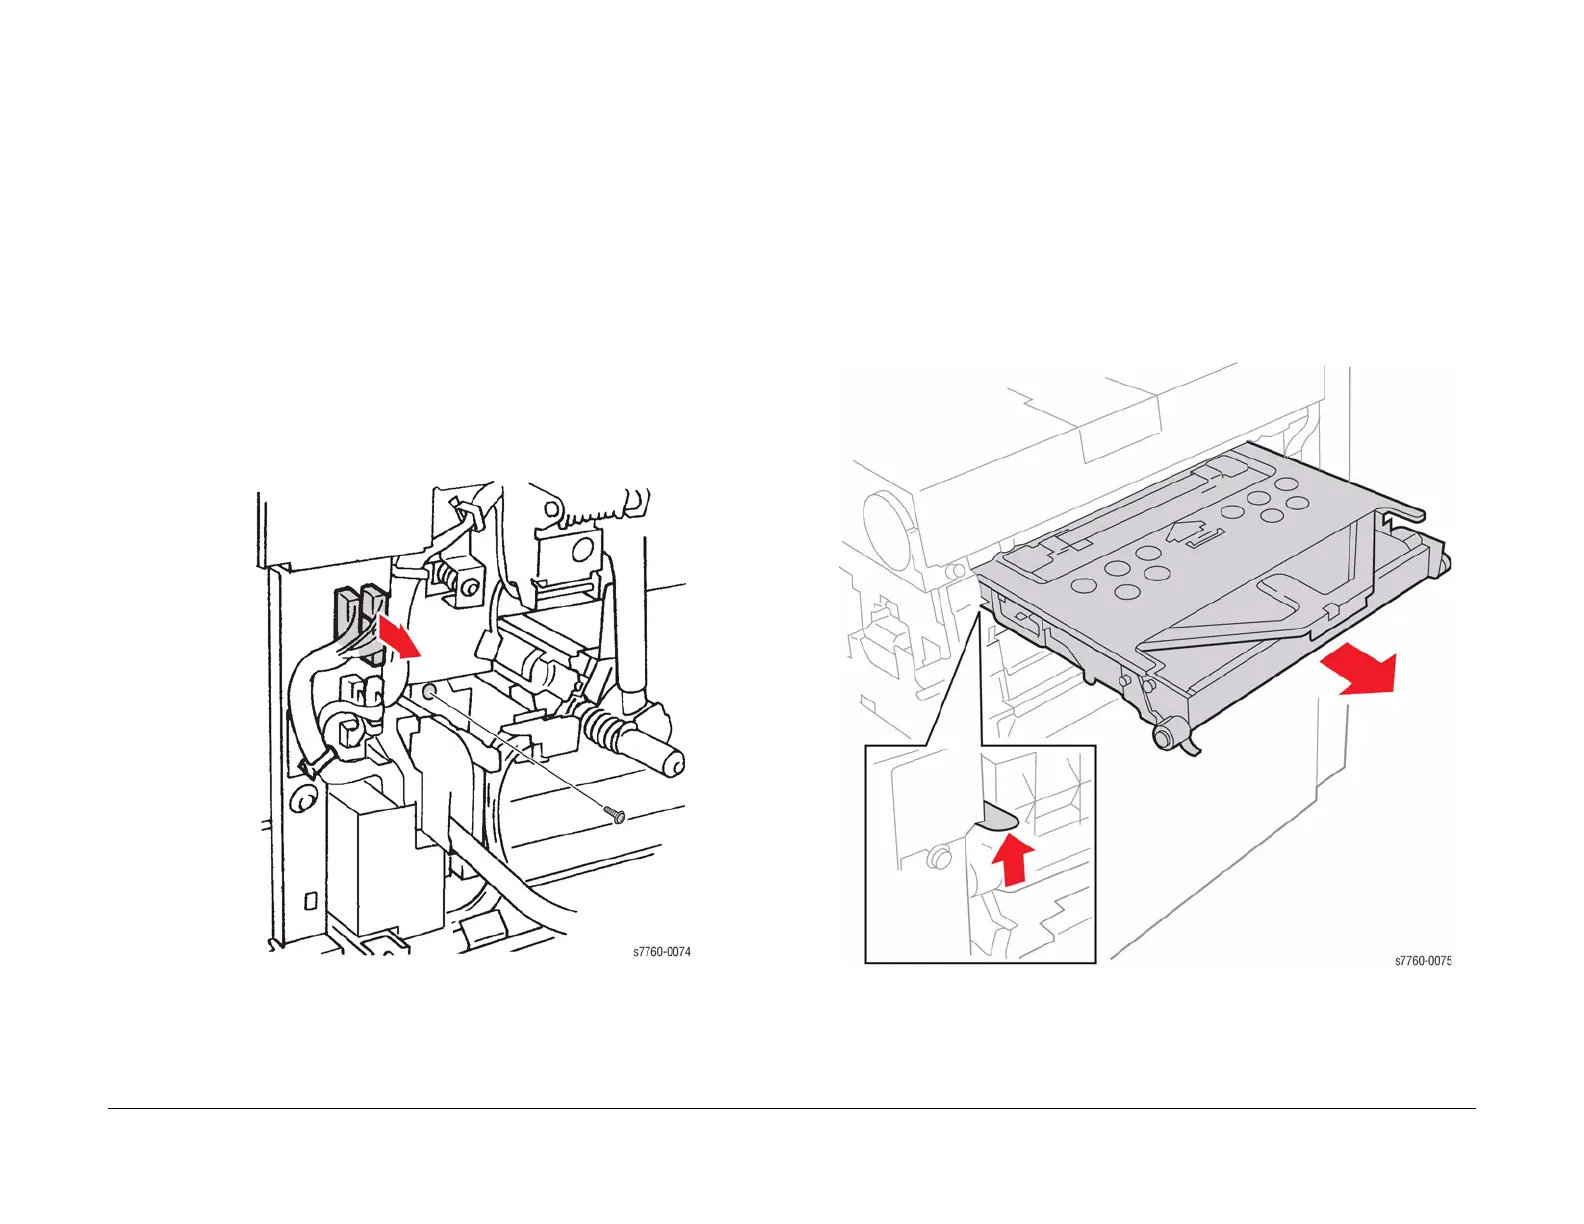
7. Removing the MOB Sensor Assembly (Figure 1).
a. Remove the Inner Cover (REP 14.10).
b. Remove the Full Toner Sensor (REP 9.5).
c. Disconnect the purple harnesses.
d. Remove the wiring harnesses from 3 clips.
e. Ensure to have the Locking Lever down. Remove 1 black screw and remove the
MOB Sensor Assembly.
Figure 1 Removing MOB Sensor Assembly
REP 9.15 IBT Belt Assembly (Accumulator Belt Assembly)
Parts List on PL 5.2
Removal
CAUTION
Ensure to carefully remove the IBT Belt Assembly to prevent damaging the Waste Auger Gate.
1. Open the Front Cover.
2. Release and move the IBT Cam Lever down.
3. Open the Right Side Door.
4. Removing the IBT Belt Assembly (Figure 1).
a. Lift the Accumulator Belt Locking Level and pull the Assembly out to remove.
b. Use Handle to transport IBT Unit. Protect the IBT Belt Assembly from direct light.
Figure 1 Removing IBT Belt Assembly