January 2010
4-37
Phaser 7760 Color Laser Printer
REP 9.2
Repairs and Adjustments
Revised
REP 9.2 ROS Shutter Motor
Parts List on PL 8.1
Removal
1. Remove Tray 1 (MPT) (REP 7.1).
2. Remove the Left Cover Assembly (REP 8.1).
3. Remove the Registration Transport Assembly (REP 8.6).
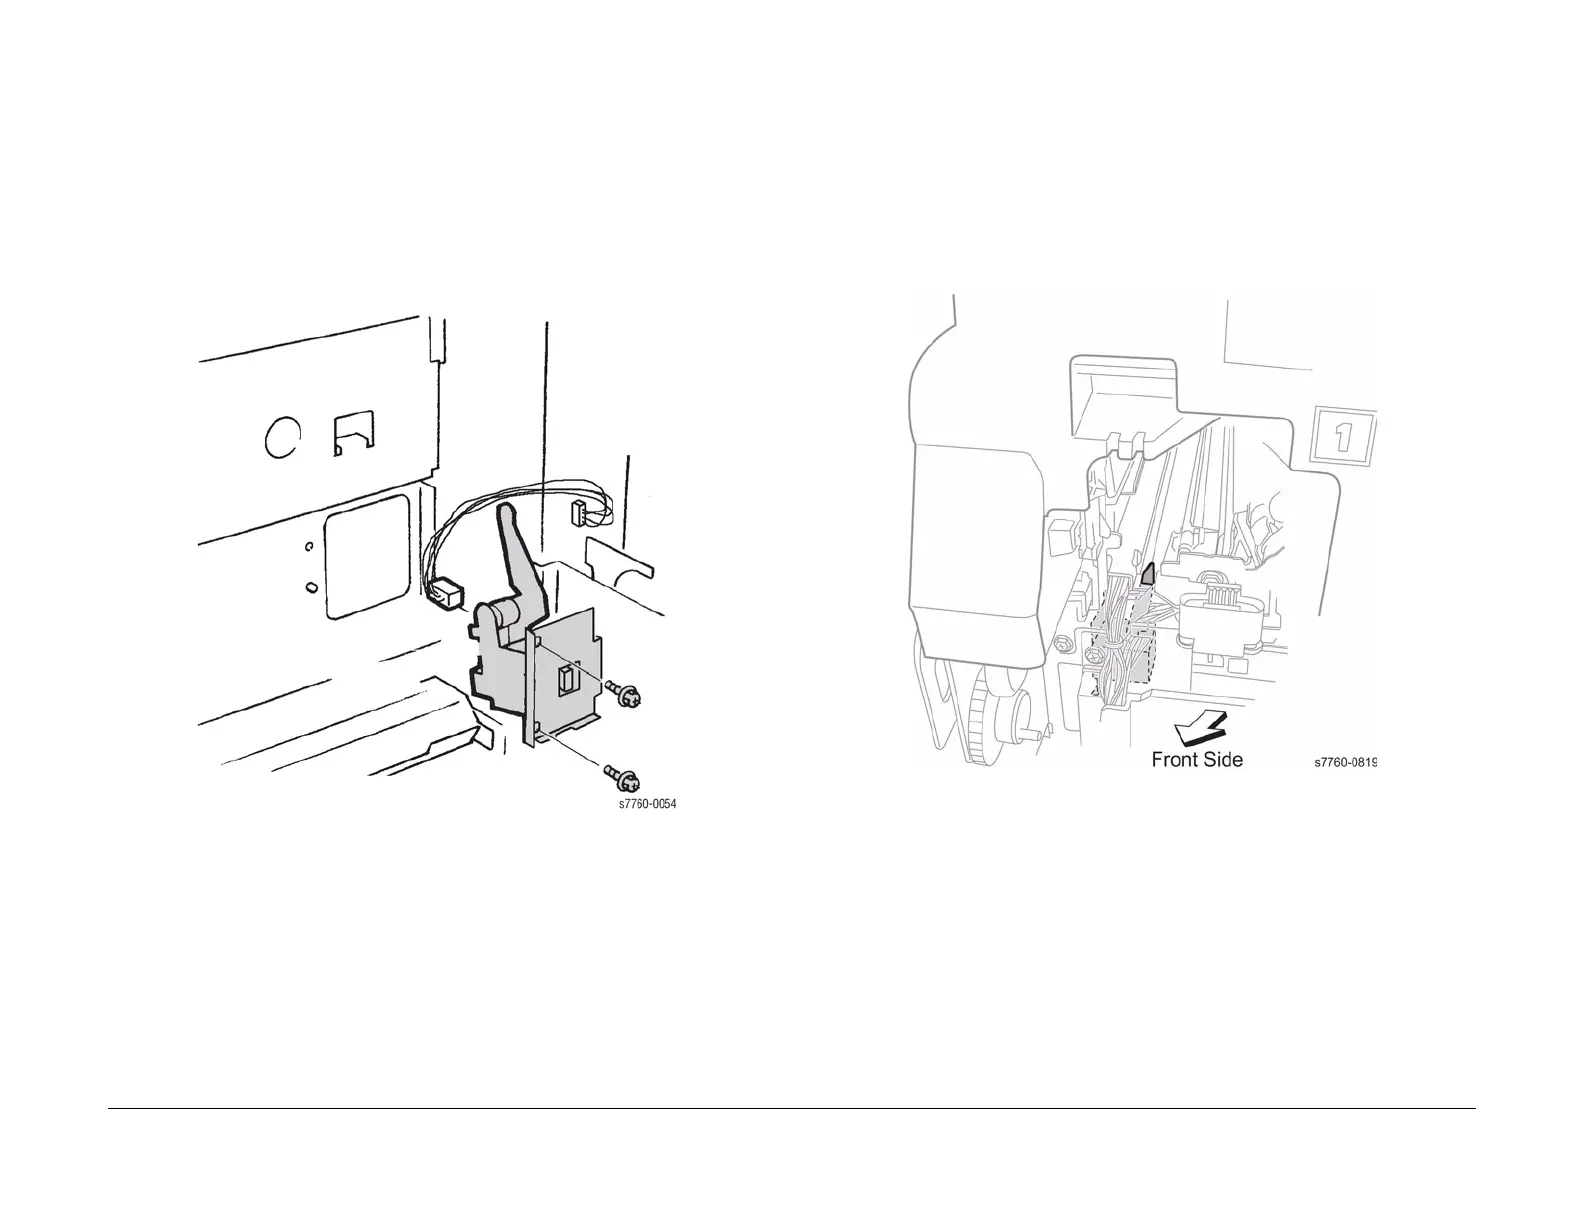
4. Removing the Shutter Actuator (Figure 1).
a. Disconnect the wiring harness P/J from the Frame Connector.
b. Remove the 2 screws and remove the ROS Shutter Motor.
Figure 1 Removing Shutter Motor
Replacement
CAUTION
Verify that the Lever is correctly positioned in the slot on reassembly. Ensure the Shutter Motor
Assembly engages.
1. Remove the Waste Toner Cartridge.
2. Remove the Black Imaging Unit.
3. While installing the ROS Shutter Motor, verify that the Shutter Motor Assembly Level
engages the notch in the Shutter Plate (Figure 2).
4. Tighten the screw and reconnect the wiring harness (Figure 1).
Figure 2 Installing ROS Shutter Motor