January 2010
4-59
Phaser 7760 Color Laser Printer
REP 9.26
Repairs and Adjustments
Revised
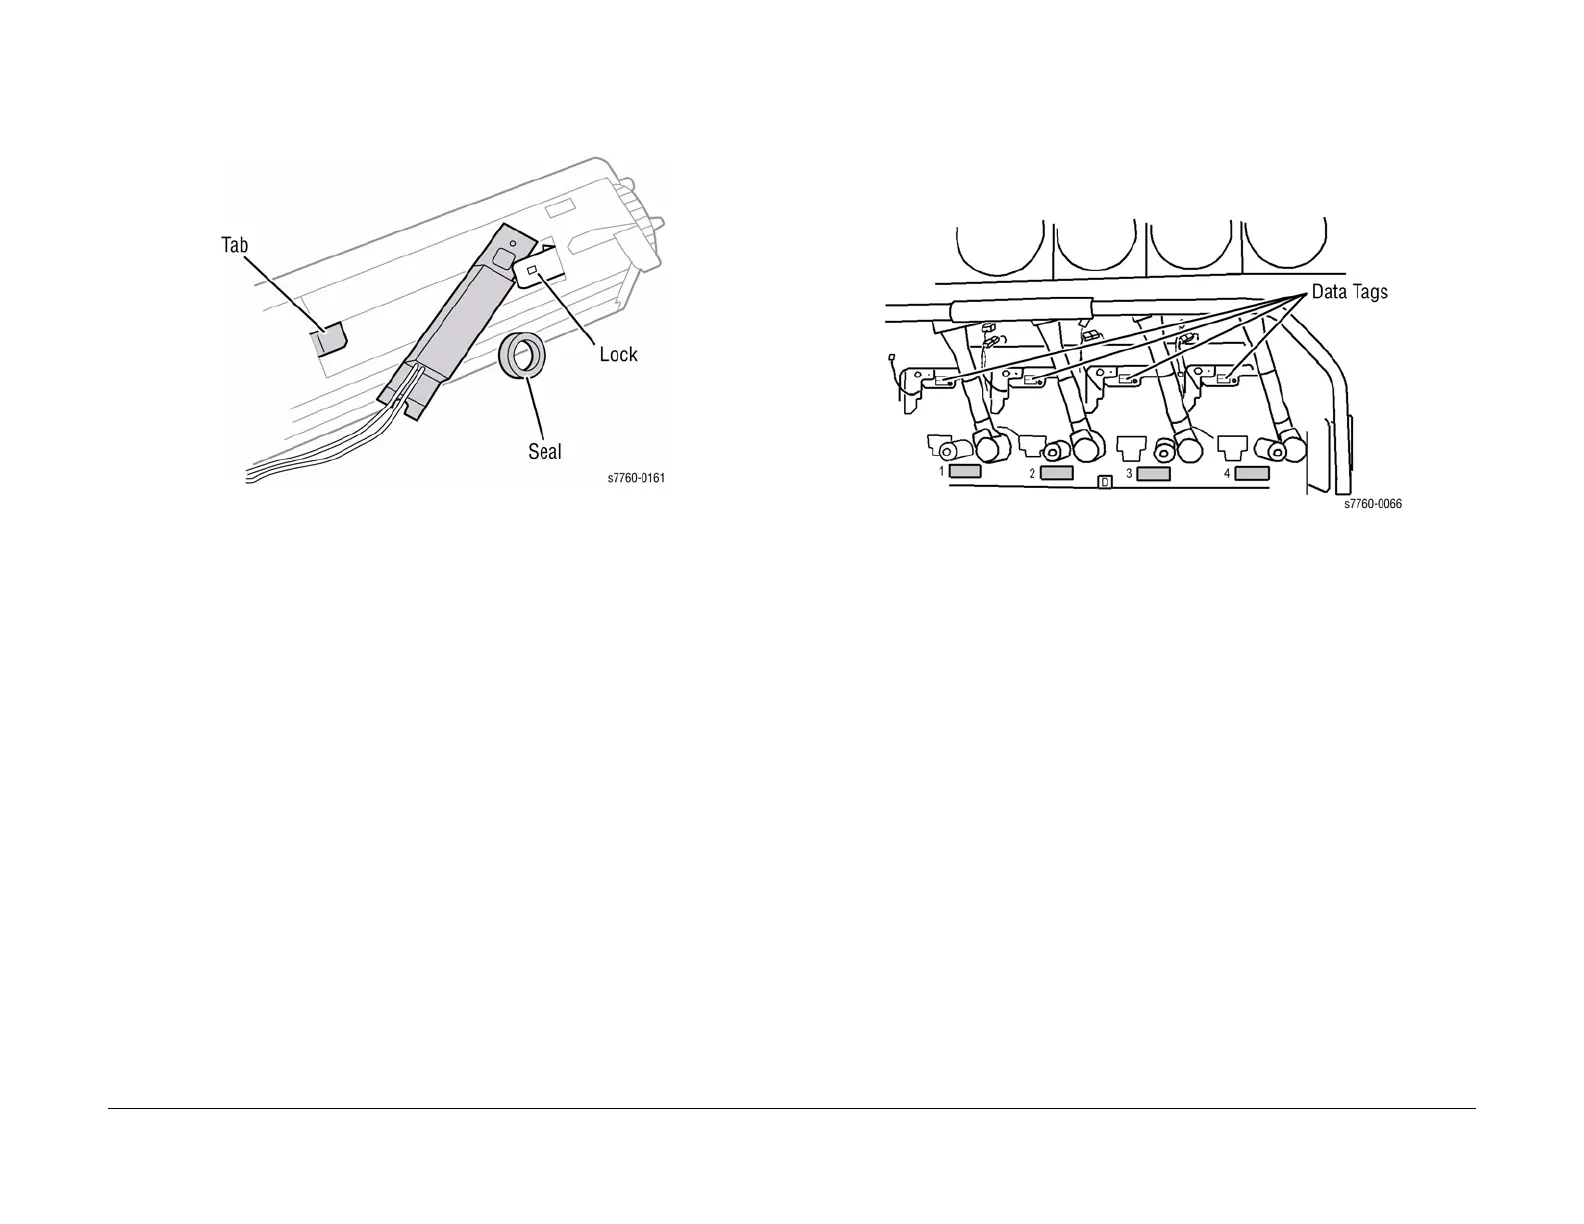
3. Removing the ATC Sensor (Figure 2).
a. Lift the Lock and move end away from the Tab.
b. Remove the Seal from the under the Sensor.
Figure 2 Removing ATC Sensor
Replacement
NOTE: Ensure to install the Seal (Figure 2) correctly and fully seated to prevent from leakage.
Remove the ATC Sensor Setup Data Tag from new sensor. On tag, highlight K, C, M, or Y as
required for color of developer housing. Raise the IBT Cam Lever and install Tag in position
shown (Figure 3).
Figure 3 Installing ATC Sensor Setup Data Tag
NOTE: Perform ATC Sensor Setup, (ADJ 9.2 - Section 4) using the Service Diagnostics Menu:
Printer Menu > Troubleshooting > Service Tools > Printer Status Page >hold the Up and
Down buttons simultaneously > Run Service Diagnostics > OK.