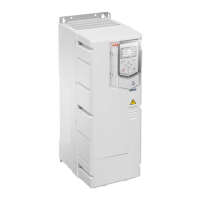
■ Installing the drive vertically, frames R6…R9
Select fasteners and their application to meet local requirements appropriate to wall
surface materials, drive weight and application.
1. Mark the hole locations for the six mounting holes using the mounting template
included in the package. Do not leave the mounting template under the drive.
The drive dimensions and hole locations are also shown in the drawings in chapter
Dimension drawings (page 309).
Note: You can use only two bolts instead of four to attach the lower part of the drive.
R9R8R7R6
inmminmminmminmm
28.371827.670124.562322.5571a
25.965825.965823.058320.9531b
13.634510.32639.72458.4213c
11.830011.830011.830011.8300d
7.92006.191556.11556.1155e
lbkglbkglbkglbkg
IP21,
UL Type 1
213.997152.269119.15493.542.4
Mechanical installation 69
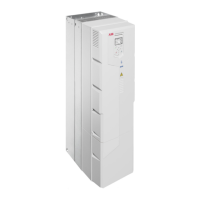
Installing the drive vertically, frame R5
1. Mark the hole locations using the mounting template included in the package. Do
not leave the mounting template under the drive. The drive dimensions and hole
locations are also shown in the drawings in chapter Dimension drawings on page
227.
2. Drill the mounting holes.
3. Insert fixing anchors or plugs into the holes. Start the two upper bolts and the two
lowest bolts into the anchors or plugs.
Drive the bolts long enough into the wall to make them carry the weight of the
drive.
c
b
1
R5 IP21 (UL Type 1)
R5 IP55 (UL Type 12)
mm in mm in
a 612 24.09 612 24.09
b 581 22.87 581 22.87
c 160 6.30 160 6.30
d > 200 7.9 200 7.9
e > 200 7.9 200 7.9
R5 IP21 (UL Type 1)
R5 IP55 (UL Type 12)
kg lb kg lb
28.3 62.4 28.6 63.1
×2
×2
×2
×2
×2
3
lbkglbkglbkglbkg
IP55,
UL Type 12
227.1103169.877123.55694.843
Mechanical installation 69
Installing the drive vertically, frame R5
1. Mark the hole locations using the mounting template included in the package. Do
not leave the mounting template under the drive. The drive dimensions and hole
locations are also shown in the drawings in chapter Dimension drawings on page
227.
2. Drill the mounting holes.
3. Insert fixing anchors or plugs into the holes. Start the two upper bolts and the two
lowest bolts into the anchors or plugs.
Drive the bolts long enough into the wall to make them carry the weight of the
drive.
c
b
1
R5 IP21 (UL Type 1)
R5 IP55 (UL Type 12)
mm in mm in
a 612 24.09 612 24.09
b 581 22.87 581 22.87
c 160 6.30 160 6.30
d > 200 7.9 200 7.9
e > 200 7.9 200 7.9
R5 IP21 (UL Type 1)
R5 IP55 (UL Type 12)
kg lb kg lb
28.3 62.4 28.6 63.1
×2
×2
×2
×2
×2
3
2. Drill the mounting holes.
3. Insert fixing anchors or plugs into the holes and start the bolts into the anchors or
plugs.
4. Position the drive onto the bolts on the wall. Lift the drive with a lifting device as it
is heavy.
5. Tighten the top two bolts in the wall securely.
82 Mechanical installation
 Loading...