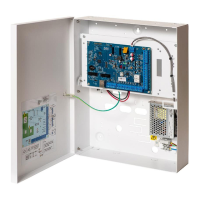
To wall mount the housing:
1. Open the cover and locate the initial fixing screw hole at the top of the housing.
2. Mark the position of this screw hole on the desired location on the wall and drill the initial screw
hole.
3. Screw the unit to the wall and mark the position of the bottom 2 screw hole positions with the unit
vertically aligned.
Back Tamper Requirements
A back tamper switch may be required by your local approval.
The back tamper switch is delivered with SPC panels in G3 housings or is available as an optional extra
with a mounting kit (SPCY130). EN50131 G3 panels are supplied with a back tamper kit as standard.
6.2.1 Mounting a Back Tamper Kit
The SPC back tamper kit provides SPC control panels and power supplies with the option of having back
tamper as well as front tamper.
The back tamper kit comprises the following parts:
l
Tamper switch
l
Leads for connecting the back tamper switch to the controller
l
Wall fixing plate
Mounting the Wall Fixing Plate
1. Mount the SPC in the appropriate position on the wall using all three fixings.
2. Draw a line around the inside of the back tamper cut out to provide a guide for the wall plate on the
fixing wall. Remove the housing from the wall.
3. Place the wall plate on the wall centering it precisely around the rectangle previously drawn.
4. Ensure all four flanges on the wall plate are flush with the wall.
5. Mark the four fixings on the wall plate.
6. Drill and use suitable screws (max. 4mm) for the wall substrate.
7. Fit the wall plate to the wall.
Fitting the Back Tamper Switch
1. Insert the tamper switch (see item 2 below) into the back of the housing so that the plunger faces
outwards (see item 1 below).
SPC42/52/53/63 – Installation & Configuration Manual Mounting system equipment
© Vanderbilt 2023 24 I-200572
08.12.2023