Step 2: select the exposure
In the operator room:
1. At the NX workstation, select the thumbnail for the exposure in the Image
Overview pane of the Examination window.
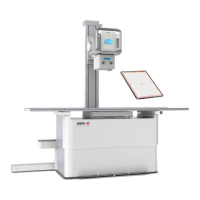
The default X-Ray exposure parameters for the selected exposure are sent
to the modality and displayed on the Software Console.
The selected DR Detector is activated.
The DR Detector Switch shows which DR Detector is active and shows its
status.
• Flashing: starting up
• Green (constant): ready for exposure
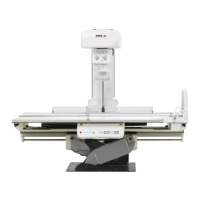
The radiographic table or wall stand lights up in blue, indicating the
selected modality position.
The default X-Ray system position for the selected exposure is sent to the
modality and displayed on the software console and on the tube head
display, for automatic positioning of the X-Ray system.
2. To position the X-Ray system automatically, press and hold the automatic
movement button.
The X-Ray system moves to the default position for the selected exposure.
Related Links
Moving to an Automatic Position on page 163
96 | DR 600 | Basic Workflow
3261K EN 20210708 0808