To select and create stored sync patterns (QAM only)
When using sync search you can enter a sync bit pattern as in the previous
task, or you can load up to six of your own sync patterns into softkeys F3
through F8, and then use the softkeys to select a sync bit pattern. This
task uses the results of the previous task.
1. Insert the Signals Disk into the analyzer’s disk drive.
2. Load an example of user-defined sync patterns:
Press [
Save/Recall
], [
catalog on
].
Scroll to highlight SYNC_KEY.TXT
Press [
recall more
], [
recall sync/state defs
], [
enter
].
3. Choose one of the user-defined sync patterns:
Press [
Time
], [
sync setup
], [
offset
], 15, [
sym
], [
user sync patterns
].
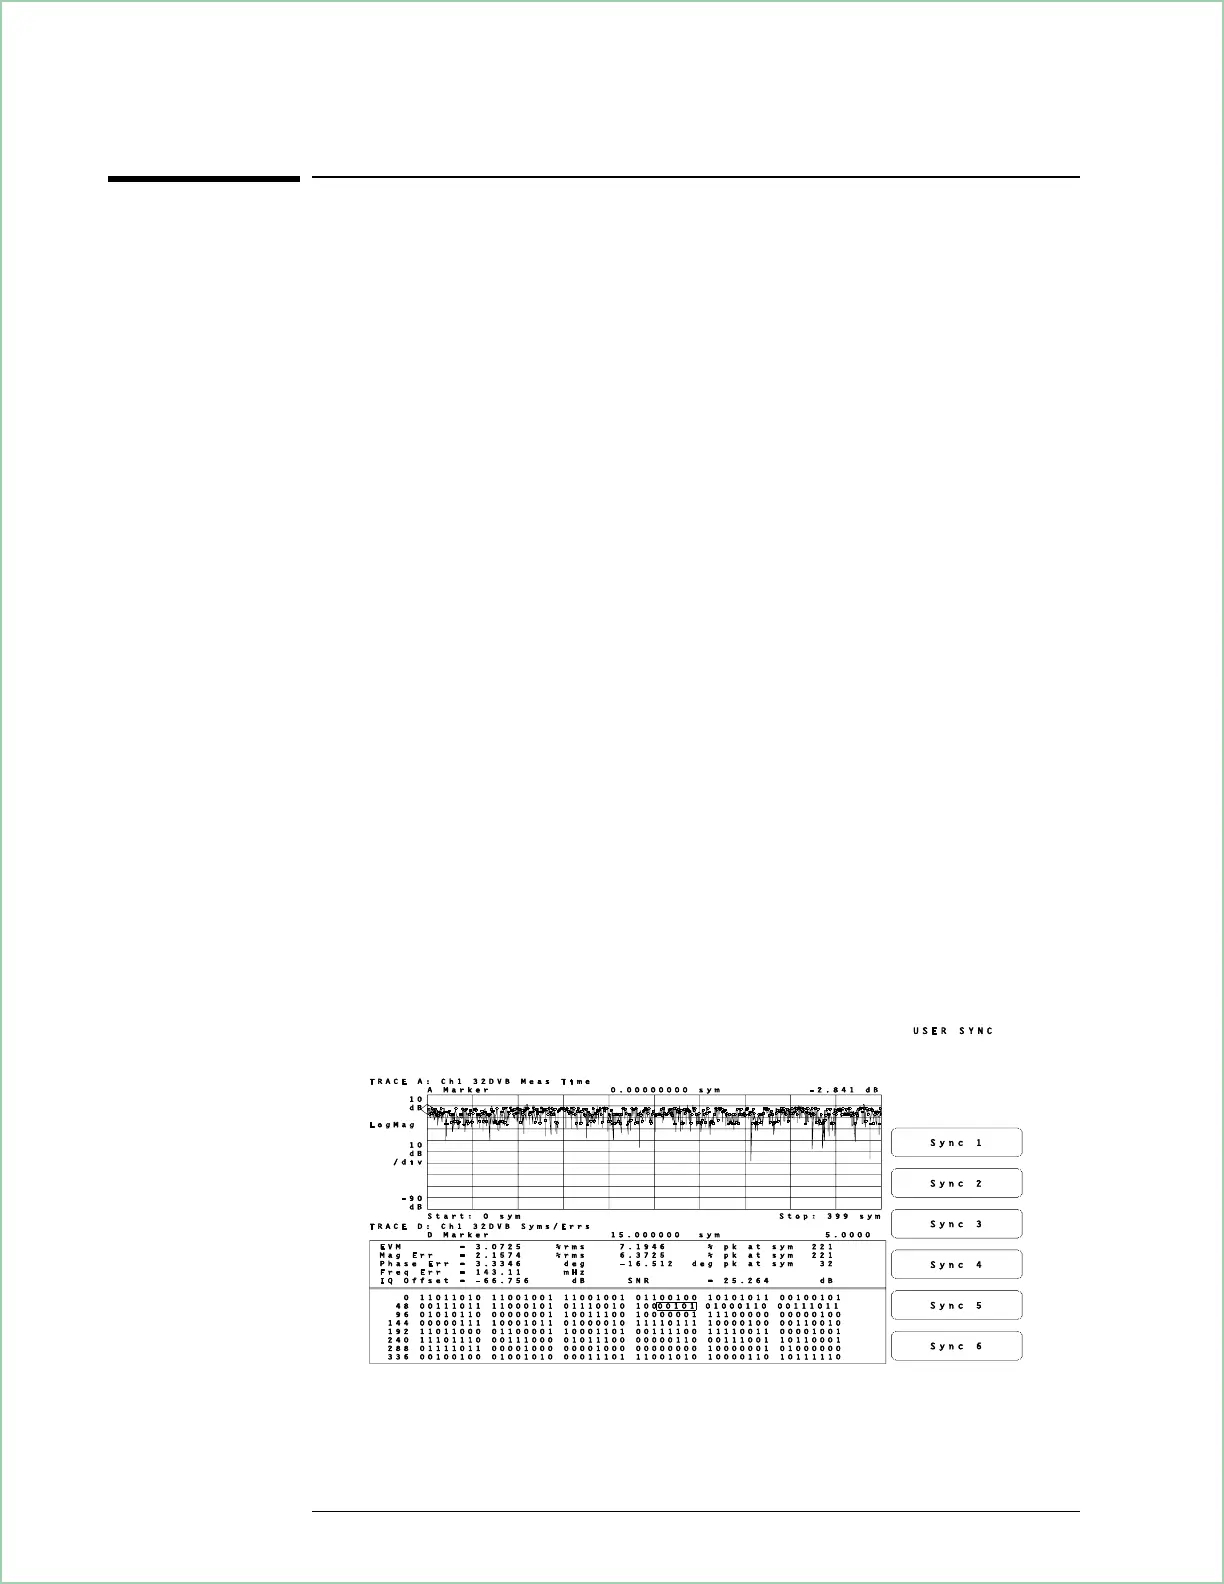
Pres s one of the six user-defined softkeys to change sync patterns.
If you select Sync 1, Sync 5, or Sync 6 you see what happens if the
analyzer cannot find the sync pattern. The analyzer demodulates the signal
but displays the message “SYNC NOT FOUND.” When this happens the
result is positioned at the start of data collection. In this case the sync is
not found because the combination of offset and sync word place the
result length beyond the pulse. The other four sync words show the result
length on the leading edge, trailing edge, or center of the pulse.
You may create your own sync bit pattern definitions for the softkeys. See
the file “STAT_DEF” on the Signals Disk provided with this documentation.
The file may be viewed and edited with any ASCII editor and the results
may be saved on a disk. If you have IBASIC installed, you may use it as
an editor. You may view the files “SYNC_KEY.TXT” and “STATES.TXT” to
see a sync pattern and a state definition which were created by using
IBASIC to modify portions of the “STAT_DEF” file.
Up to 6 sync patterns may be loaded into softkeys
Using Video Demodulation
(Opt. AYH)
9 - 14

 Loading...


