Getting Started 1
6000 Series Oscilloscope User’s Guide 29
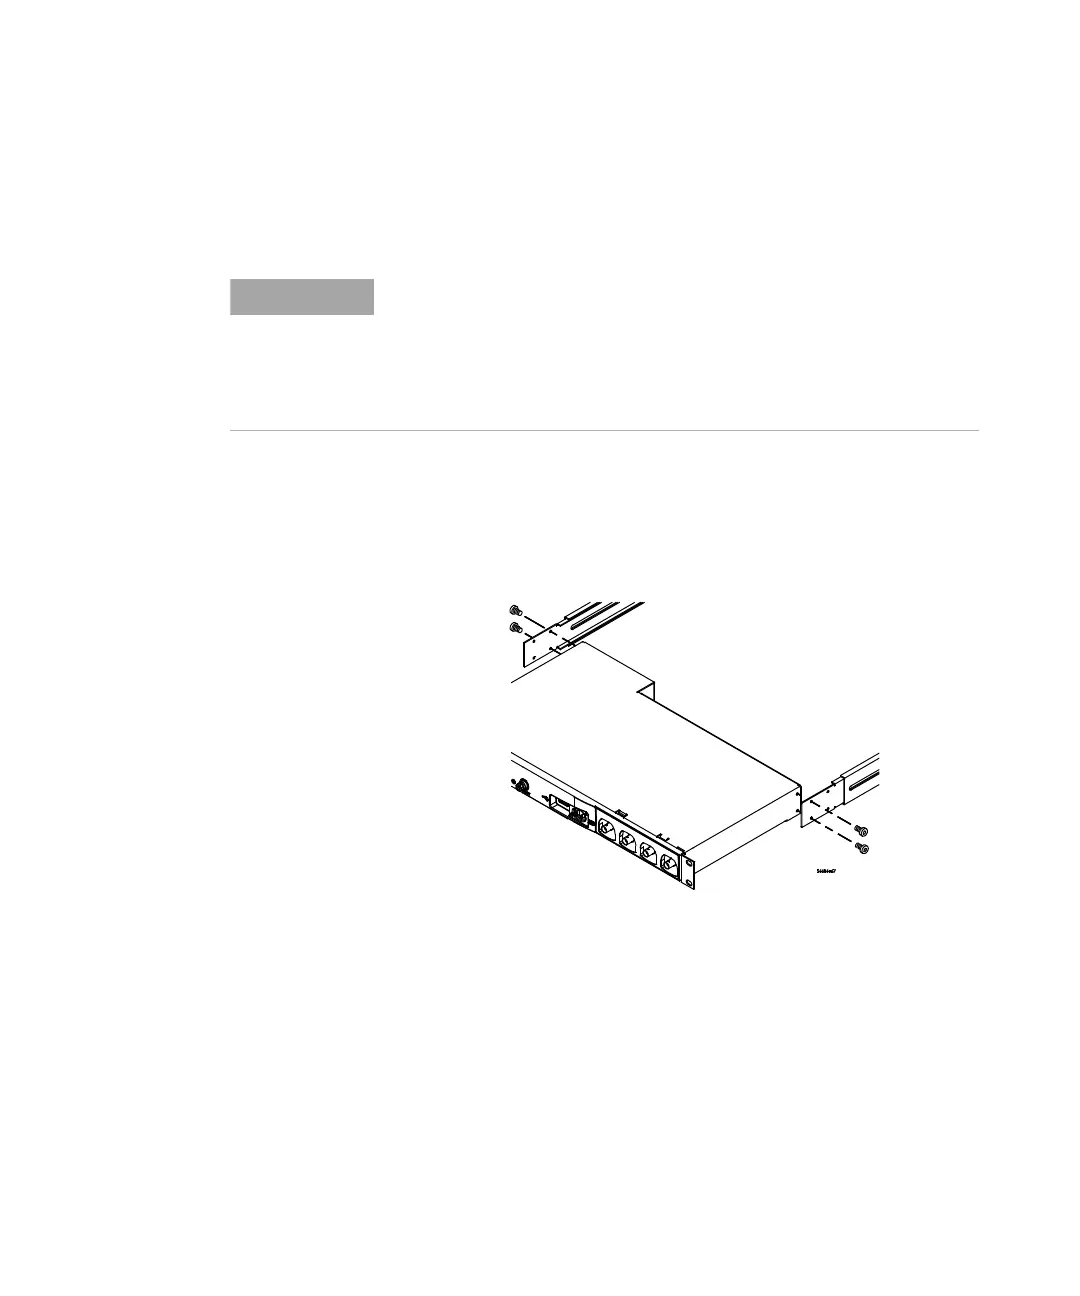
2 Fasten the Rack Mount Extenders to the oscilloscope chassis
with the four (4) M3 x 6 mm screws, using a Torx T10 driver
as follows:
a Attach a Rack Mount Extender to the left side of the
oscilloscope using two (2) of the M3 x 6 mm screws in the
inner set of holes on the Rack Mount Extender.
b Attach the other Rack Mount Extender to the right side of
the oscilloscope using two (2) of the M3 x 6 mm screws in
the outer set of holes on the rack mount extender.
3 Place the instrument in the rack. Install the four (4)
10-32 x 0.625 Dress Screws in the chassis front ears to secure
the front of the instrument to the rack. Use the Phillips
screwdriver.
4 Align the ears in the Rear Mount Extenders with the correct
set of holes in the rear of the rack and secure the Rack Mount
NOTE
The sets of holes in the Rack Mount Extenders are slightly offset. This was
done to ensure that the Rack Mount Extenders are attached to the
oscilloscope at the correct points so that the oscilloscope’s ventilation
area is not obscured. The holes in the Rack Mount Extenders will align
with the correct holes in the oscilloscope and the screws will go in easily.
Do not force the screws into the wrong holes.
Use outer
holes in
extender
Use inner
holes in
extender
 Loading...