Assembly Replacement 7-9 LCD Assembly Replacement
MT8212E and MT8213E MM PN: 10580-00255 Rev. J 7-9
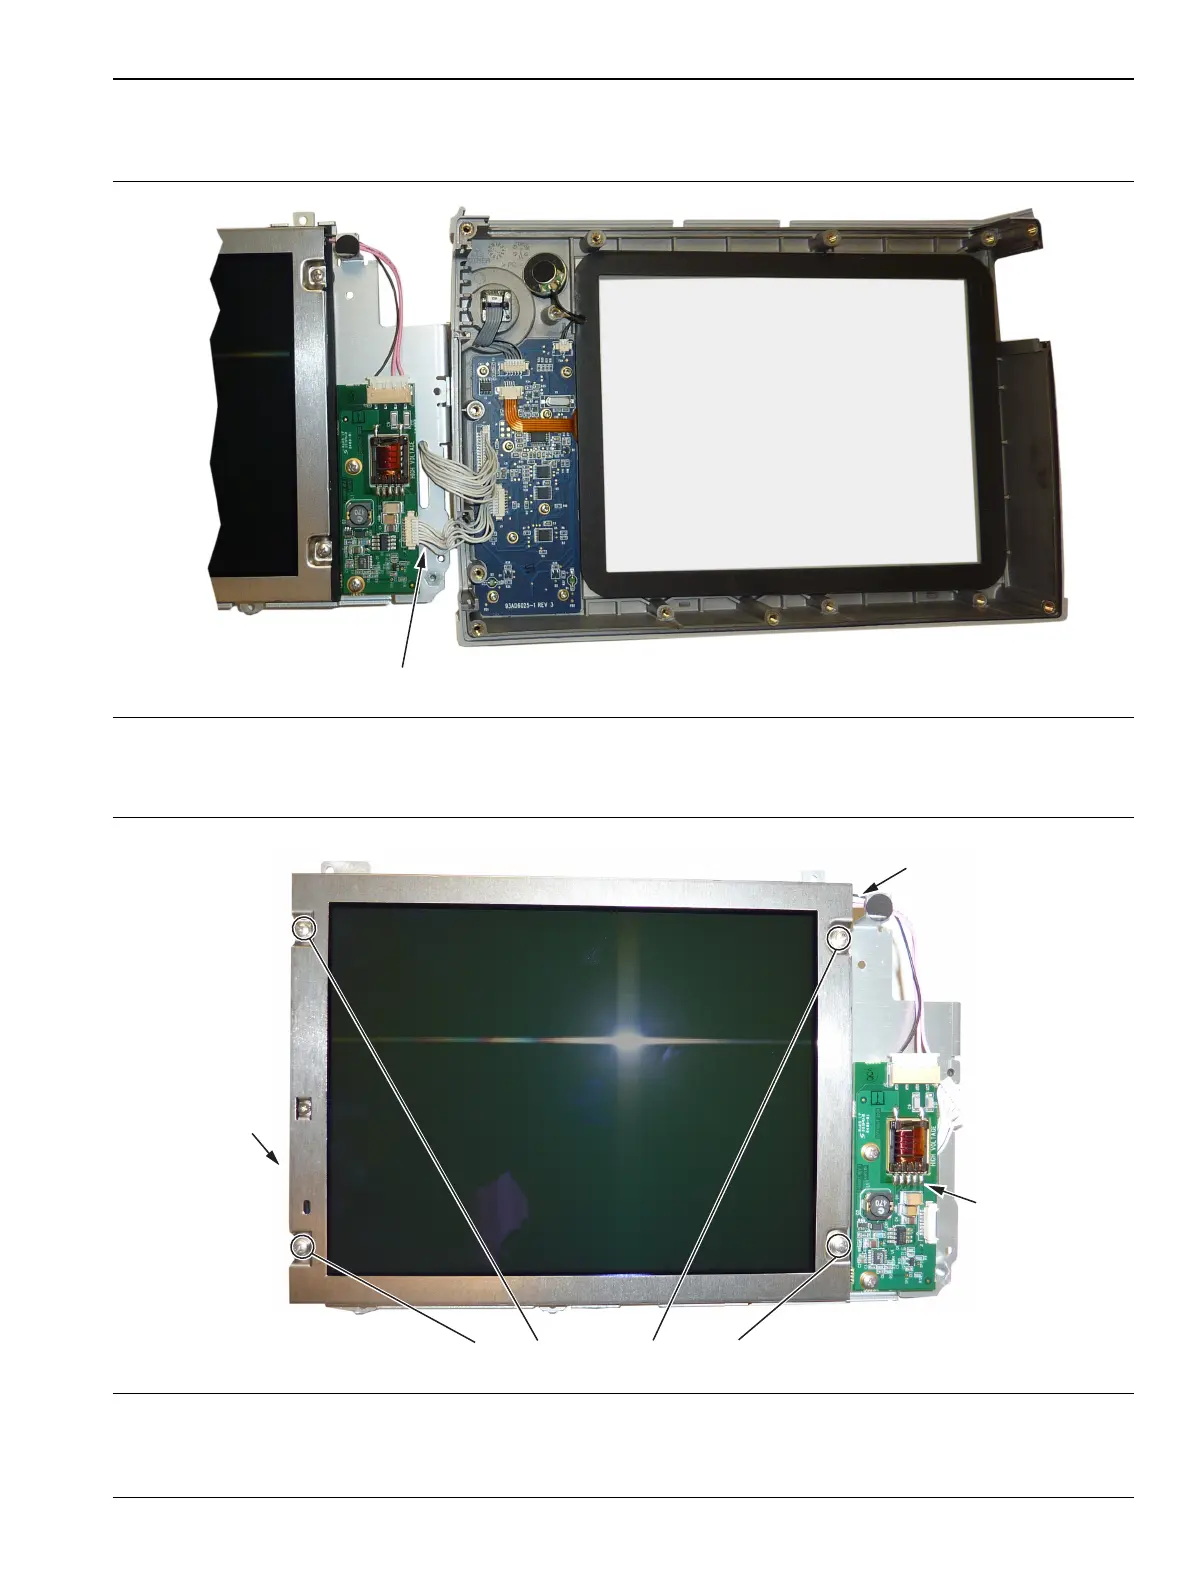
4. Turn the LCD assembly over and disconnect the front half of the case from the LCD Assembly
(Figure 7-11).
5. Use a Phillips screw driver to remove the four screws securing the LCD to the housing (Figure 7-12).
Figure 7-11. Replacing the LCD Assembly
Figure 7-12. Replacing the LCD
LCD Cable to
Motherboard
Remove 4 screws to replace LCD
LCD Backlight
Cable
LCD Backlight
PCB