www.ayyeka.com | +1 (310) 876-8040 | info@ayyeka.com 125
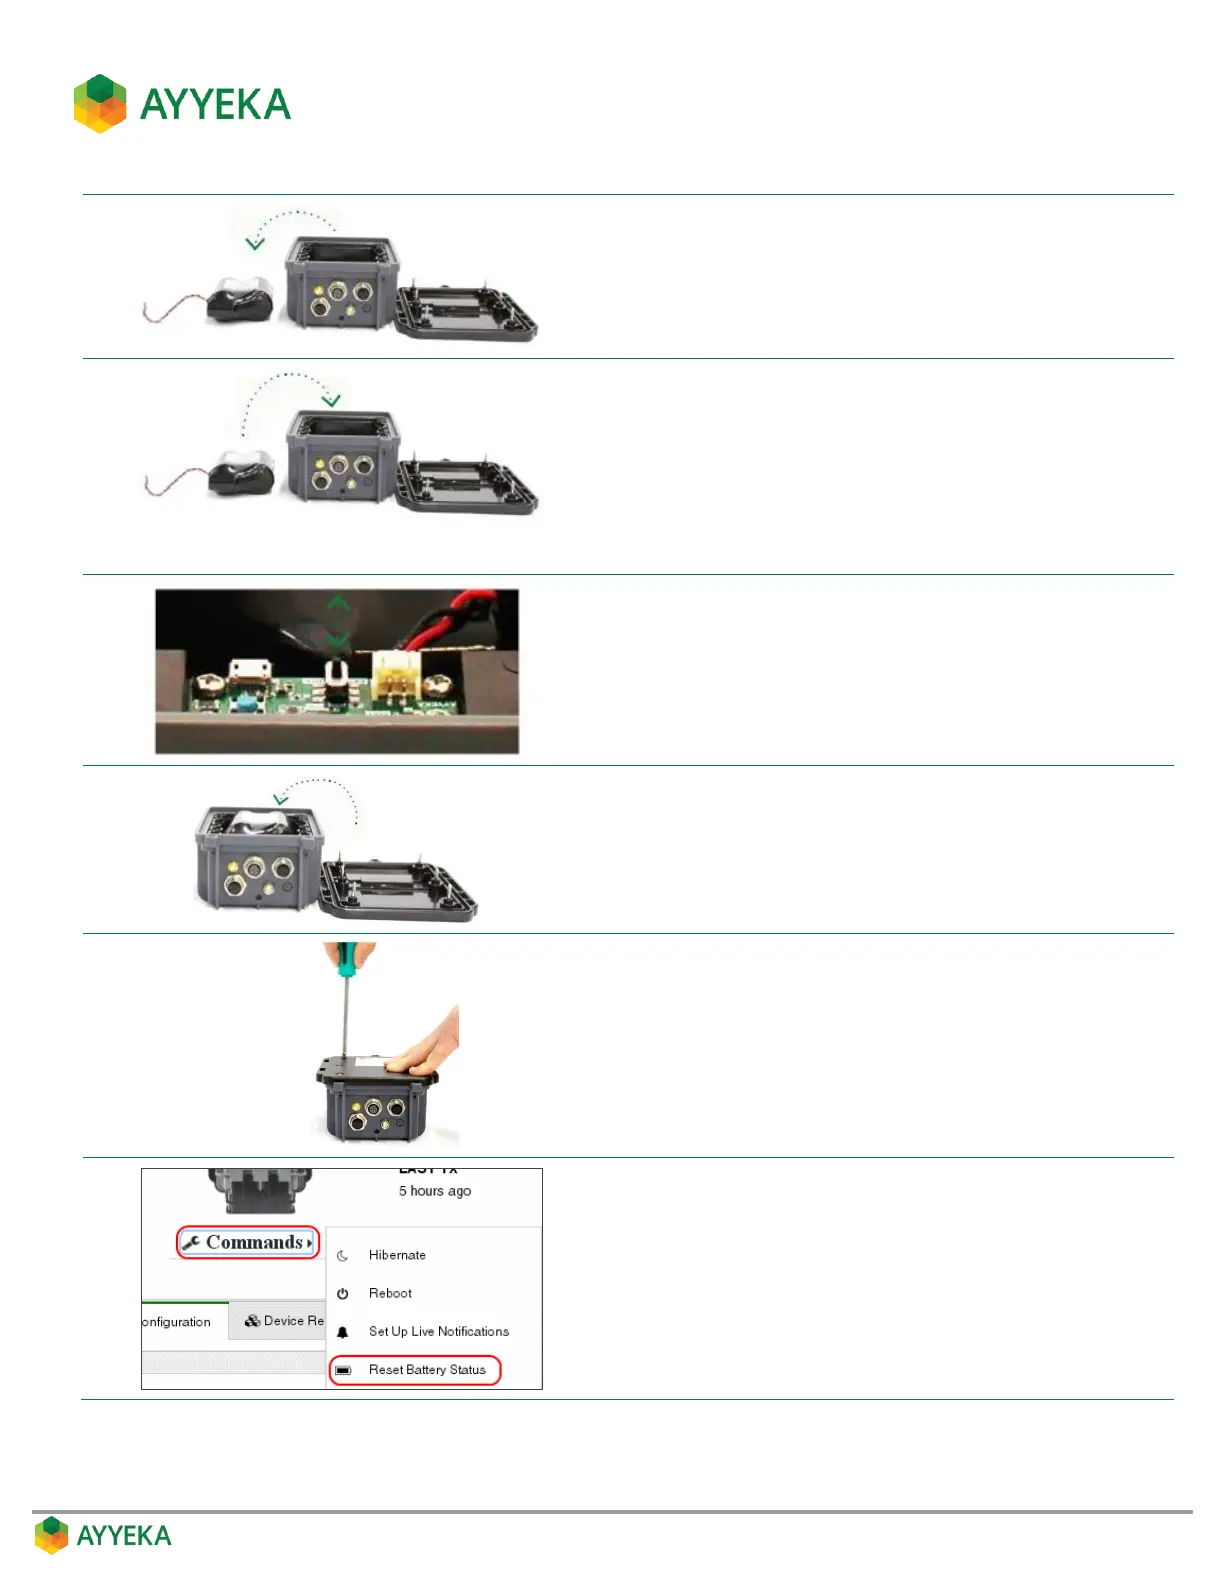
Carefully disconnect the male end of the battery connector
cable from the female connector on the interface board. Using
an indelible pen, mark the battery as “Used” and dispose of it
properly.
Mark the new battery with the current date. Place the battery in
the Wavelet enclosure and carefully connect the male end of the
battery connector cable to the female connector on the
interface board.
Verify that the yellow, red and blue LED lights on the interface
board blink briefly. This confirms that the battery has been
successfully connected.
On the interface board, move the ON/OFF switch to the ON
position. The Wavelet device turns on and performs a 10-minute
calibration process, after which it starts operating in normal
mode.
Replace the Wavelet back panel, ensuring that the battery cable
is neatly arranged and not pinched within the Wavelet
enclosure.
Tighten the six (6) back panel screws until the Wavelet is closed
and sealed. Do not over-tighten as this will strip the screw
threads.
The Wavelet device is now ready to resume monitoring and
transmission.
In the Management user interface, select Devices in the sidebar,
and select the device in the Sites Tree pane.
In the bottom part of the device information box, click the arrow
in the drop-down Commands list, and select Reset Battery
Status.