R5906848 /04 DP2K SLP Series 197
Image 16-47
4. Install the new Lens Holder Cover assembly onto the front plate. Use a PH1 Phillips screwdriver to tighten the
seven original screws (reference 5 Image 16-46. Make sure you tighten the earth wire (reference 6) back to its
original place.
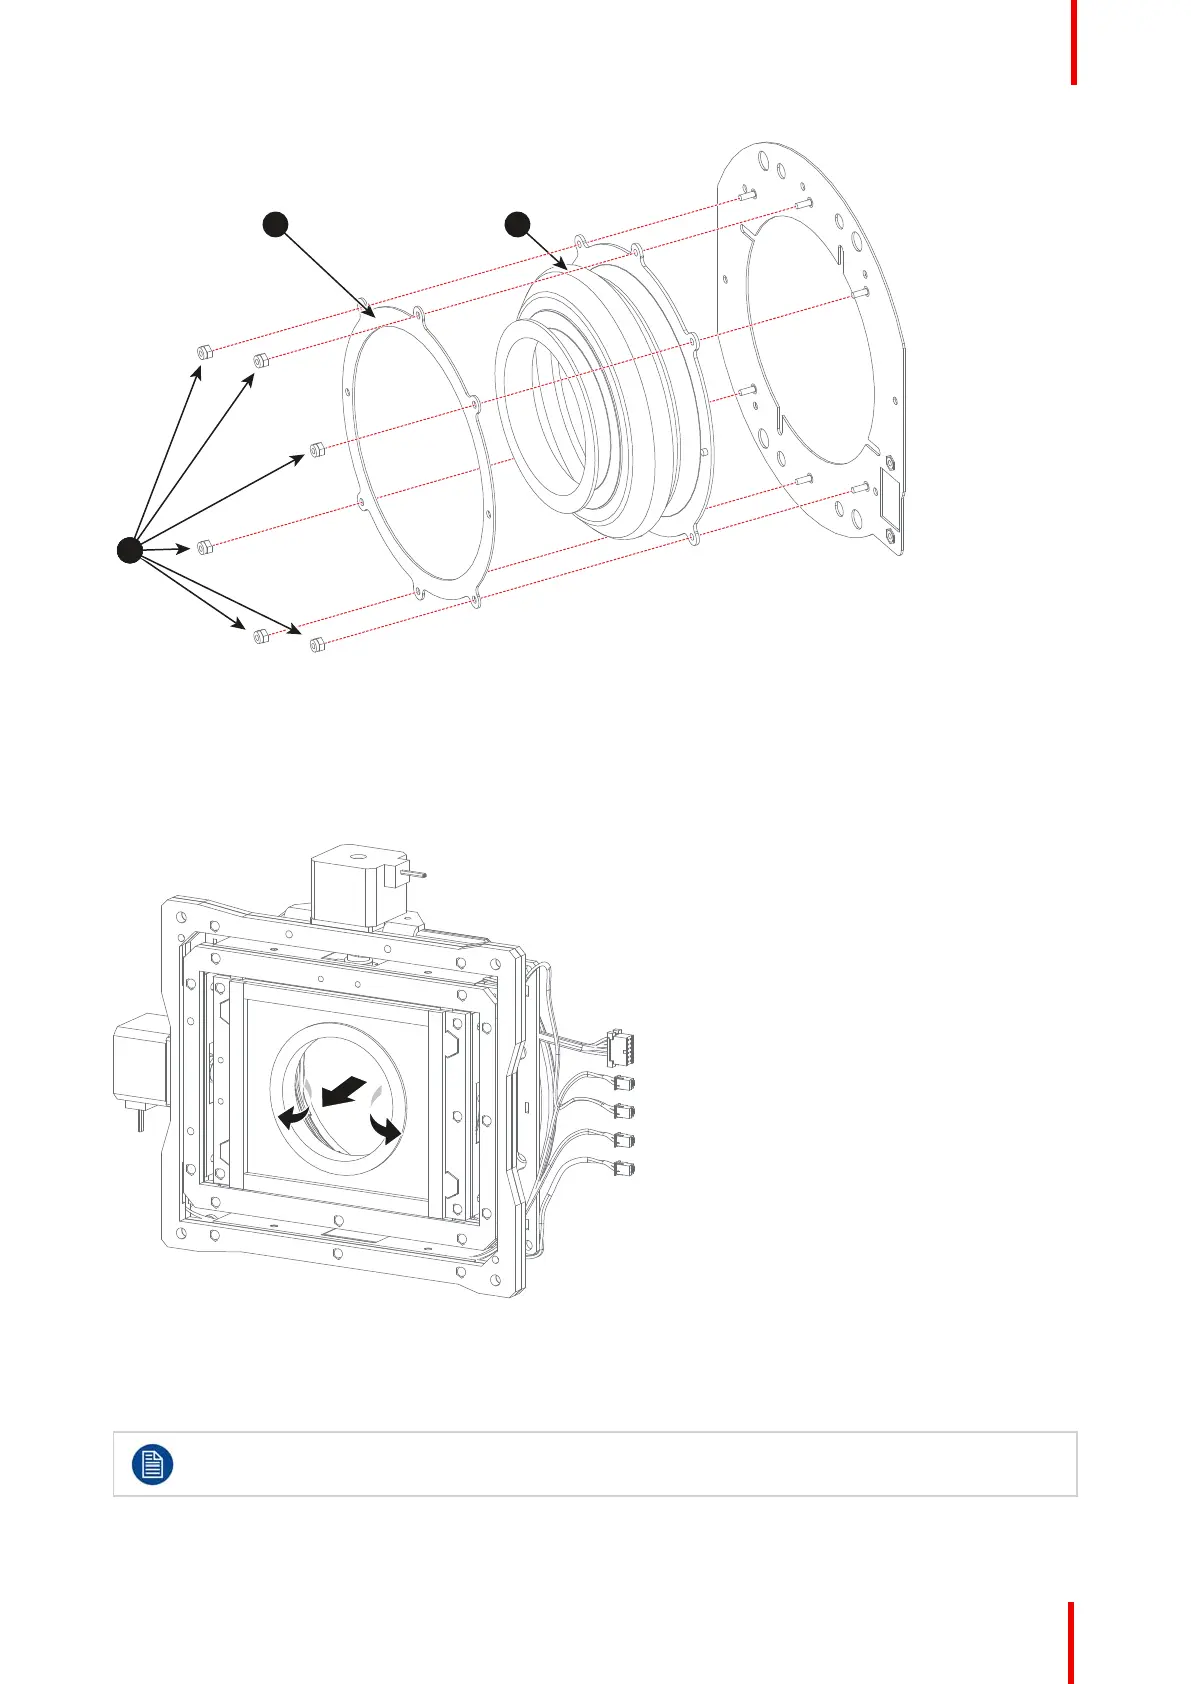
5. Carefully reinstall the front plate from the Lens Holder. Help the rubber through the lens Holder onto the other
side.
Image 16-48
6. Carefully reinstall the front plate from the Lens Holder. Use a 13 mm nut driver to fasten the four Scheimpflug
nuts (reference 3 Image 16-45). Fasten the big nuts crosswise bit by bit. Ensure that the upper two rods and
the lower left rod contain a big spring (reference 4).
Proceed with reinstalling the Lens Holder. See procedure “Installation of the Lens Holder cover
plate”, page 185.
Lens Holder

 Loading...


