R5906848 /04 DP2K SLP Series 203
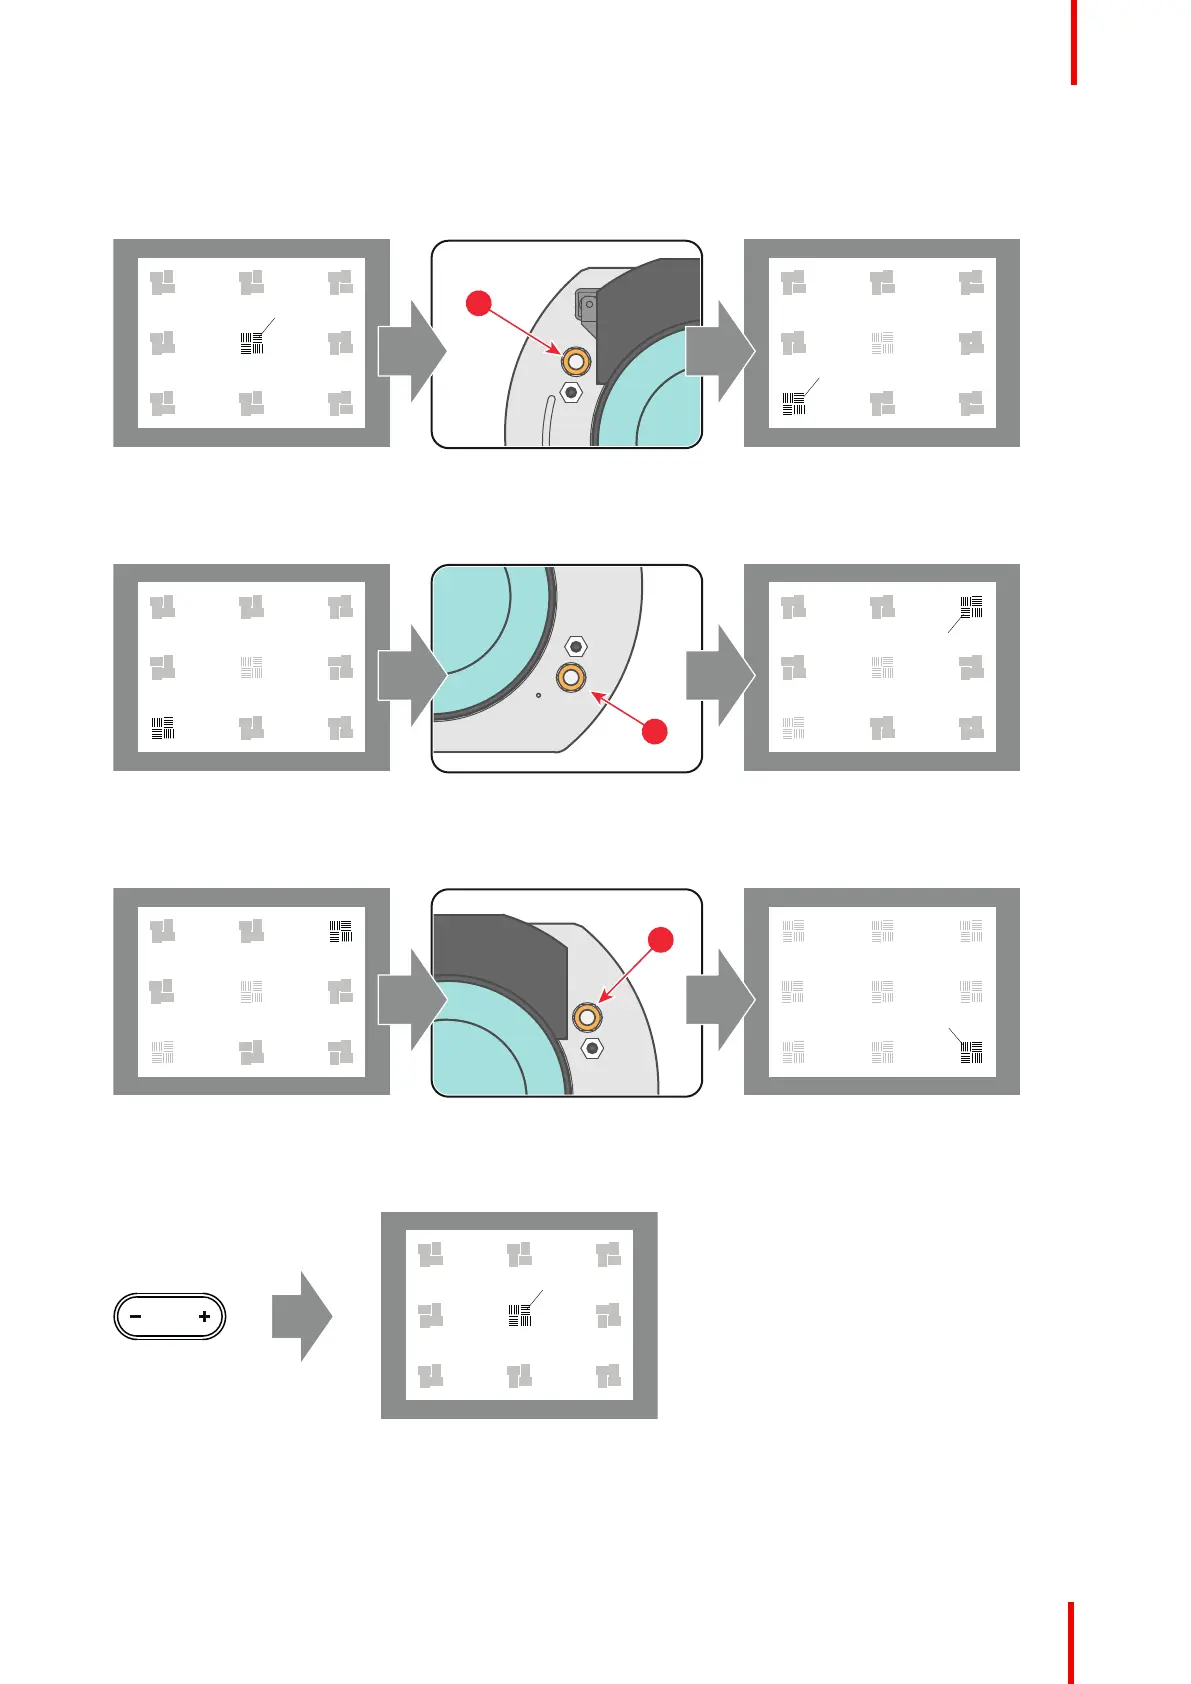
Scheimpflug adjustment steps:
1. Sharpen the image at the bottom left corner of the screen by turning the upper left Scheimpflug adjustment nut
(reference 1 Image 17-6). As a result the focus in the center will fade a bit but that's normal.
Image 17-6
2. Sharpen the image at the top right corner of the screen by turning the lower right Scheimpflug adjustment nut
(reference 3 Image 17-7).
Image 17-7
3. Sharpen the image at the bottom right corner of the screen by turning the upper right Scheimpflug adjustment
nut (reference 2 Image 17-7).
Image 17-8
4. Optimize the focus of the projected image in the center of the screen using the motorized focus control (Local
Keypad).
Image 17-9
5. Repeat from step 1 until the projected focus pattern is as sharp as possible in the center, left, right, top and
bottom of the screen.
Scheimpflug

 Loading...


