EasyManuals Logo
Home>Barco>Projector>DP2K SLP Series

Barco DP2K SLP Series Service Manual

Barco DP2K SLP Series
410 pages
To Next Page IconTo Next Page
To Previous Page IconTo Previous Page
Page #240 background imageLoading...
Page #240 background image
R5906848 /04 DP2K SLP Series240
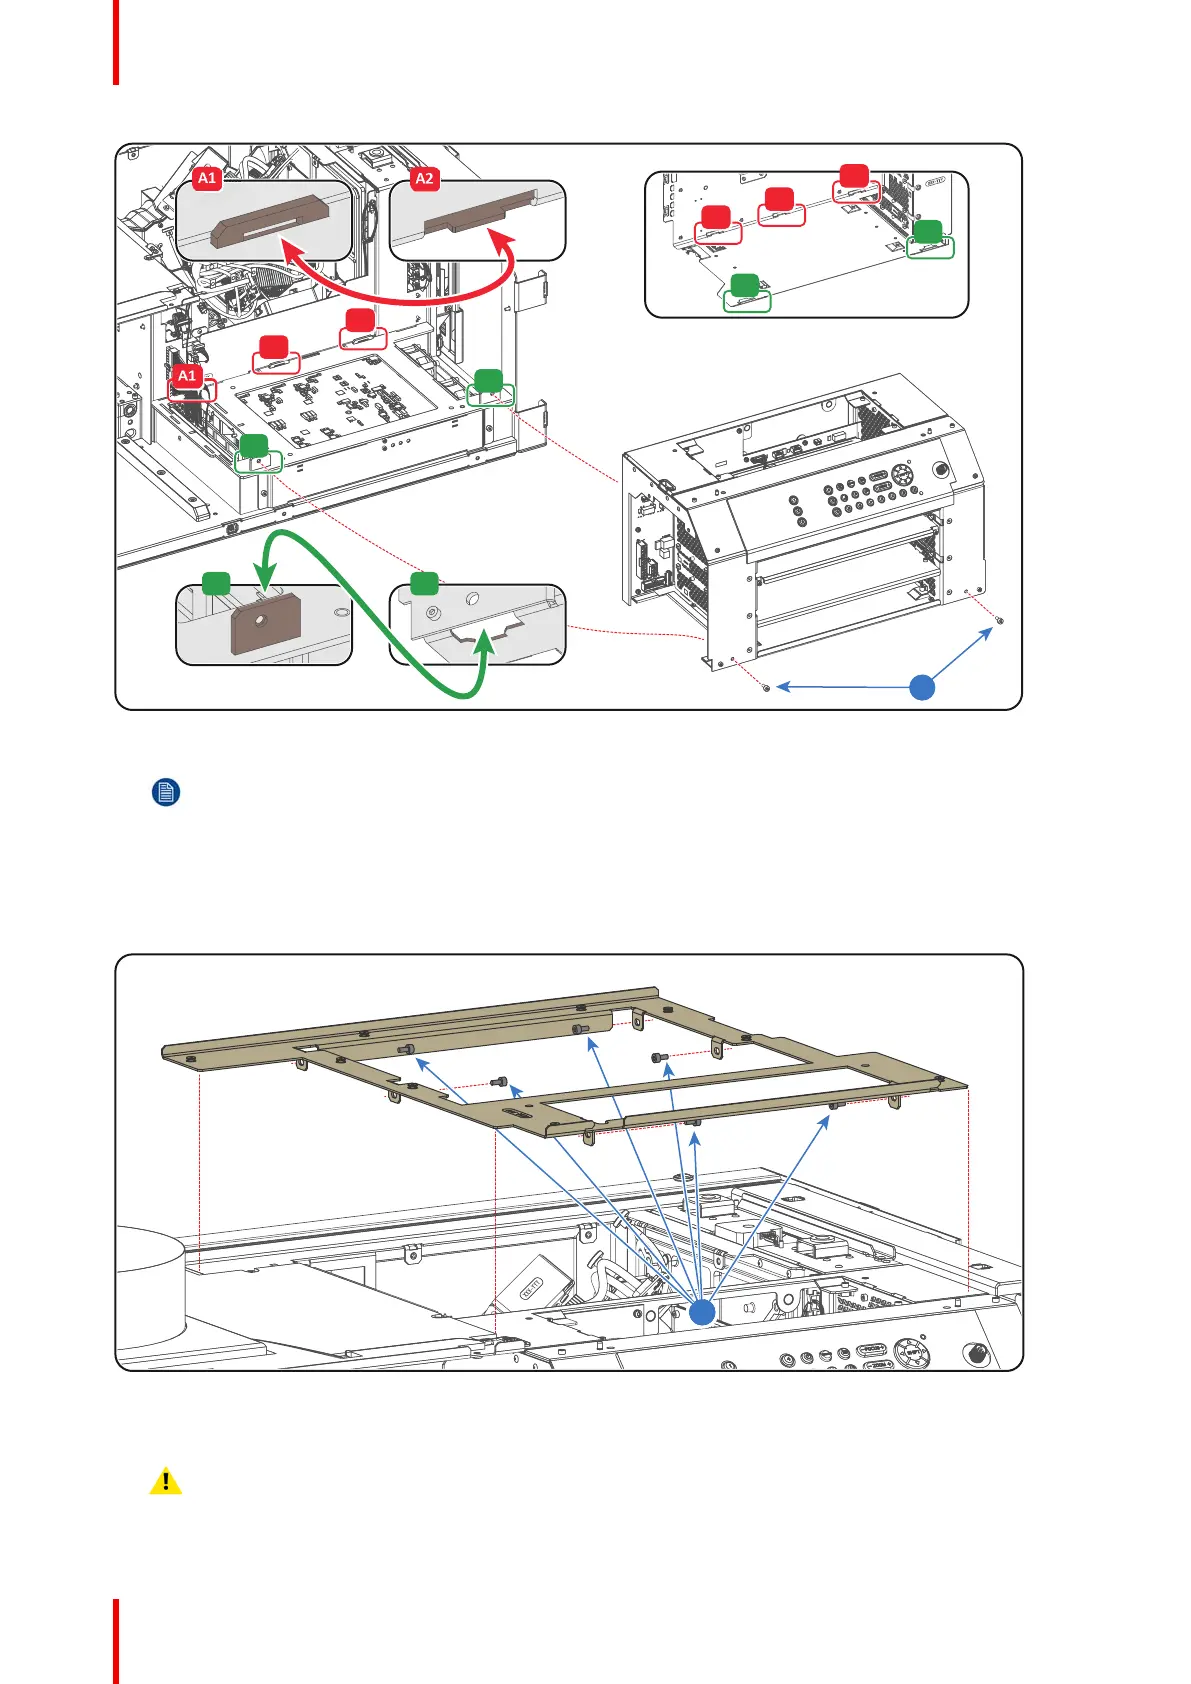
2
A1 A2
A1
A1
A1
A1
A1
B1
B1
B1 B2
A1
A1
A2
A2
A2
A2
A2
A2
A2
A2
A2
A2
A2
A2
A2
A2
B2
B2
Image 18-48
Note: The rear bottom of the Card Cage is engaged into the projector chassis with three horizontal
slots (reference A1 and A2 Image 18-48). The front bottom of the Card Cage is engaged into the
projector chassis with two vertical slots (reference B1 and B2 Image 18-48).
3. Secure the Card Cage with two screws at the base of the Card Cage (reference 2 Image 18-48). Use 3mm
Allen wrench.
4. Place the top frame in its position on top of the projector.
3
Image 18-49
5. Secure the top frame with 6 fixation screws (reference 3 Image 18-50) as illustrated. Use a 3mm Allen wrench.
Caution: Take care not to drop the screws inside the projector.
Card Cage

Table of Contents

Other manuals for Barco DP2K SLP Series

Questions and Answers:

Question and Answer IconNeed help?

Do you have a question about the Barco DP2K SLP Series and is the answer not in the manual?

Barco DP2K SLP Series Specifications

General IconGeneral
BrandBarco
ModelDP2K SLP Series
CategoryProjector
LanguageEnglish

Related product manuals