!
172 ATOMLAB 500 DOSE CALIBRATOR
To Perform A Manual Decay Test:
1. From the Linearity Testing Menu, touch <Manual Decay Test>. The Manual Decay Test
screen is now displayed.
• Touch <Back> to return to the Linearity Testing screen.
• Touch <Select Detector> to select a different detector if multiple detectors are selected.
• Touch <Select Decay Isotope> to select the isotope to be used in the decay test.
• Touch <Select Setup Options> to select setup options.
• Touch <Zero Background> to zero the background reading if necessary.
2. Touch <Start Test> to begin the manual decay test. The Manual Decay Test screen is displayed.
3. Place the source to be used into a dipper and then place the dipper with the source into
the chamber.
4. Once the reading has stabilized, touch <Record Reading>. The reading is recorded and the
next line for the manual decay test is displayed. The system will continue to display a live
reading until <Record Reading> is selected.
5. Continue taking readings at the appropriate time intervals by touching <Record Reading>.
NOTE: If you need to use the calibrator for counting doses, touch <Measure> to advance to
the Measure screen. Touch <Return to Manual Decay Test> to go back to the manual
decay test.
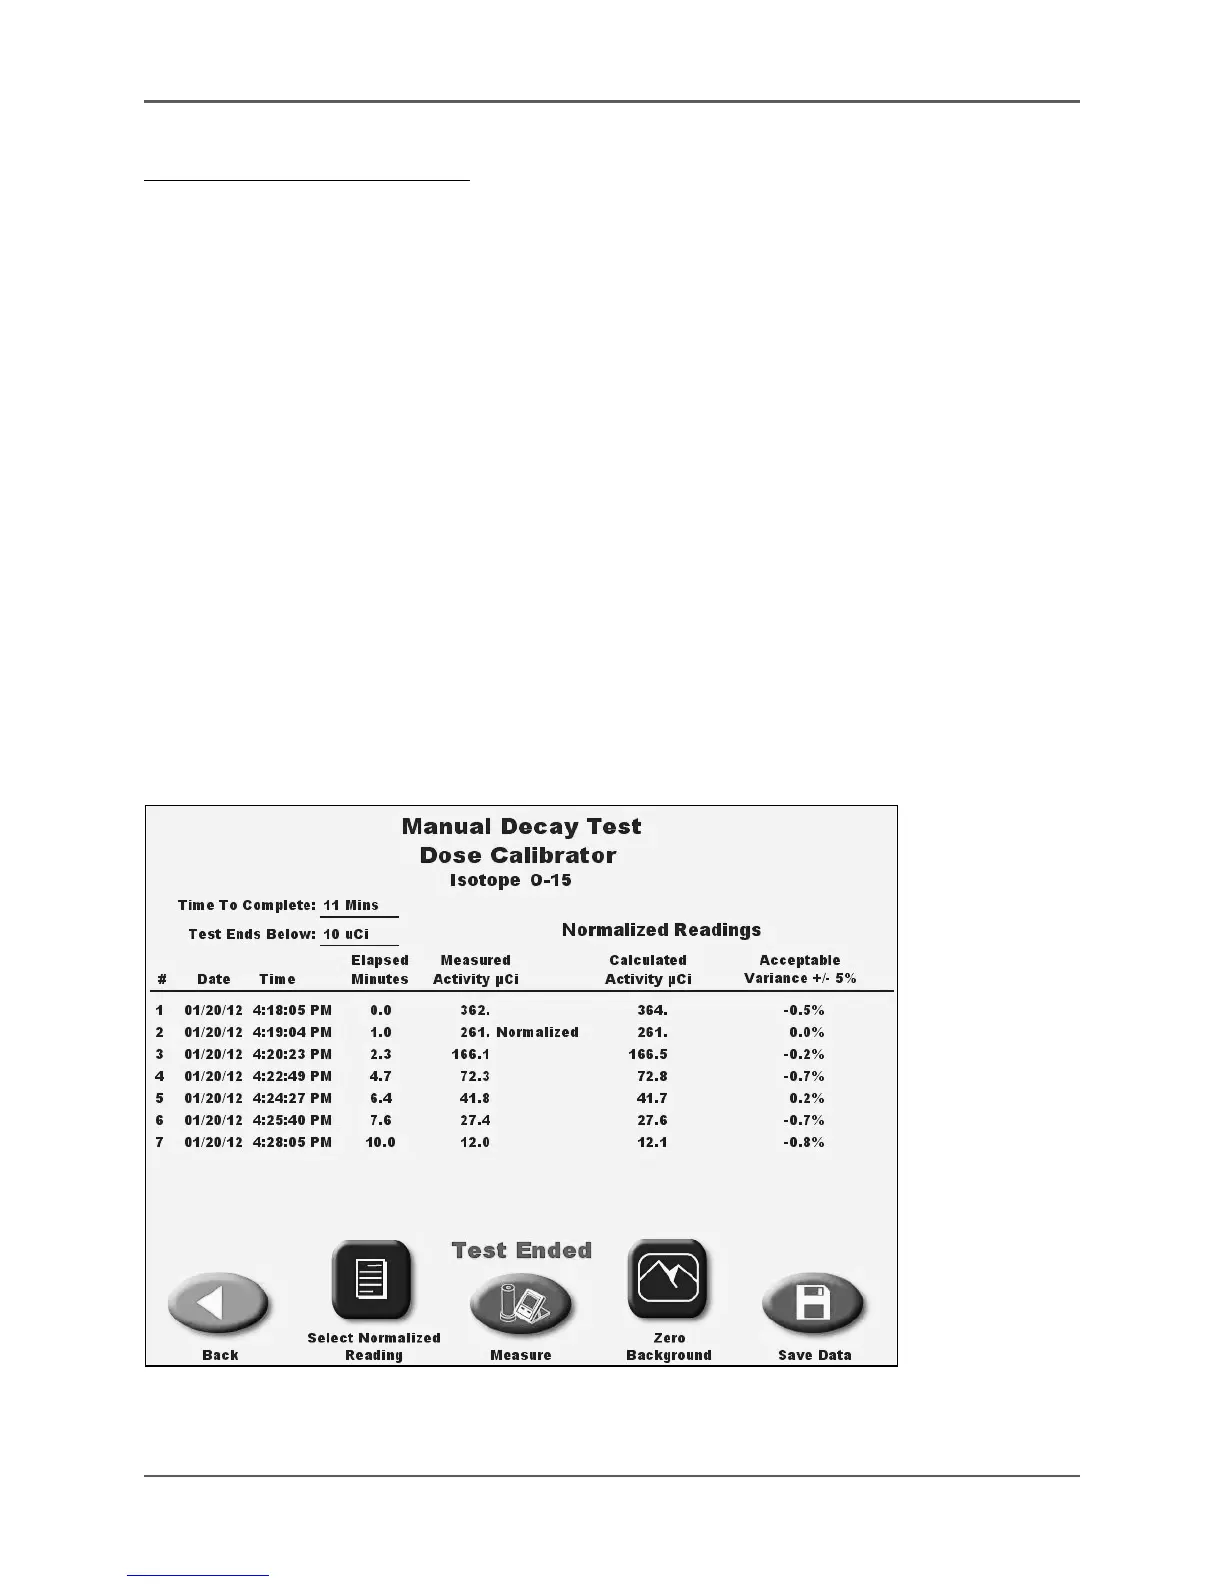
6. Touch <End Test> to end the test and advance to the Normalized Reading screen.
Figure 6.43. The Manual Decay Test screen with Test Ended message and data displayed