3-74
Confidential
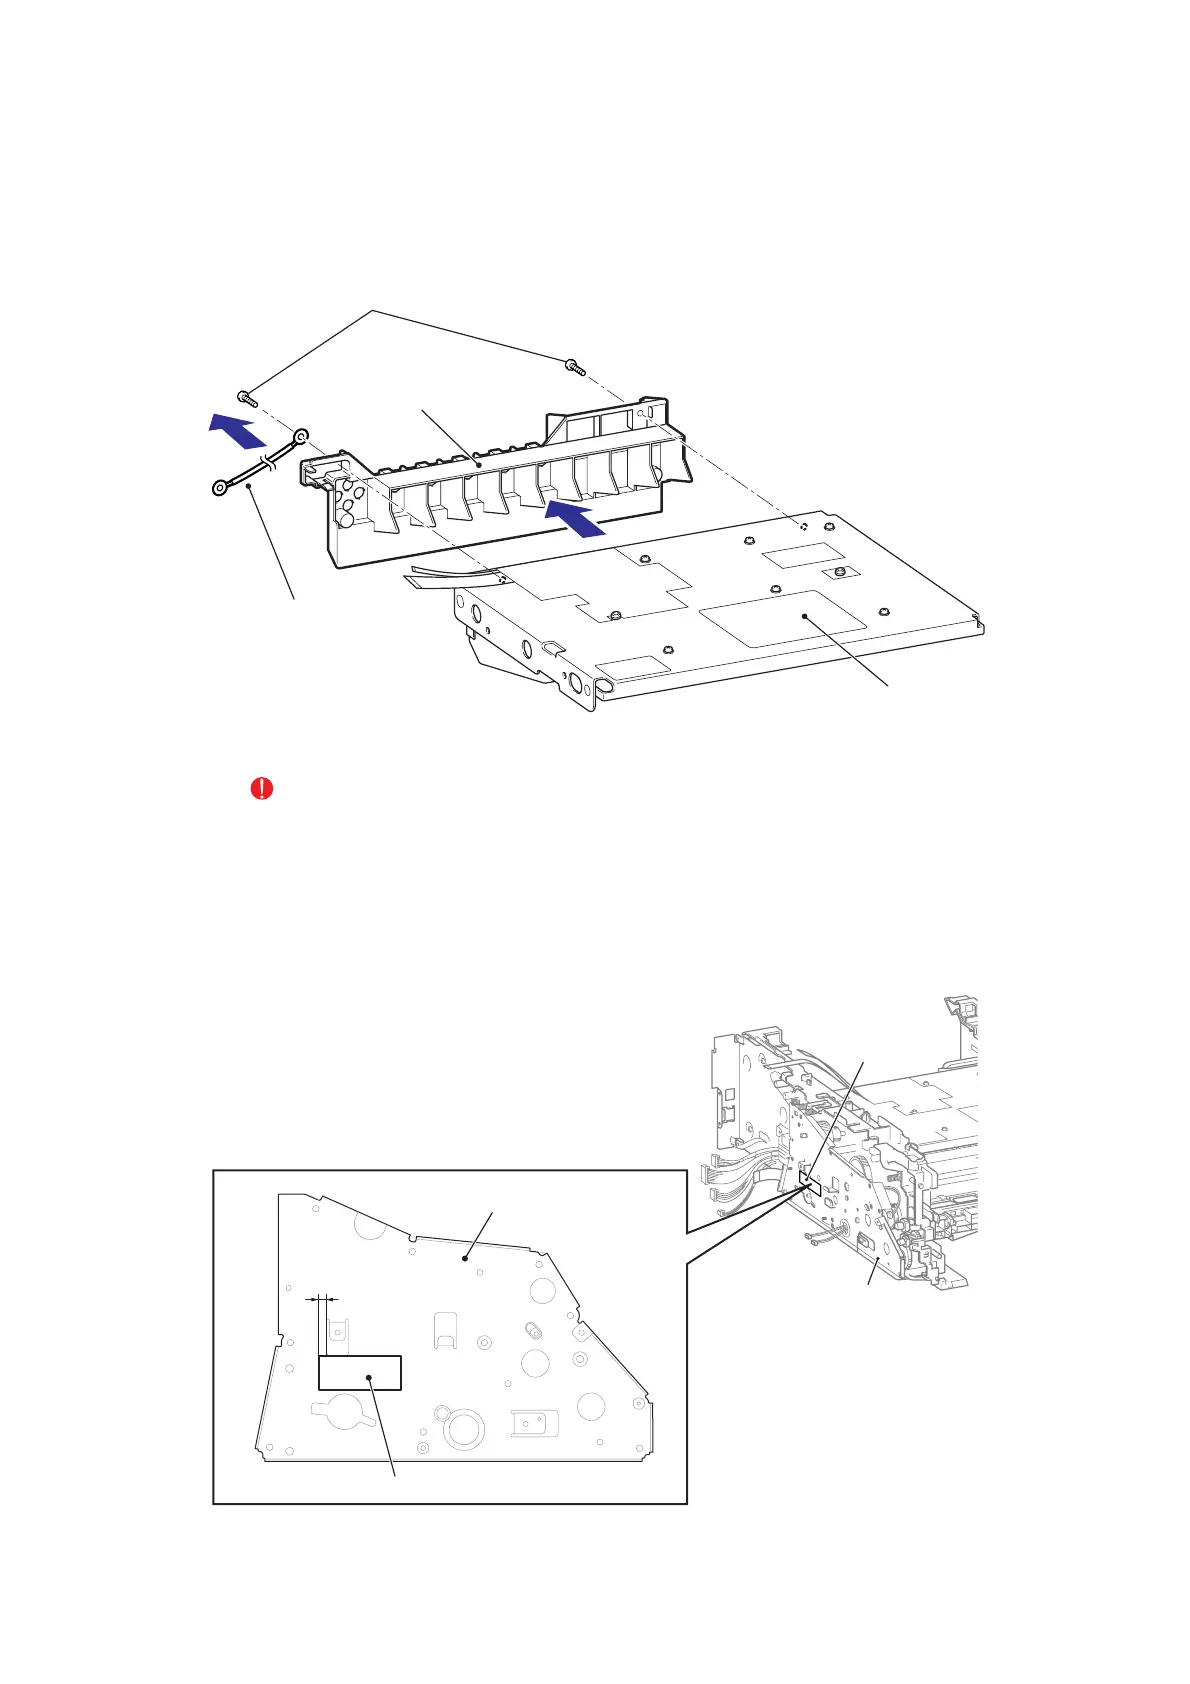
(2) Remove the Taptite cup S M3x6 SR screw, and then remove the FG harness ASSY from
the Laser unit.
(3) Remove the Taptite cup S M3x6 SR screw, and then remove the Air duct from the Laser
unit.
Fig. 3-74
CAUTION:
When replacing the Laser unit, replace the Serial label attached on the Drive sub ASSY
with the new one supplied with a new Laser unit. If an extra Serial label is supplied with a
new unit as spare. Make sure to throw the spare label away after replacing the Laser
unit, *** it is necessary to input the new Laser unit characteristics information.***
(Refer to "3. IF YOU REPLACE THE LASER UNIT" in Chapter 4.)
Fig. 3-75
Air duct
Laser unit
FG harness ASSY
Taptite cup S M3x6 SR
3
2
2 to 10mm
Serial label
Drive sub ASSY
Drive sub ASSY
Serial label
 Loading...