290
GEARCASE
GEARCASE REMOVAL AND INSTALLATION
Gearcase Installation
Before installing gearcase, shift rod
adjustment MUST be checked. Refer t o SHIFT
ROD ADJUSTMENT on p. 295.
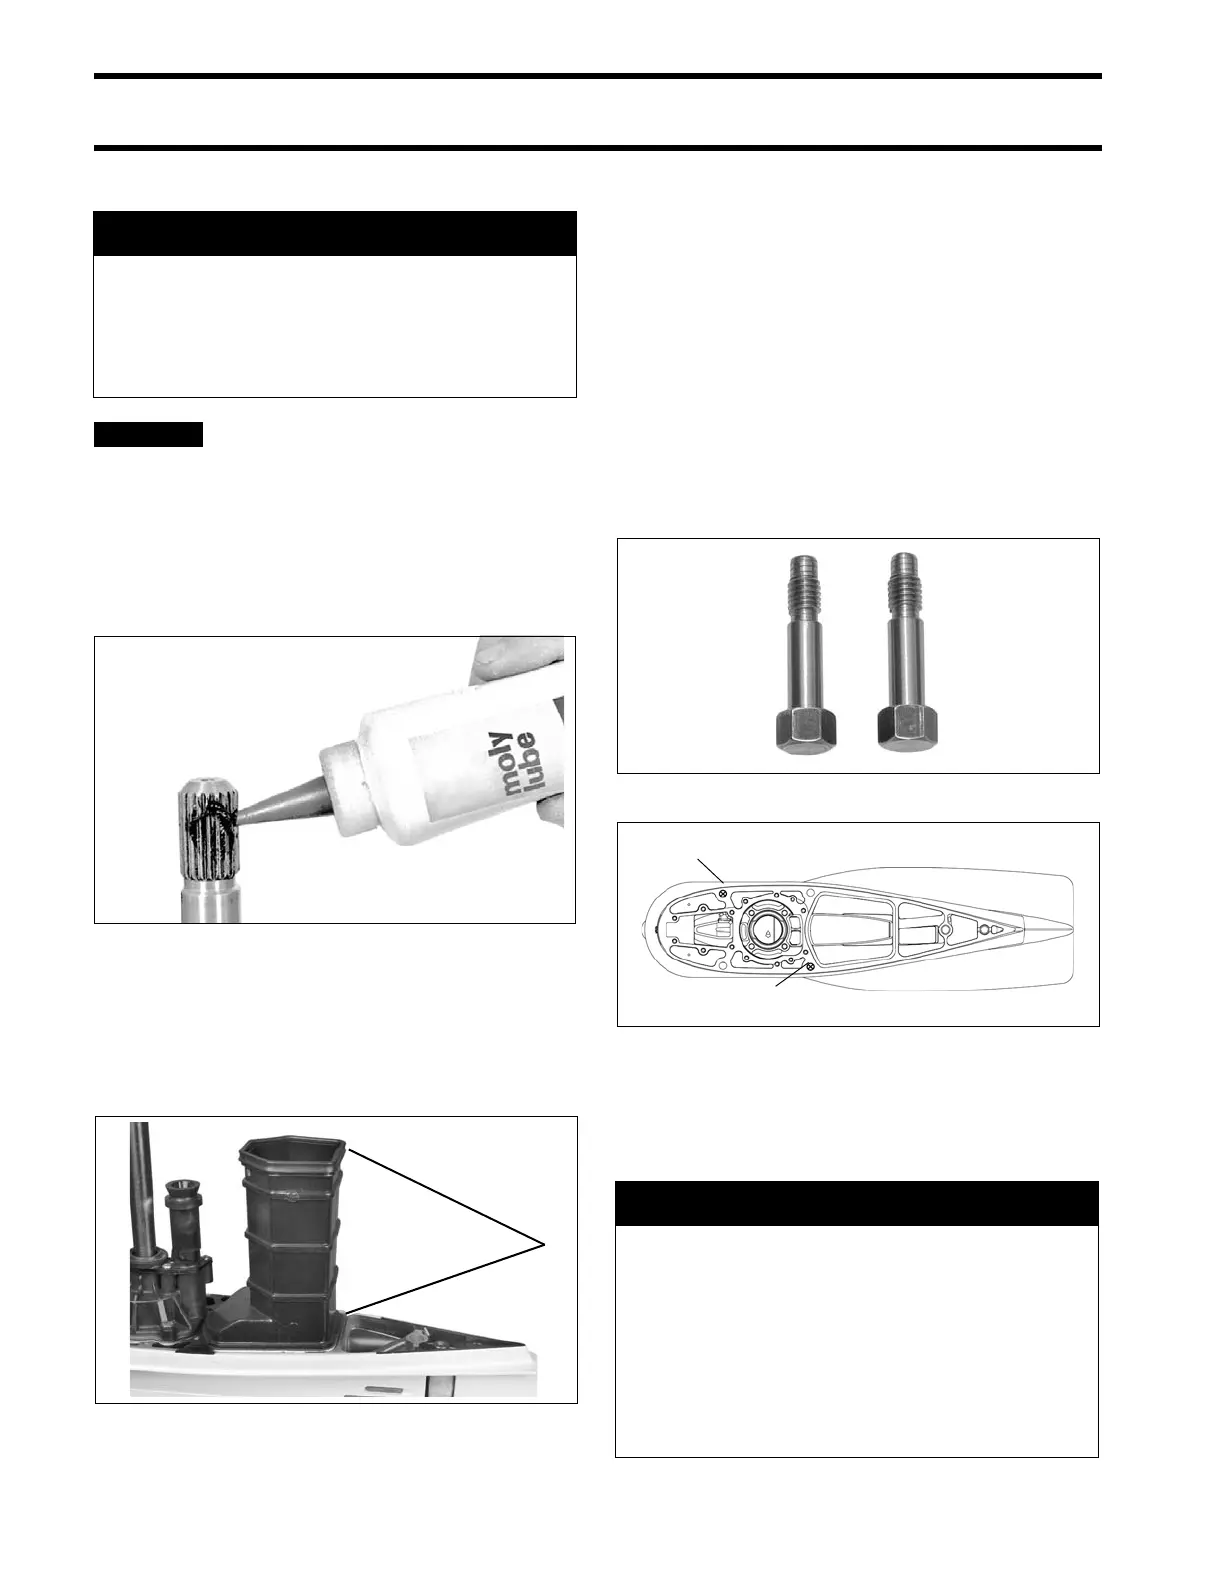
Coat th e drivesh aft splines with Moly Lube. DO
NOT co at top su rface of th e driveshaf t be cause
lubricant may prevent seat ing of the driveshaf t in
the crankshaft.
Apply Adhesive 847 to the lo wer exhaust housing
seals’ inner surfaces. Place two new seals on the
housing. Apply Triple-Guard grease to the seals’
outer surfaces and pla ce the housing on the
gearcase.
Slide the gearcase into place, making sure:
• Driveshaft engages the crankshaft.
• Water tube enters the water pump.
• Lower inner exhaust housing installs correctly.
• Shift ro d does not turn an d is positio ned pro p-
erly in the shift rod lever below the crankcase.
Some outboa rd mode ls include hollow alignme nt
pins between the exhaust housing and gearcase.
If o utboard is not equipped with alignment pins,
use Gea rcase Alig nment Kit, P/N 5 007231, to
accurately align gearcase h ousing to exhaust
housing. Position alignment bolts (2) as indicated.
IMPORTANT: Replace alignment b olts with
mounting scre ws after all other gearcase mou nt-
ing screws are installed.
A WARNING
During service, the outboard may drop
unexpectedly. A void perso nal inju ry;
always support the outboard’s weight with
a suitable hoist or the tilt support bracket
during service.
30385
1. Lower exhaust seals 001985
Alignment Bolt(s) 005401
1. Position of alignment bolts (2) 005402
A WARNING
Failure to properly tighte n gearcase
screws with a torque wrench could lead to
gearcase damage or loss, resulting in loss
of control and possible personal injury.
Screw torque should be checke d regu-
larly, e specially in high-speed a pplica-
tions, or any t ime p ropeller d amage has
occurred.