303
GEARCASE – STANDARD ROTATION
SHIFTER, BEARING AND SEAL SERVICING
13
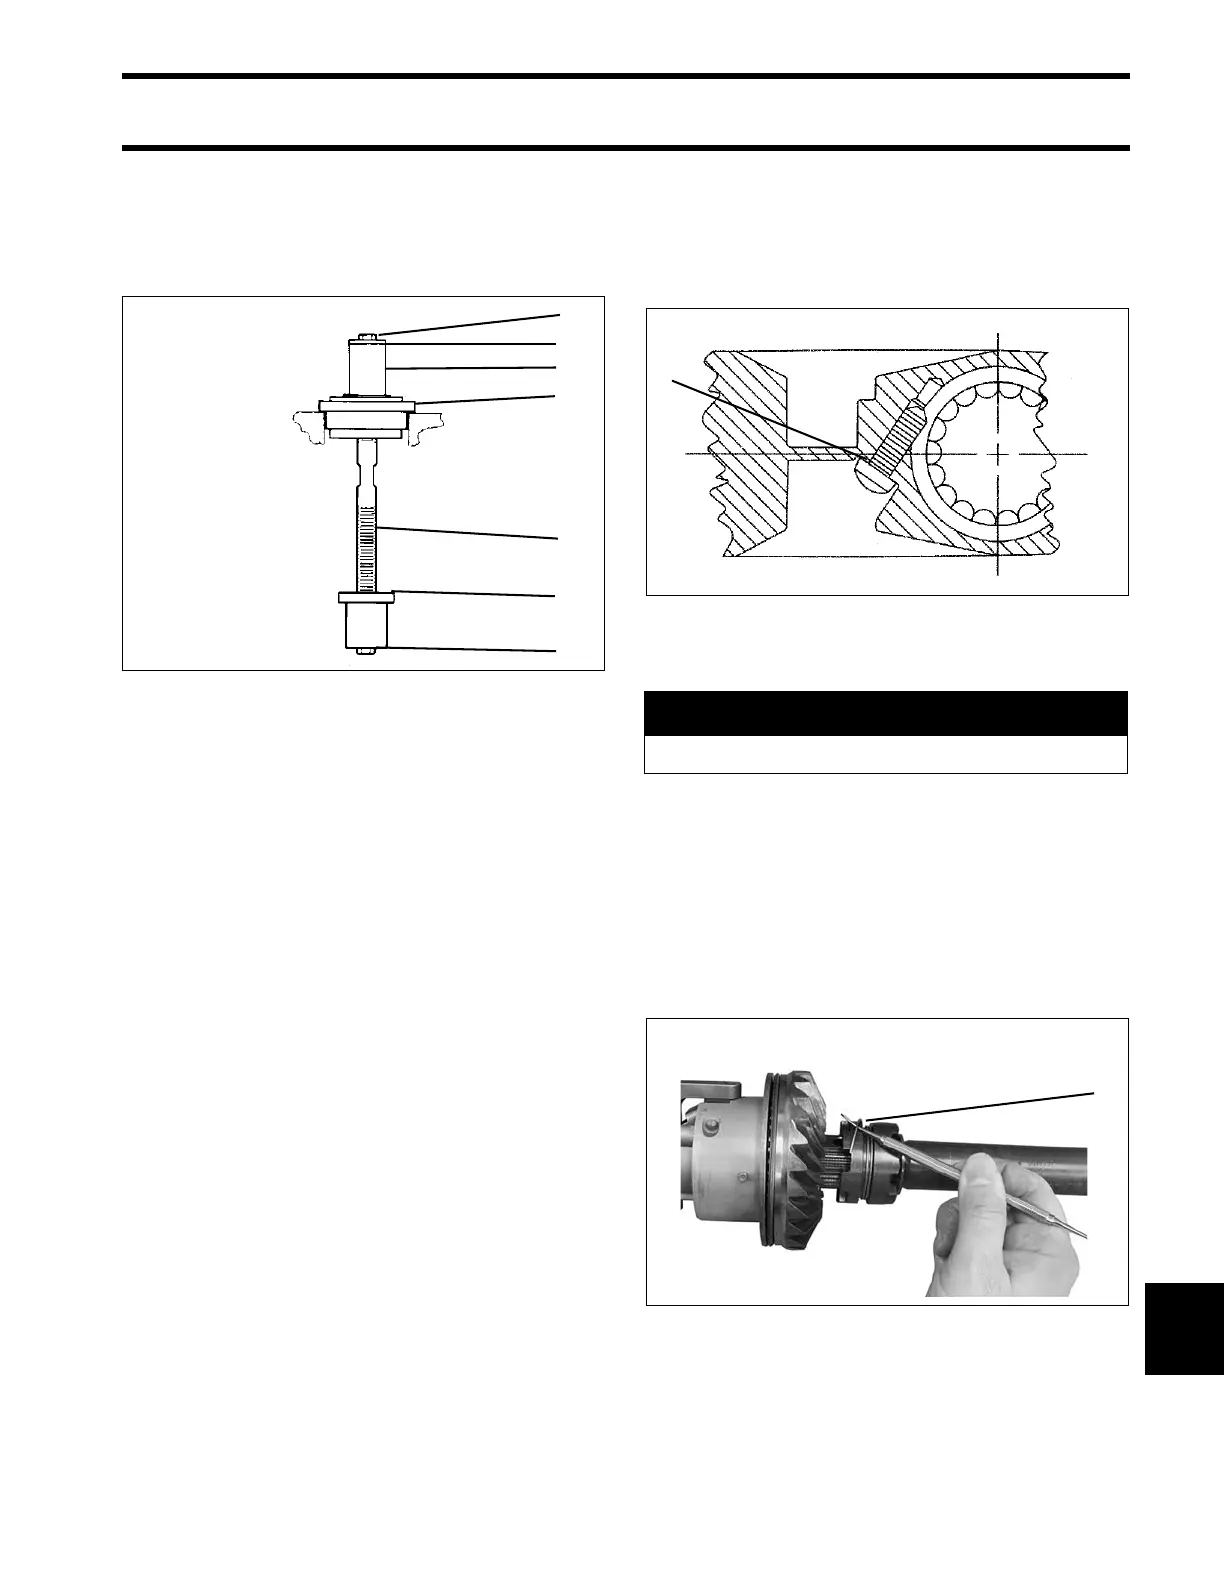
Pinion Bearing Installation
Assemble the following compone nts of Pinion
Bearing Remover and Inst aller, P/N 5005927, a s
shown:
IMPORTANT: Spacers are dif ferent sizes a nd
cannot be interchanged.
Apply Needle Bearing grease to the needle bear-
ings and insert them into the bearing case.
Place the bearing on the installer tool with the let-
tered side of the b earing facing the top of t he
gearcase. Use Needle Bearing grease to hold the
bearing on the tool.
IMPORTANT: The pinion bear ing is tapered so
that, when inst alled co rrectly, it s sh ape comp en-
sates for stresses in the gearcase and allows full
bearing con tact. Wh enever a g earcase is d isas-
sembled, the pinion bearing should be checked to
ensure that it has been installed with the lettering
facing up.
Insert the to ol with the be aring into the gearcase.
Drive the bearing into the gearcase until the
washer on the tool contacts the spacer.
Remove the tool.
Position new O-ring on the pinion bearing retain-
ing screw. Apply Gasket Sealing Compound to O-
ring. Apply Nut Lock to screw thre ads. Install the
screw and tighten to a torque of 60 to 84 in. lbs. (7
to 9.5 N·m).
Shift Housing Disassembly
IMPORTANT: The shift housing and bearing are
serviced as an assembly . If e ither are wo rn or
damaged, replace the complete assembly.
Insert a suit able tool under one end of the clutch
dog spring an d remove it from it s g roove by
unwrapping it from aro und the clut ch dog. Dis-
card the spring.
1. 1/4-20 X 1/2 in. Hex head screw
2. 1 in. O.D. Flat washer
3. Spacer; P/N 350932 “M” and “M2”
P/N 326584 “L” and “L2”
4. Plate and Bearing P/N 391260
5. Rod P/N 326582
6. Installer/Remover, P/N 350958
7. 1/4-20 X 1 1/4 in. Hex head screw
824182
1. O-ring DRC7416
A WARNING
Wear safety glasses to avoid injury.
1. Clutch dog spring 006887