BT Micro Owner’s Manual
93
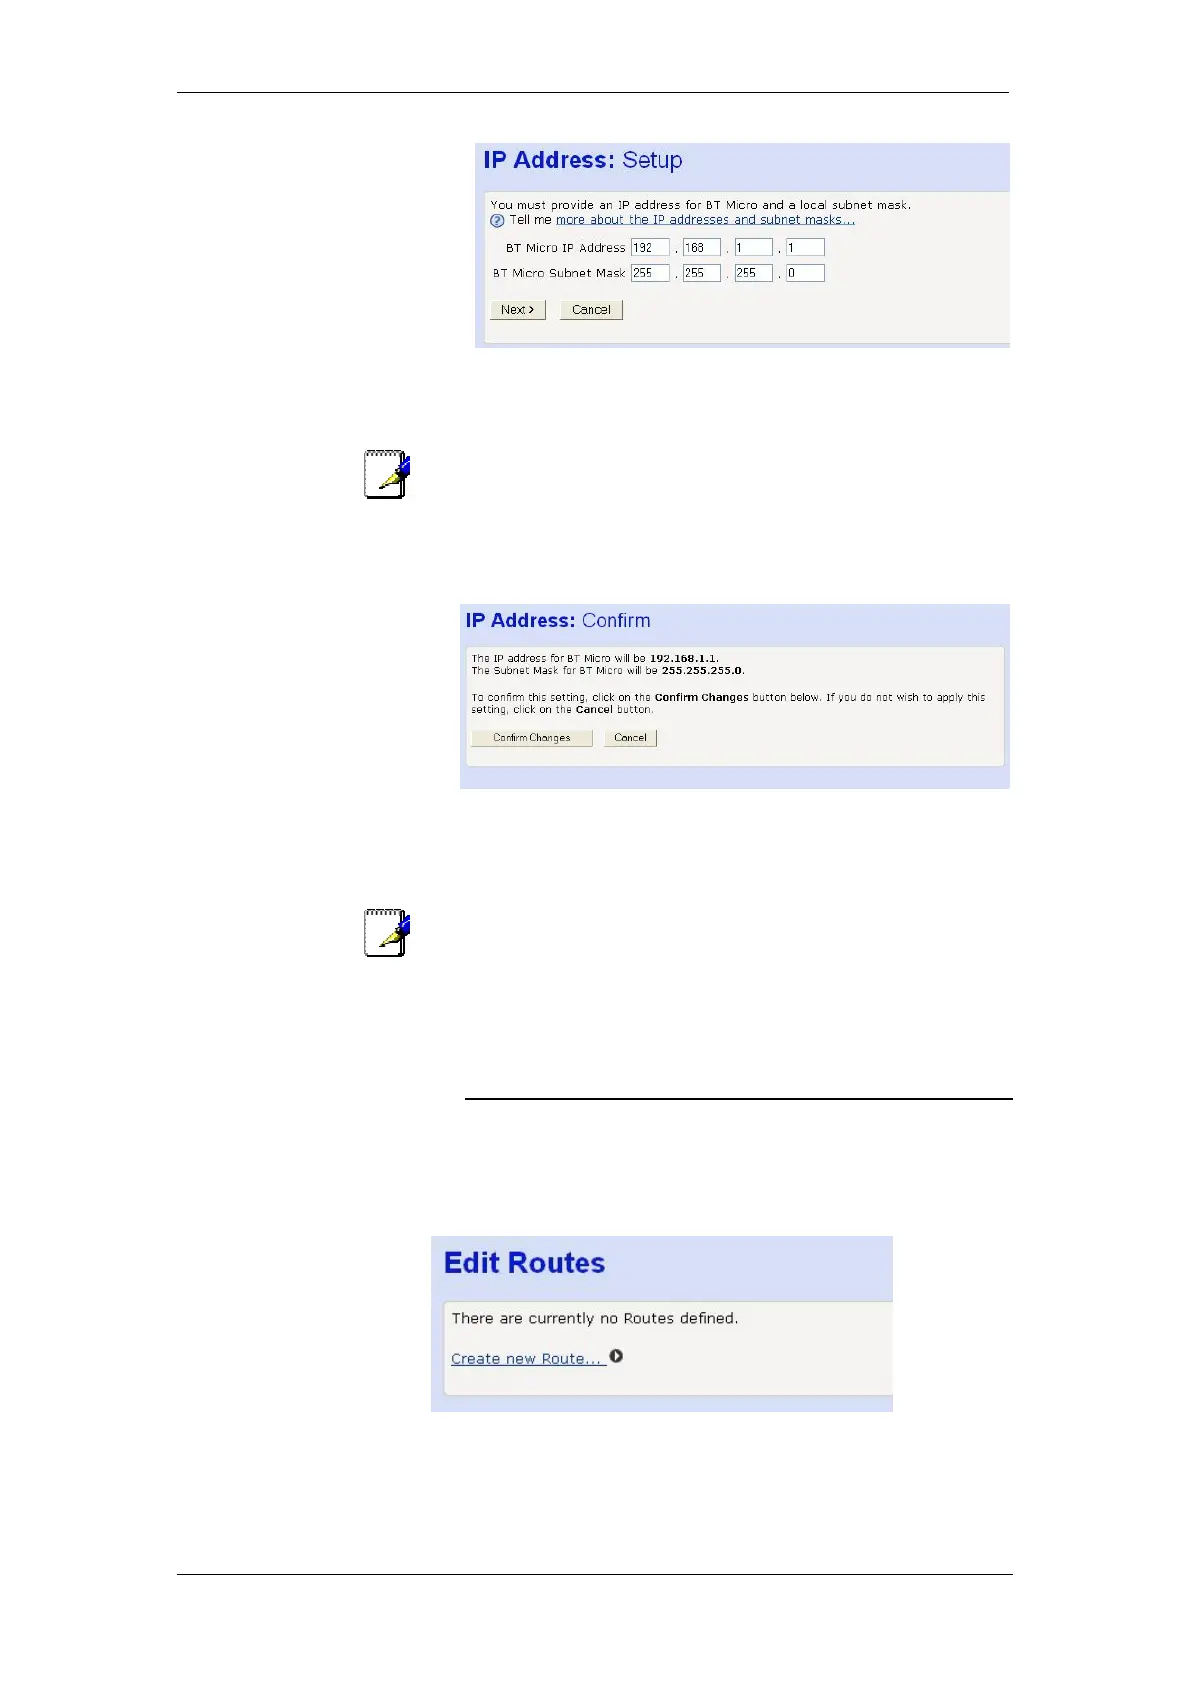
3. Click in the IP Address and Subnet Mask boxes and type
the new address details.
Note
Your LAN PCs must remain on the same subnet as your BT
Micro (that is, the subnet masks must be the same) For more
information about IP addresses and subnets, see 164. If
necessary, reconfigure the LAN PCs so that their IP addresses
place them in the same subnet as the new BT Micro IP address.
4. Click Next>. The following page is displayed:
This page displays the new IP address and subnet mask and
asks you to confirm whether these are correct. Click
Confirm Changes. The Addressing page is displayed,
confirming your new LAN address settings.
Note
If you change the LAN IP address of the BT Micro while
connected through your Web browser, you will be disconnected.
You must open a new connection by entering your new LAN IP
address as the URL. See Accessing the Web pages on page 22.
IP Routes
This allows static routes to be defined.
Select IP Routes in the Router Configuration menu. The
following page is displayed: -
Select Create new Route