All content © 2017, cmotion GmbH. All specications subject to change without notice. http://www.cmotion.eu
82/112
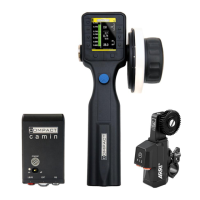
5.2. Working with an ALEXA Mini
cvolution hand units tted with the ARRI White RF module are compatible with ARRI Alexa Mini
cameras. In this conguration, the cvolution camin is not required and up to 3 cforce/cforce
mini motors can be daisy-chained from the 4pin LBUS port located on the lens mount.
To use your cvolution hand unit wireless with the Alexa Mini camera, follow these simple steps:
Camera:
■Press the MENU “jog wheel” on the camera’s viewnder to enter the main menu.
■Turn the MENU “jog wheel” to highlight “SYSTEMS” and press to select.
■Select “ Wireless Remote System”.
■Set “Radio Power” to ‘ON’. This will be indicated by a check mark in the box on the
right of the display.
■Set an available RF Channel by using the MENU “jog wheel” to select and conrm.
Hand unit:
■Press the “SELECT” button twice to enter the Menu.
■Select “MAIN” followed by “RF Channel”.
■Turn the “SELECT” wheel to highlight the same RF channel as on the camera and
press “SELECT” to conrm.
5.2.1. Assigning cforce mini / cforce plus Motors
■Press the Setup button to identify the axis that the motor is currently assigned to.
■Press the Setup button again repeatedly within 2 seconds to cycle through F, I and
Z.
Note: Regular cforce motors can only be assigned to F, I and Z when
connected to a cvolution camin, cworld or compact LCS hand unit.