xStack® DGS-3120 Series Layer 3 Managed Gigabit Ethernet Switch Web UI Reference Guide
315
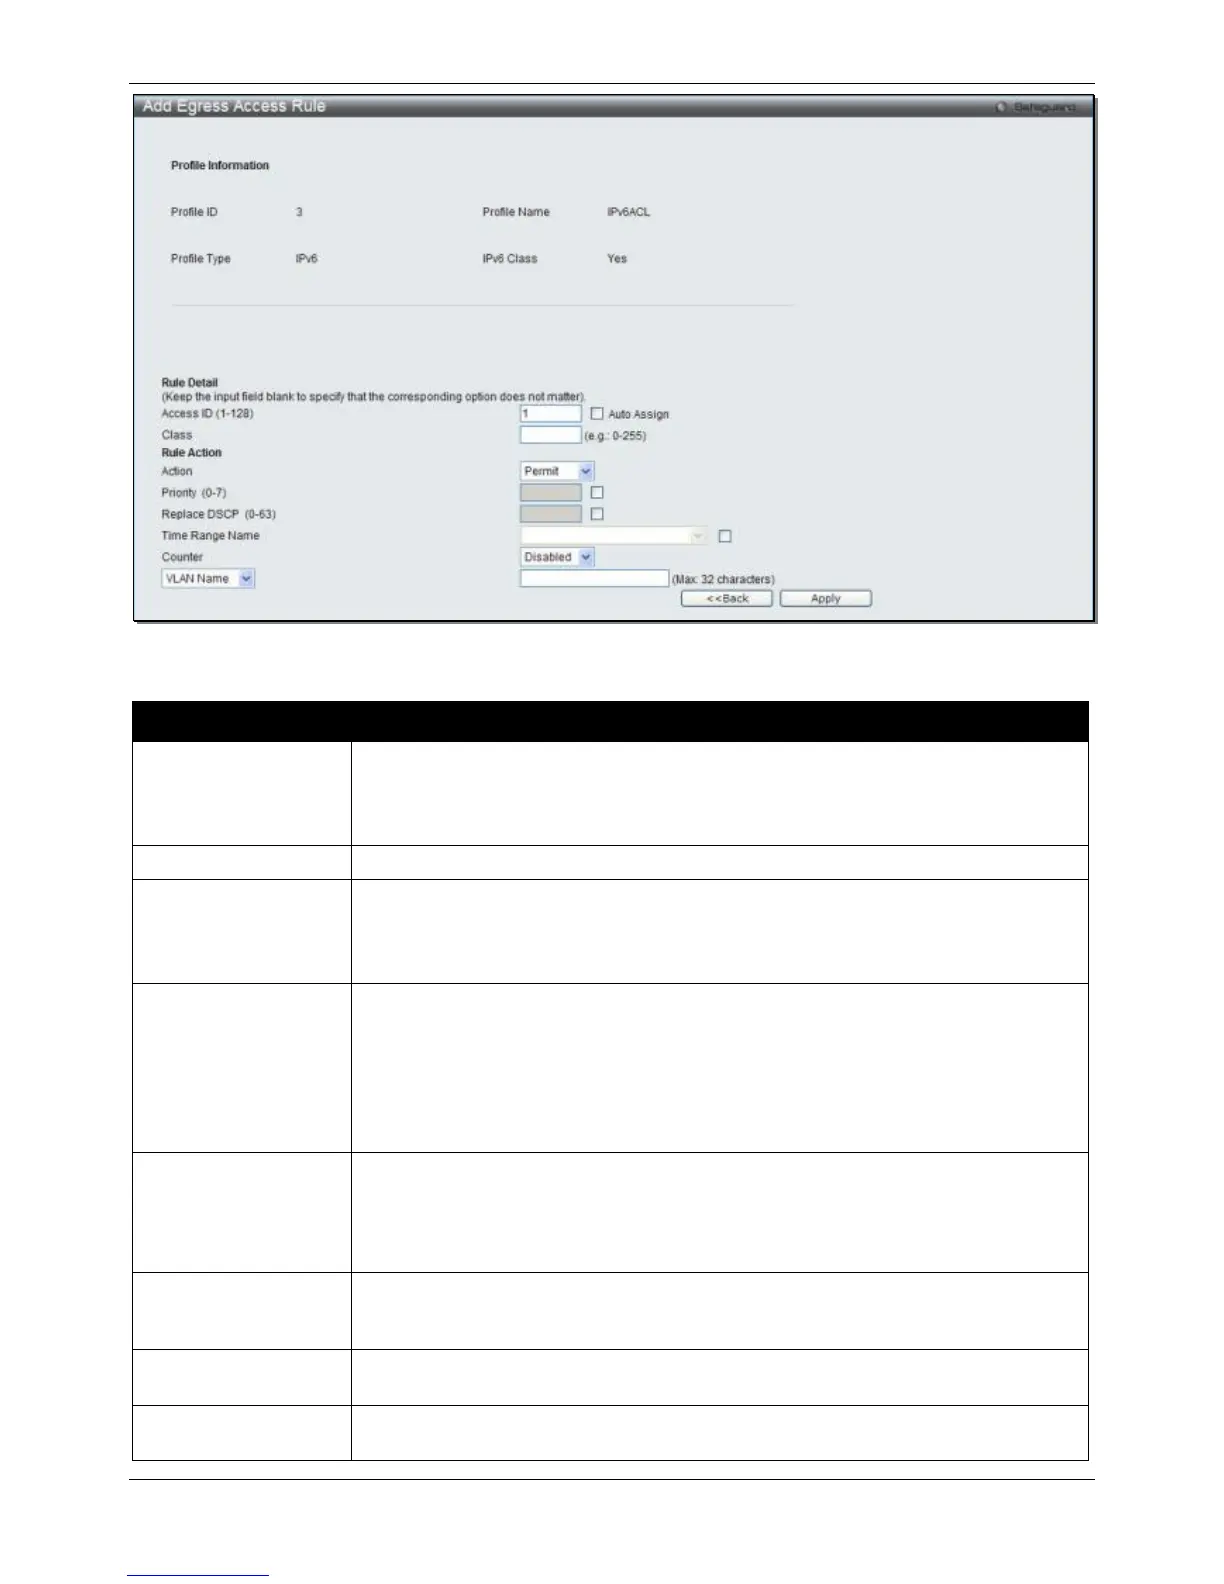
Figure 7-62 Add Egress Access Rule (IPv6 ACL)
The fields that can be configured are described below:
Parameter Description
Access ID (1-128) Type in a unique identifier number for this access. This value can be set from 1 to
128. A lower value denotes a higher priority.
Auto Assign – Ticking this check box will instruct the Switch to automatically assign
an Access ID for the rule being created.
Specify the value of IPv6 class.
Action Select Permit to specify that the packets that match the access profile are forwarded
by the Switch, according to any additional rule added (see below).
Select Deny to specify that packets that match the access profile are not forwarded
by the Switch and will be filtered.
Priority (0-7)
Tick the corresponding check box to re-write the 802.1p default priority of a packet to
the value entered in the Priority field, which meets the criteria specified previously in
this command, before forwarding it on to the specified CoS queue. Otherwise, a
packet will have its incoming 802.1p user priority re-written to its original value before
being forwarded by the Switch.
For more information on priority queues, CoS queues and mapping for 802.1p, see
the QoS section of this manual.
Replace DSCP (0-63)
Select this option to instruct the Switch to replace the DSCP value (in a packet that
meets the selected criteria) with the value entered in the adjacent field. When an ACL
rule is added to change both the priority and DSCP of an IPv6 packet, only one of
them can be modified due to a chip limitation. Currently the priority is changed when
both the priority and DSCP are set to be modified.
Time Range Name
Tick the check box and enter the name of the Time Range settings that has been
previously configured in the Time Range Settings window. This will set specific times
when this access rule will be implemented on the Switch.
Counter
Here the user can select the counter. By checking the counter, the administrator can
see how many times that the rule was hit.
Ports
When a range of ports is to be configured, the Auto Assign check box MUST be
ticked in the Access ID field of this window. If not, the user will be presented with an
 Loading...
